Migrating data to FileCloud using Rclone
FileCloud is preparing to deprecate WebDAV.
- Beginning with FileCloud 23.1, WebDAV can no longer be enabled or managed through the FileCloud admin portal.
- At some time in 2024, WebDAV will no longer be available in FileCloud.
Currently, you may enable or disable WebDAV in your configuration file. For help, please Contact FileCloud Support.
Rclone is a command-line program that manages files in cloud storage. It is a feature-rich alternative to cloud vendors' web storage interfaces. For more information on Rclone please visit their website by accessing the following https://rclone.org/.
Requirements
Complete the following requirements before using Rclone with FileCloud.
FileCloud does not provide support for Rclone, which is third-party software. If you need assistance with your Rclone configuration or setup please contact Rclone directly at https://rclone.org/contact/.
For assistance setting up WebDav or user permissions in FileCloud please contact FileCloud support at support@codelathe.com.
Creating a FileCloud WebDav Configuration in Rclone
Once you have completed the above requirements, create your FileCloud configuration profile in Rclone.
- Extract the .zip file download from the Rclone website, and access its content via command prompt or terminal window using Visual Studio Code.
- Enter rclone config

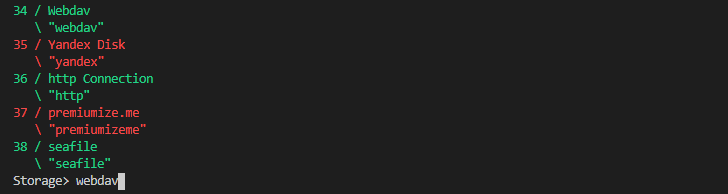
- From the menu options enter n to create a new remote profile and enter FileCloud, and click enter.

- From the list of types of storage, enter webdav. and click enter.
- Once processing is completed you are prompted to enter your FileCloud URL. You must include /webddav at
the end as mentioned in our WebDAV documentation, for example: HTTP:// or HTTPS://YOUR-FILECLOUD-URL/webdav/
- After you enter your FileCloud URL, you are prompted to enter the name of the WebDav site or software
you are using.
Enter FileCloud and click enter. - Now you are prompted to enter your FileCloud user name and password.
In this example we are using a user named rclone.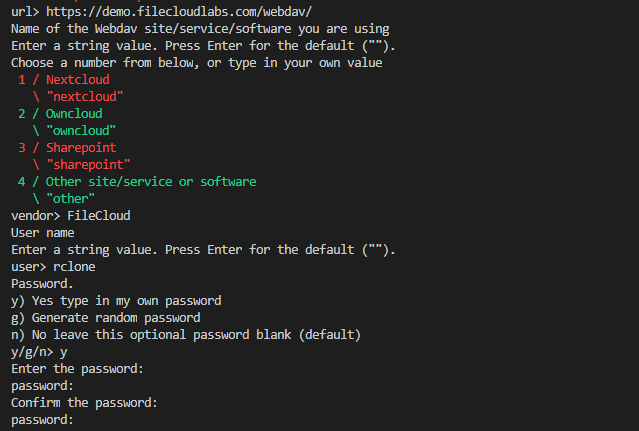
- You are prompted to enter the bearer token.
Click enter to leave the value blank and continue. - Next, you are asked if you would like to edit the advanced configuration.
Click enter to answer No.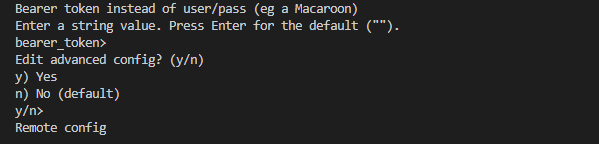
- Once processing is completed, Rclone displays a summary of your configuration that should look similar the following.
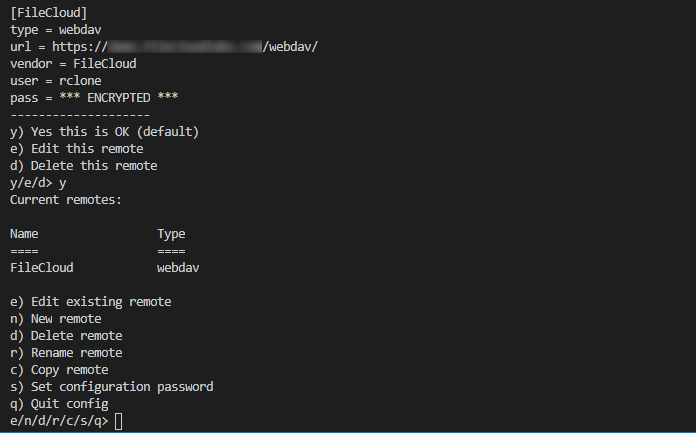
- Enter y to continue.
Rclone displays your FileCloud profile. - Enter q to exit the configuration.
Testing your configuration and connectivity using Rclone.
Once you have creatied your profile you can use the command below to confirm that it is configured correctly.
For more details on available commands, go to https://rclone.org/commands/.
rclone ls remote:path
This command displays all FileCloud files based on the configuration profile created.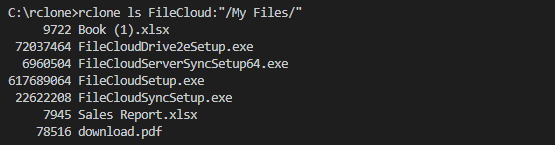
Migrating (Move/Copy/Sync) Data from other solutions to FileCloud.
To copy, move, or sync data directly from other providers into FileCloud, create corresponding profiles within your Rclone configuration file.
For more details click on the hyperlink of each corresponding solution below.
- copy data from s3 to FileCloud
- copy data from OwnCloud to FileCloud
- copy data from Box to FileCloud
- copy data from OneDrive to FileCloud
- copy data from Dropbox to FileCloud
Things to consider when using Rclone to migrate your data to FileCloud.
- FileCloud does not have any control over the bandwidth speed of your host machine. Rclone fully depends on the machine's /host bandwidth where it is being executed to copy, move, or sync your data.
- FileCloud does not control any bandwidth restriction or limitation when copying, syncing, or moving your data from another provider to FileCloud using Rclone.
- To view the progress of your data transfer when using rclone simple add --progress at the end of the command.
- FileCloud does not limit the amount or size of data (files or folders) you transfer. However, prior to starting your migration make sure you have enough storage space available in your FileCloud Server to avoid any issues.
Additional FileCloud Configurations
By default when using WebDav, FileCloud has a single file maximum upload size limitation of 524288000 bytes. You can increase this parameter by accessing :
Windows: C:\xampp\htdocs\.htaccess
Linux: /var/www/html
and modifying the following parameters. It is also recommended that you increase the max_execution_time.php_value post_max_size 500M
php_value upload_max_filesize 500M
php_value max_execution_time 60Once you have applied the changes, restart Apache and retry your upload. In the example below, notice that once the change is applied Rclone is able to upload a 6GB file into FileCloud.
