Install a certificate using the FileCloud Control Panel
The ability to create and install an SSL certificate from FileCloud Control Panel is available in FileCloud Server version 14.0 and later.
The option to add an Intermediate Certificate is available in FileCloud Server version 18.2 and later.
If you want to include an intermediate certificate and do not have one saved locally, see Extracting an Intermediate Certificate from your Browser.
After you receive an SSL certificate, you can use the FileCloud Control Panel to install it.
![]() If you encounter issues using the FileCloud control panel, you can:
If you encounter issues using the FileCloud control panel, you can:
![]() Manually install an SSL certificate in Windows
Manually install an SSL certificate in Windows
To install an SSL Certificate using the FileCloud Control Panel:
On the server, open the FileCloud Control Panel.
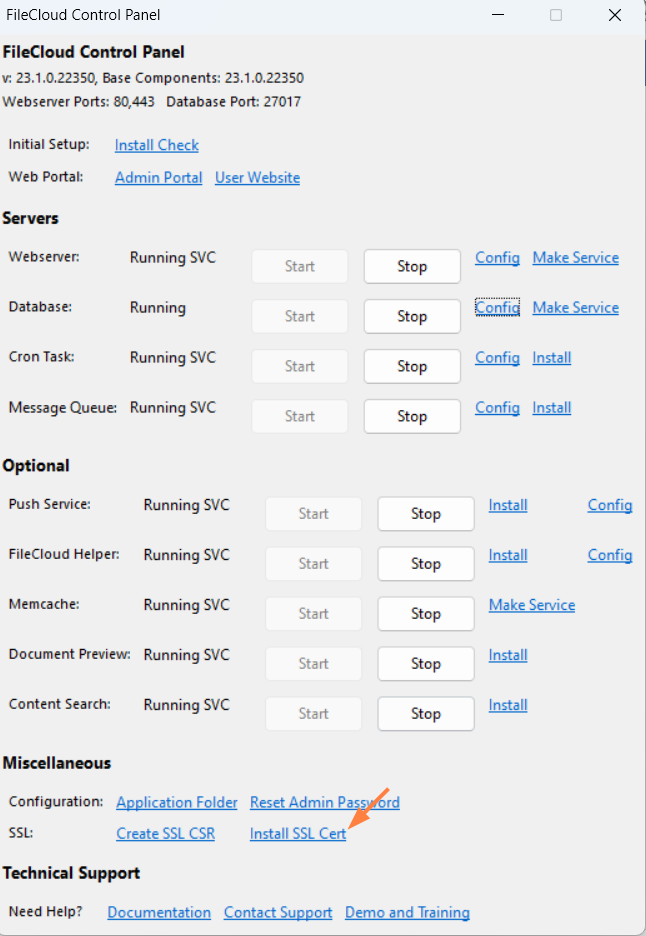
- Under Miscellaneous, click Install SSL Cert.
- Your screen should look similar to the following example:
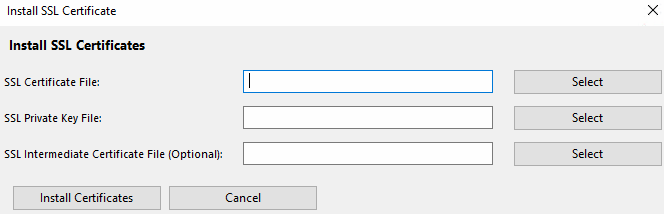
- Across from SSL Certificate File, click Select.
- Browse to the default location in: c:\xampp\htdocs\config\server.crt or to the place where the file is saved.
- Across from SSL Private Key File, click Select.
- Browse to the default location in: c:\xampp\htdocs\config\server.key or to the place where the file is saved.
- Optionally, to install an intermediate certificate, across from SSL Intermediate Certificate File, click Select.
- Browse to the default location in: c:\xampp\htdocs\config\server-ca.crt or to the place where the file is saved.
- Your screen should look similar to the following example:
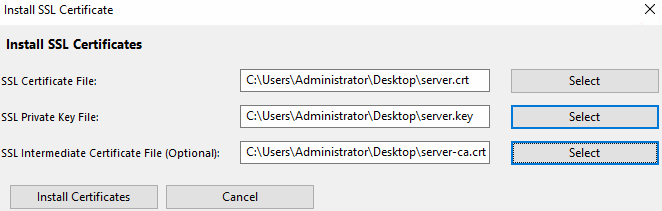
- Click Install Certificates.
- On the Confirm Installation dialog box, to install the provided certificate and key, click Yes.
- When you see the Installed OK dialog box, click OK.
- To allow the changes to take effect, restart the server.