Seed and Organize Team Folder Data
When you log into the FileCloud user portal with the Team Folder account, the files that appear in the My Files folder are the Team Folders for your FileCloud system. You can create and seed Team Folders by logging into Sync, Drive, or the user portal as the Team Folder account and moving the folders that you want to become Team Folders into the Team Folder account's My Files folder. The recommended method is to log into the Sync client and sync the folders.
Alternately, as an admin, you can log into the admin portal, and manually create Team Folders.
Go to the Team Folders page in the admin portal to create Team Folders and seed them with files.
- Open a browser and log in to the admin portal.
- Ensure the account that is used to log in has permissions to access Team Folders.
The main admin account has automatic access to Team Folders. To set Team Folder access to additional admin accounts, see Managing Admin Users. From the left navigation panel, click Team Folders.
Add Team Folders.
- Drag and drop an existing folder (with or without contents) from your file system onto the Team folders screen.
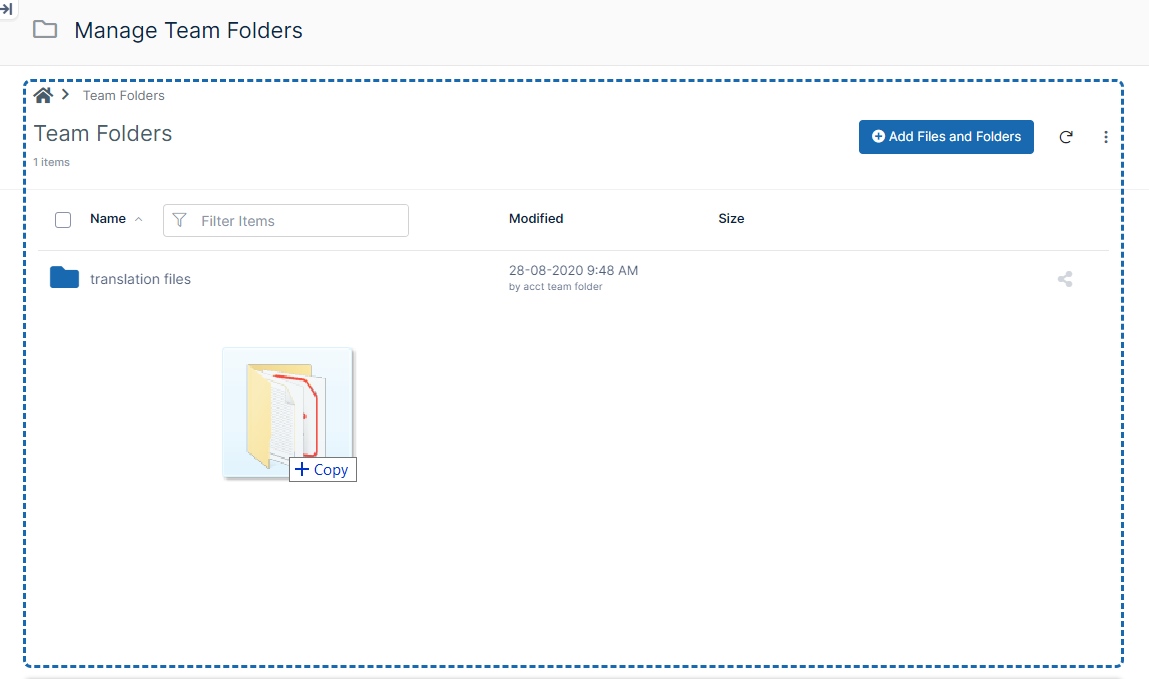
- The folder becomes a Team Folder, and you are prompted to share it with users or groups.
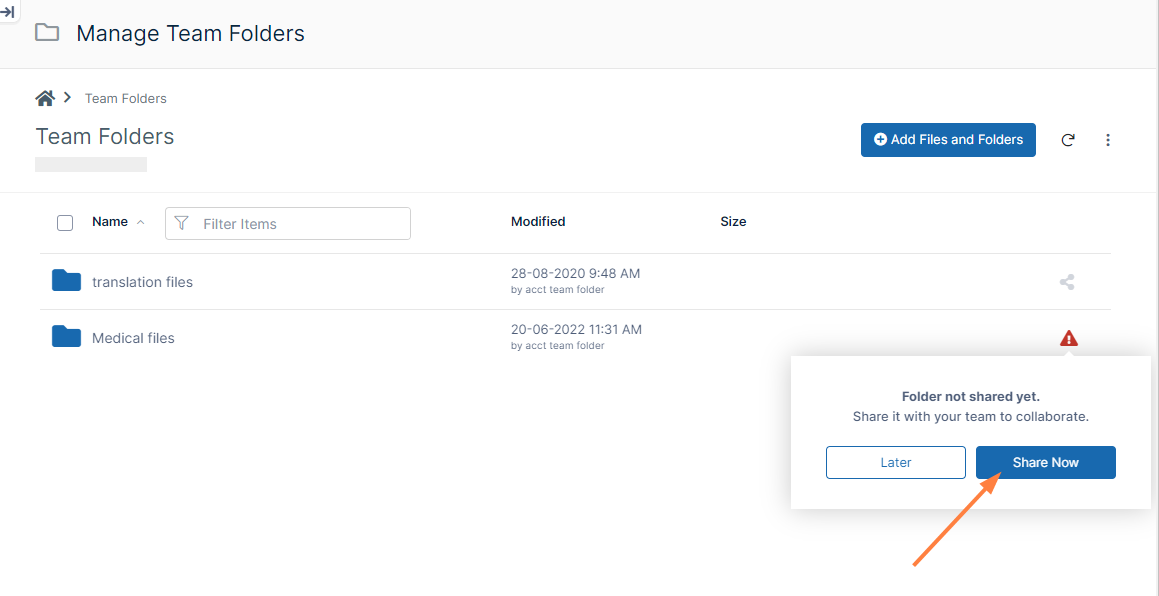
- Click Share Now to share the Team Folder with users and/or groups.
- To add contents to the folder, drag and drop them into the folder or click the Add Files and Folder button and select them from your file system.
- Click the Add Files and Folders button.
A drop-down menu opens.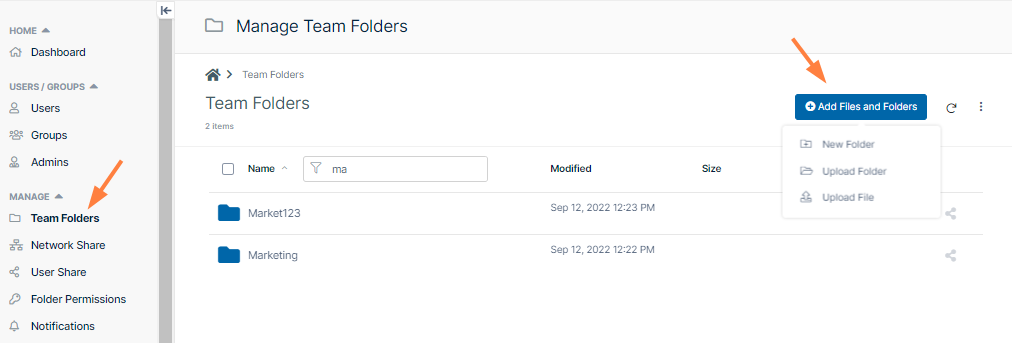
- Either choose New Folder to create a new Team Folder, or click Upload Folder to upload an existing folder (with or without contents) and make it a Team Folder.
If you choose New Folder:
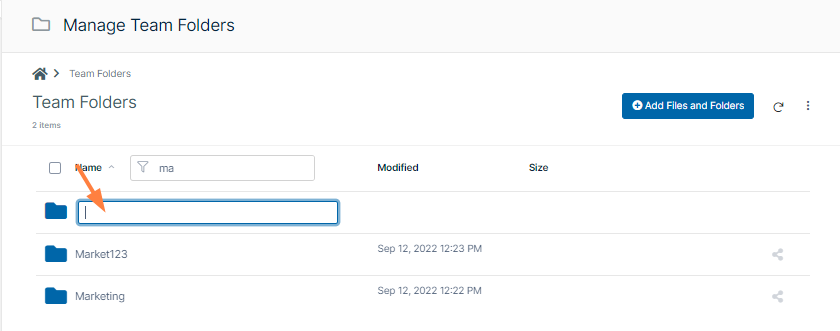
- A new folder appears in the list. Your cursor is positioned so that you may give the folder a name.
- A new folder appears in the list. Your cursor is positioned so that you may give the folder a name.
- Add a name and click Enter.
The folder opens and displays a reminder to share the file. - Click Share Now.
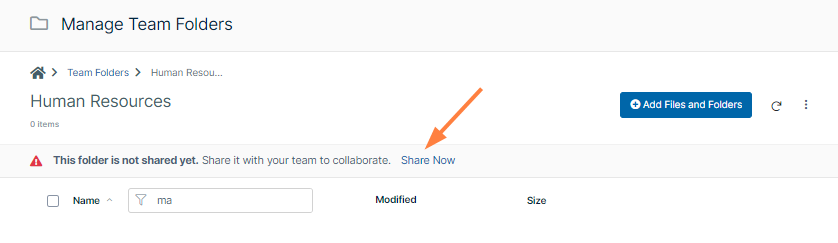
A share dialog box opens. - To share the folder with users, see Share the Team Folder and Set Permissions.
- To add contents to the folder, drag and drop them into the folder or click the Add Files and Folder button and select them from your file system.
- Add a name and click Enter.
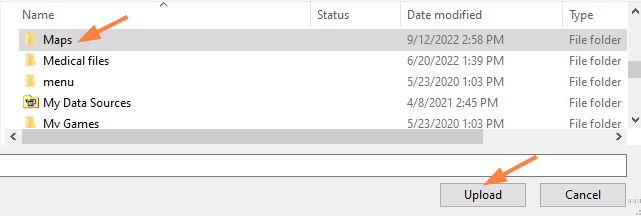
If you choose Upload Folder, your file explorer opens.
- Select the folder to use as a Team Folder and upload it. Agree to upload the its files if prompted.
The folder and its contents are uploaded. The folder becomes a Team Folder, and you are prompted to share it with users or groups.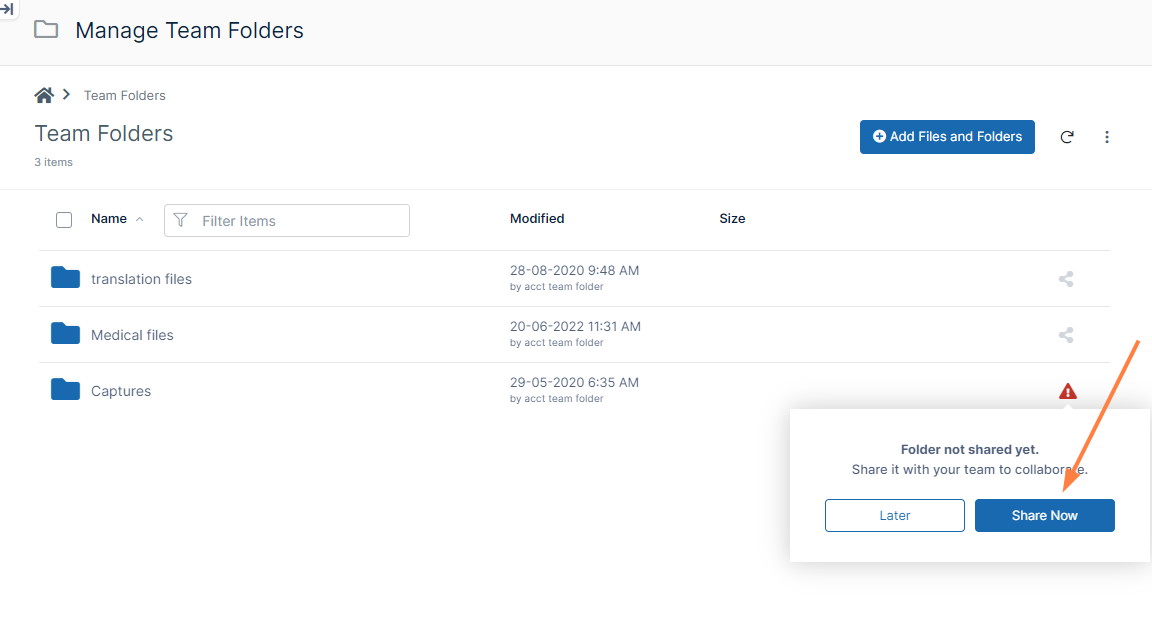
- Click Share Now to share the Team Folder with users and/or groups.
- To add contents to the folder, drag and drop them into the folder or click the Add Files and Folder button and select them from your file system.
- Select the folder to use as a Team Folder and upload it. Agree to upload the its files if prompted.
- Drag and drop an existing folder (with or without contents) from your file system onto the Team folders screen.