<style>

.wiki-content .confluenceTh,
.wiki-content .confluenceTd {
    border: none;padding-top: 0px;
padding-right: 20px;
padding-bottom: 0px;
padding-left: 20px;
}

</style> |
<style>
p {font-size:16px;}
</style> |
<span style="font-size: 22px">AirSend channels are the places where you collaborate with clients or team members by exchanging messages, sharing files, and assigning tasks. You can create an AirSend channel in a few simple steps. </span><br><br> <span style="font-size: 18px">This video shows you how.</span> |
<p><span style="font-size: 16px"><br>1. Open AirSend, and click the <b>Create New Channel</b> icon. <br><br> 2. Enter a channel name and any number of members. <br><br>3. Click <b>Create Channel</b>.</span><br><br> <span style="font-size: 18px">That's it. You're ready to go!</span> |
Now you can begin sending messages, sharing files, and assigning tasks.
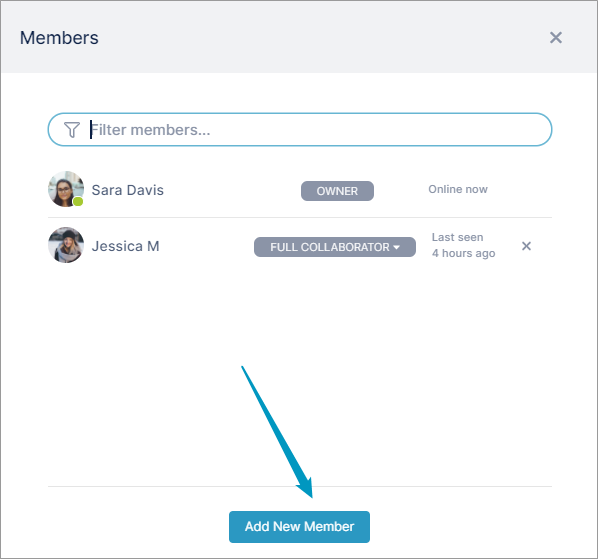
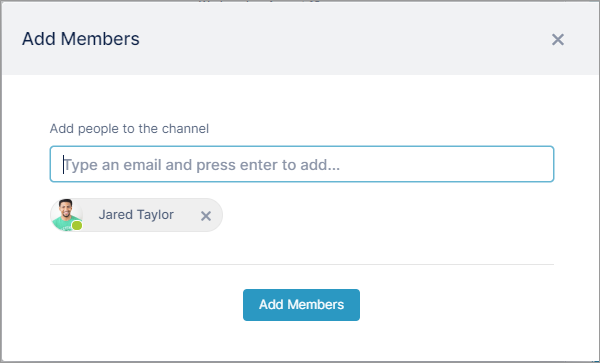
You can add more members at any time
- Click the members icon at the top of the channel.

- Click Add New Member.

- Then enter the member's email address, and click Add Members.

In AirSend, there are different member types. Channel creators are Owners with full privileges, and other members are Full Contributors or Viewers by default. Additional member types can be assigned to give channel users increased privileges. For more information, see Member types. |
To customize your channel by adding your own logo or background, see Fun features. |