Delete Audit Log Entries
Admin Audit Log Deletion
Admins can prohibit other admins from deleting audit logs.
If you need to you can remove entries from the log file manually or configure an automatic archival and deletion of log entries.
It is important to keep in mind that removing log entries from the Admin dashboard also removes them from the database. However, MongoDB does not release the space but keeps it for new entries to be added in the future.
Some reports, such as reports on file actions and failed logins, get their data from the audit log. These reports only include events that are in the audit logs when you run the report. See Custom Reports for information about specific reports
![]() If you need to reclaim the space, you should compact the database.
If you need to reclaim the space, you should compact the database.
How do you want to remove Audit log entries?
![]() Manually Trim the Audit Database
Manually Trim the Audit Database
To manually remove audit log entries:
- In the FileCloud admin portal's left navigation bar, scroll down and click Misc > Audit.
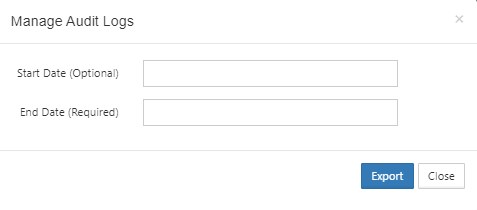
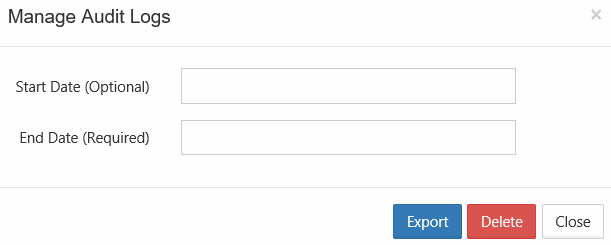
- On the Audit Logs window, click Manage.
- In Start Date, select a date or type in a date in the following format: YYYY-MM-DD. If you do not specify a start date, the deletion will occur for the very first log entry until specified End Date.
- In End Date, select a date or type in a date in the following format: YYYY-MM-DD.
- Click Delete.
- On the Confirm dialog box, click OK.
To ensure that audit database does not grow too large for its allotted disk space, audit records should be archived and removed regularly.
![]() Before you enable Automatic Archiving, you must ensure that Cron job or Task Scheduler is installed and running.
Before you enable Automatic Archiving, you must ensure that Cron job or Task Scheduler is installed and running.
When you are deciding whether or not to automatically archive and remove audit records (or how often to archive and remove them), please note that some reports use the audit log and can only show events if they are still contained in the audit log.
As part of the daily cron job (scheduled task), you can configure FileCloud to export records to a .csv file and delete those records from the audit database.
This is configured in the Settings screen on the Admin tab.
To auto archive audit log entries:
- In the FileCloud admin portal's left navigation bar, scroll down and click Settings. Then, on the Settings navigation page, click Admin
 .
.
The Admin settings page opens. - Scroll down and locate the audit settings.
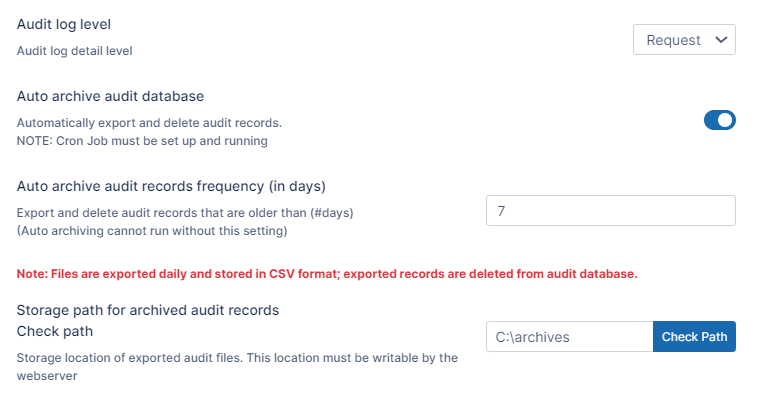
- Fill in the audit settings as indicated in the following table:
| Setting | Description |
|---|---|
| Audit log level | To create an audit log, set to Request or Full. |
| Auto archive audit database | Enable this setting. Note: Cron Job must be set up and running. |
| Auto archive audit records frequency (in days) | Number of days to store the audit records in the database. After the number of days specified, audit records are exported to csv and deleted from the audit database. |
| Storage path for archived audit records | Path of folder that stores the exported audit records in CSV format. For example, C:\archives |
If you want to automatically remove records but not archive them, you can configure FileCloud to remove audit records but not export them to a csv file.
To auto remove records without exporting them:
- Open cloudconfig.php:
Windows Location: XAMPP DIRECTORY/htdocs/config/cloudconfig.php
Linux Location: /var/www/config/cloudconfig.php Add the following :
Define("TONIDOCLOUD_AUDIT_AUTO_ARCHIVE_OMIT_BACKUP", true);
To disable manual deletion by administrators:
- Open cloudconfig.php:
Windows Location: XAMPP DIRECTORY/htdocs/config/cloudconfig.php
Linux Location: /var/www/config/cloudconfig.php Add the line:
define("TONIDOCLOUD_DISALLOW_ADMIN_AUDIT_DELETE", true);- Save and close cloudconfig.php.
Now, in the admin portal when you click Audit in the navigation pane, and then click Manage, the Delete button is no longer available on the Manage Audit Logs dialog box.