Sync Settings
You can view and control Sync settings from the Settings page of the main dashboard.
To get to the Settings page:
- In the system tray, right click on the Sync icon, and choose Open.
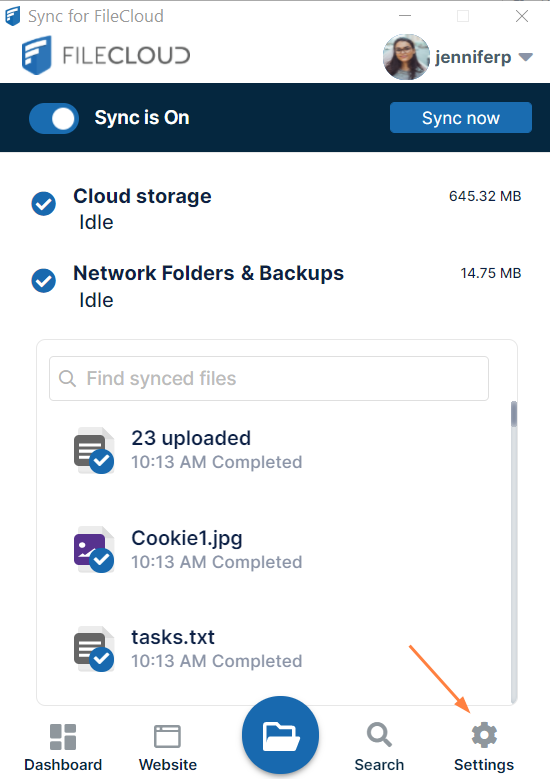
Sync's mini-dashboard opens. At the bottom of the mini-dashboard, click the Settings icon.
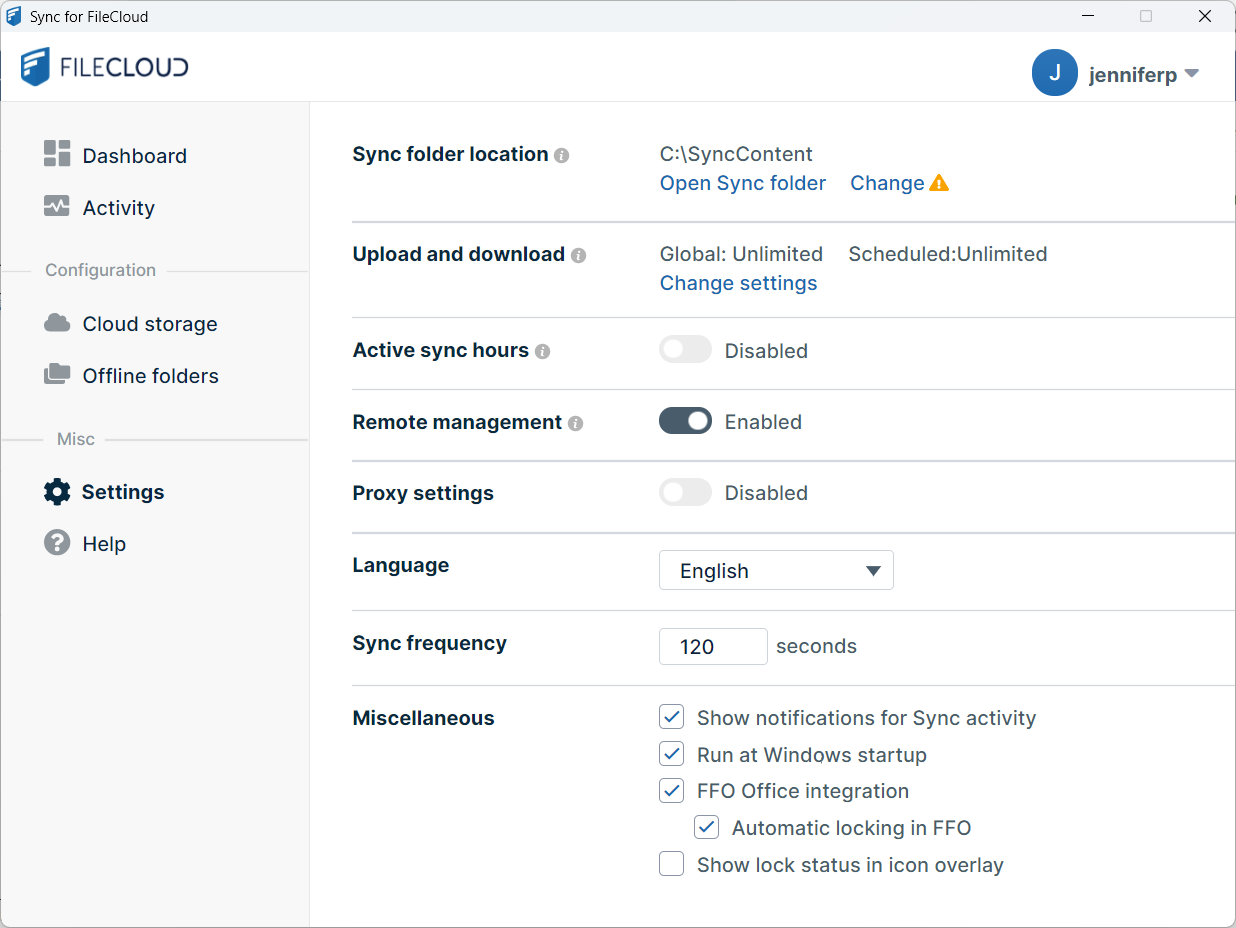
The main dashboard opens to the Settings page.Setting Function Sync folder location Click Open Sync Folder to open the Sync directories in your file explorer.
Click Change to select a different location (a different drive or folder) for your Sync folder in file explorer.Upload and download See Limit upload and download rate. Active sync hours See Limit Sync To a Schedule. Remote management Allows Sync users to manage their Sync application by overriding an Administrator's settings, but from FileCloud version 19.1 and later, administrator's may disable the ability to override. See Managing Client Devices.
Proxy settings Enabled or disabled by default depending on initial Sync configuration.
You can enable, disable, and change proxy settings here. You must restart Sync for this to take effect.Language Change the language of the inteface. You must restart Sync for this to take effect. Sync frequency You can change the built-in sync frequency of 120 seconds for cloud storage. You must restart Sync for this to take effect. Miscellaneous - Show Notifications for Sync Activity - Yes by default. Uncheck to change to No. You must restart Sync for this to take effect.
- Run at Windows Startup - No by default. Check to change to Yes.
- FFO Office Integration - checked (yes) by default. Uncheck to change the setting. You must restart Sync for this to take effect.
If you are using DocIQ instead of FFO, the label appears as DocIQ Office Integration.
For more information about DocIQ or FFO, see Using DocIQ with Office for Sync Users or Using FileCloud for Office with Sync.- Automatic Locking in FFO - Checked (yes) by default.
If automatic locking in FFO is checked, when you open a file in Sync, FFO automatically tries to lock it and give it read-only access. Check or uncheck to change the setting. You must restart Sync for this to take effect.
If you are using DocIQ instead of FFO, the label appears as Automatic Locking in DocIQ. - Trust FFO - Only appears the first time you log in to FileCloud Sync.
- Click Trust FFO to use FileCloud for Office.
- If you are prompted to allow installation of the FileCloud for Office certificate, click Yes.
The Trust FFO button disappears, and you will not have to click it again.
- Automatic Locking in FFO - Checked (yes) by default.
- Show Lock Status in Icon Overlay - No by default. When checked, if a user locks a file or folder in Sync, the lock icon overlay appears over it in the Sync directory in file explorer.


