- Open the channel.
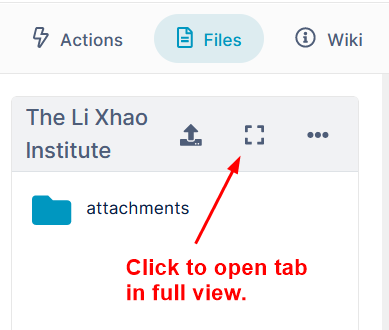
In the right panel, click the Files tab.
The attachments folder is included by default.
Tip: To work in an expanded view of the File tab, click the Full view button:
- Either use the upload button to upload a file to the tab or drag and drop the file.
You can create additional folders and sub-folders in the Files tab to insert your files into, but here we will insert the files directly into the Files tab or into the attachments folder.- Drag and drop: if you want to insert it at the top level of the Files tab drop it anywhere on the tab away from the attachments folder. If you want to insert it into the attachments folder, drop it on the attachments folder.
- Upload:
If you want to upload the file at the top level of the Files tab, leave the tab as it is. If you want to upload the file into the attachments folder, click the attachments folder to open it.
Then, click the upload button and upload the file from your file system.
If you add the file into the top level of the tab, it appears as: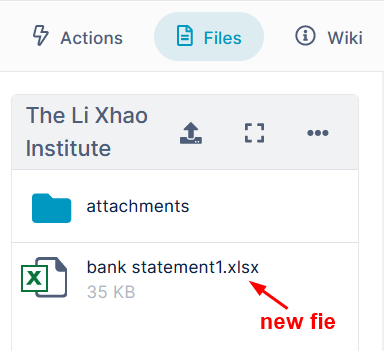
If you add the file in the attachments folder, it appears as: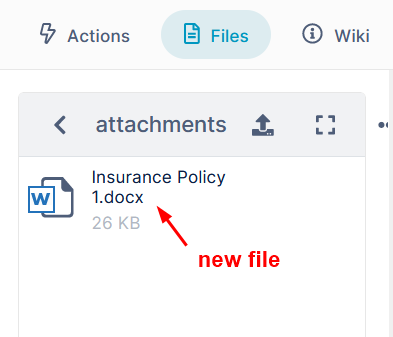
Overview
Content Tools
Apps