Integrate ADSelfService Plus with FileCloud
Integrate ADSelfService Plus with SimpleSAML SSO
Step 1: Install ADSelfService Plus and configure it to integrate with SimpleSAML SSO in FileCloud
- Install ADSelfService Plus.
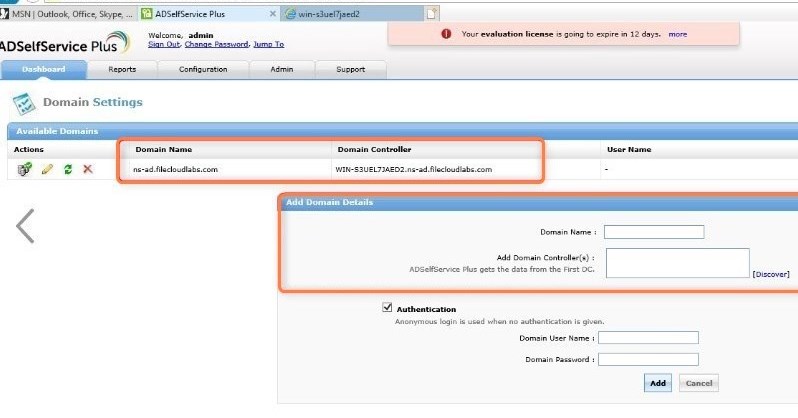
- Open the ADSelfService admin portal. Your URL should be similar to http://win-s3uexxjaed2:8888/authorization.do.
The Dashboard tab should be selected, and the server name should be similar to: win-s3uexxjaed2 - If AD is already installed, Domain Name and Domain Controller are automatically detected and entered for you.
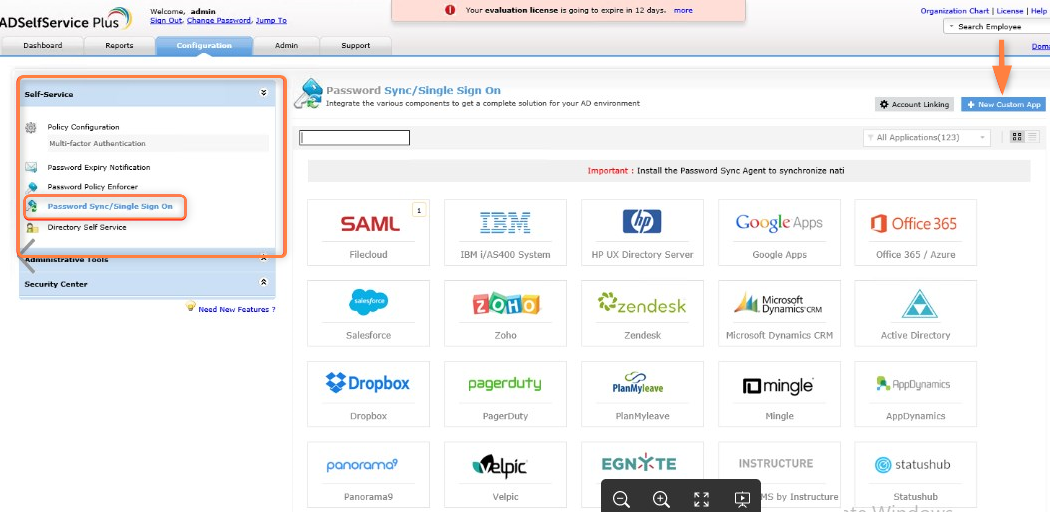
If they are not automatically entered, in Add Domain Details, enter them, and click Add. - Click the Configuration tab.
- In the navigation bar, expand Self-Service and click Password Sync/Single-Sign-On.
- Click New Custom App.
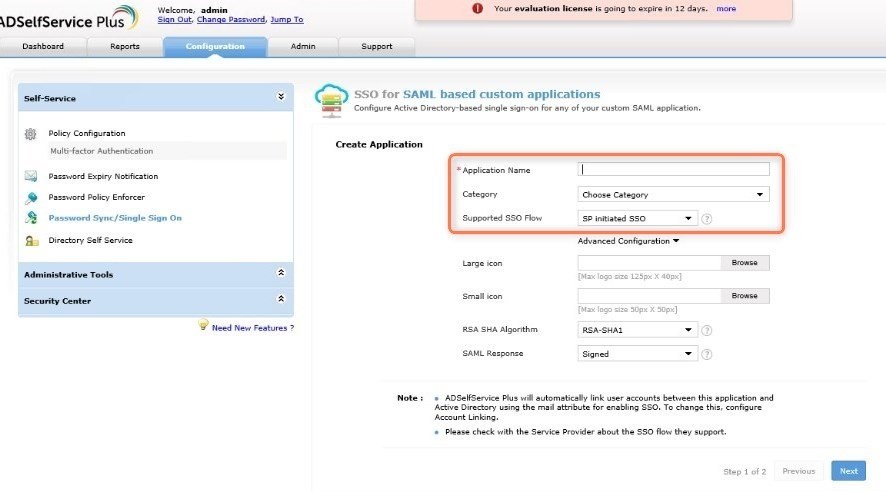
- Fill in the following Create Application fields:
- In Application Name enter FileCloud.
- In Category drop-down list, choose any option.
- In the Supported SSO flow drop-down list,choose SP initiated SSO.
The Large icon and Small icon fields are optional. You can leave the defaults for the remaining fields.
- To go to the SSO for SAML based custom applications/Configure Application page, click Next.
- Fill in the following Configure Application fields:
- In Domain Name, enter the domain name of your user’s email address in AD.
For example, if the email address is fc@test.com, enter test.com as the domain name. - In Display Name enter any name.
- In SAML Redirect URL enter https://yourFileclouddomainname/simplesaml/module.php/saml/sp/metadata.php/default-sp
- In ACS URL enter https://yourFileclouddomainname/simplesaml/module.php/saml/sp/saml2-acs.php/default-s
- In Domain Name, enter the domain name of your user’s email address in AD.
- Click Save.
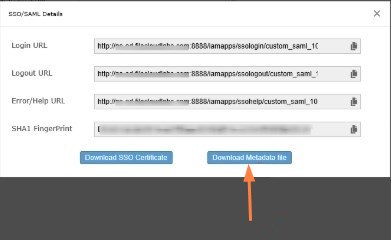
- Click Download SSO certificate in the upper-right of the page.
The SSO/SAML Details dialog box opens. - Click Download Metadata file, and save the metadata file (metadata.xml).
Step 2: In FileCloud, configure your SSO settings for ADSelfService Plus
- In the FileCloud admin portal's left navigation bar, scroll down and click Settings. Then, on the Settings navigation page, click SSO .
The SSO page opens. - In Default SSO Type, choose SAML.
- Fill in the SAML settings:
- In IDP Endpoint URL,
open the metadata.xml file you downloaded, and copy the URL after entityID. It should look similar to: entityID="http://yourFileclouddomainname:8888/iamapps/ssologin/custom_saml_10000/e6c2b84d31da852eac8e0f88ee5c4703b9974c2f - In IDP Username Parameter, enter mail.
- In IDP Email parameter enter mail
- In IDP Given Name Parameter enter givenName.
- In IDP Surname Parameter enter sn.
- In IDP Metadata paste the entire contents of the metadata.xml file.
- In IDP Endpoint URL,
By default, ADSelfService Plus passes the mail attribute, and FileCloud creates the user from the username portion of the email address. For example, if the email is sam@fc.com, FileCloud creates an account with sam as the username.
If you want to pass userPrincipalName as the parameter, contact the ADSelfService support team to make necessary changes in the database to pass that parameter. For example, to pass userPrincipalName instead of mail, ADSelfService must add the following entry to their database:
"userPrincipalName":"uid"
After they have added the entry, set IDP Username Parameter to uid.


