Integrate JumpCloud with FileCloud
As an administrator you can integrate these two systems so that your JumpCloud users can access their FileCloud account without having to enter their credentials a second time.
| JumpCloud’s is a cloud-based platform
|

In this integration scenario:
- JumpCloud must be configured as an Identity Provider (IdP)
- FileCloud will act as the Service Provider (SP)
Configure FileCloud with JumpCloud
- Open a browser and log in to your JumpCloud admin interface at https://console.jumpcloud.com/login.
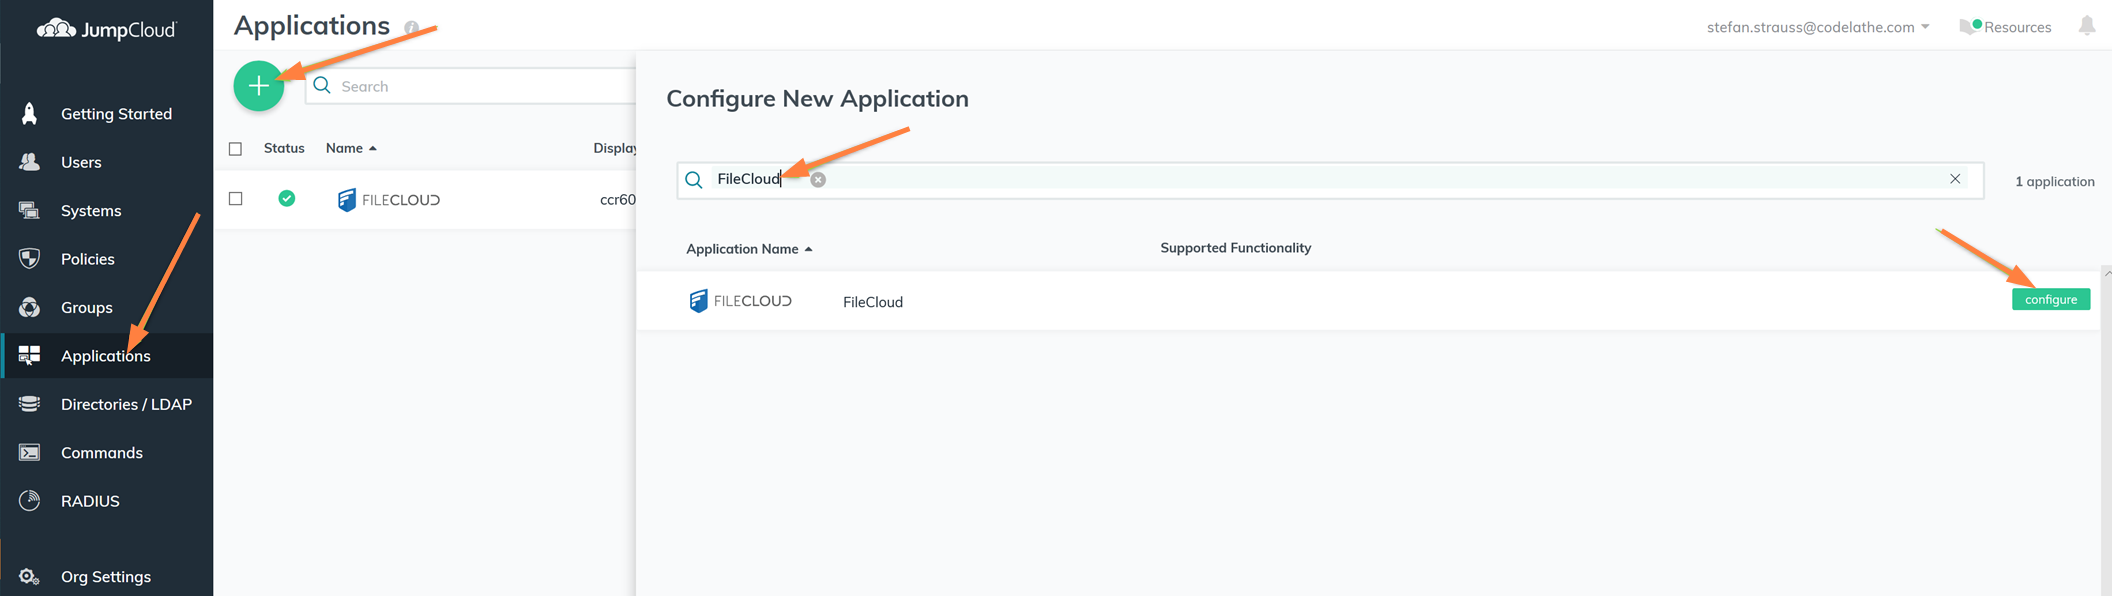
- From the left navigation pane, click Applications.
- On the Applications screen, to add a new application, click the plus sign.
- In the Configure New Application screen, enter FileCloud in the search field and click configure.
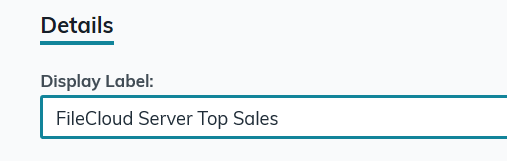
- In Display Label, enter a meaningful name.
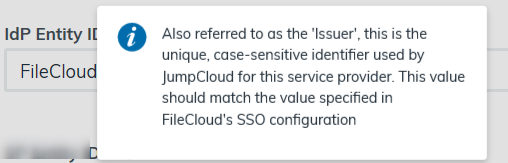
- In IDP Entity ID, enter a unique, case-sensitive identifier to be used by JumpCloud for this FileCloud service provider.
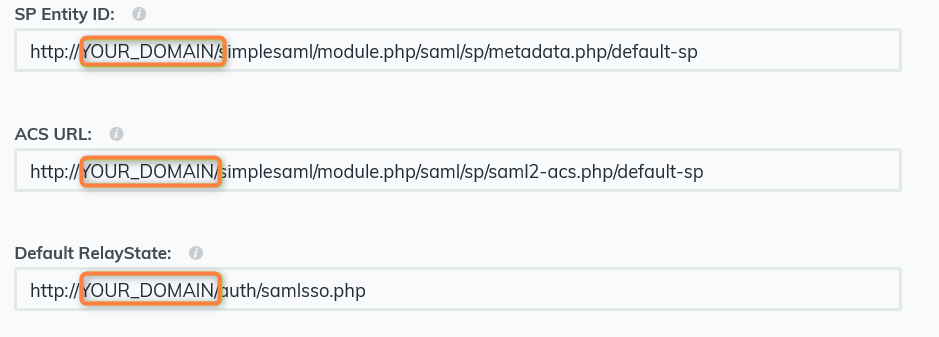
- Replace YOUR_DOMAIN with your domain name in all fields.
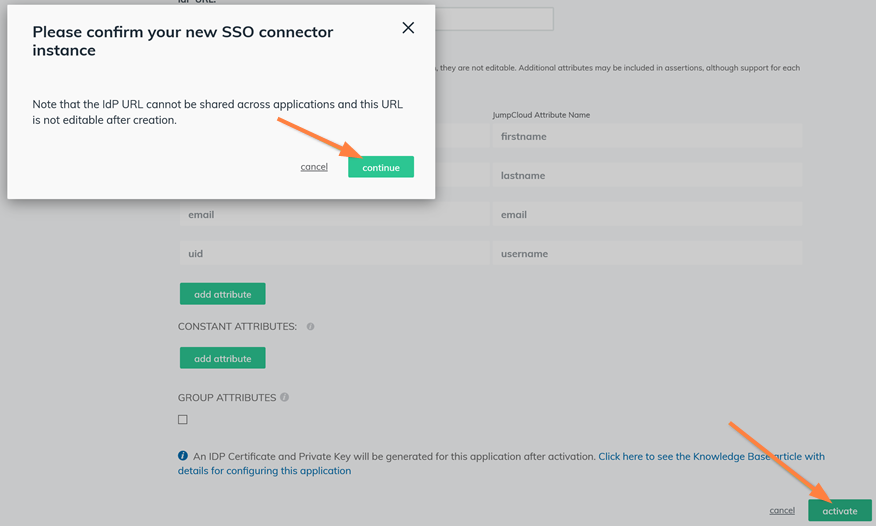
- Enter a unique value for IdP URL.
Note that the IdP URL cannot be shared across applications, and this URL is not editable after creation.
- In JumpCloud, on the configuration screen, save and activate the new application
- Download the generated certificate.
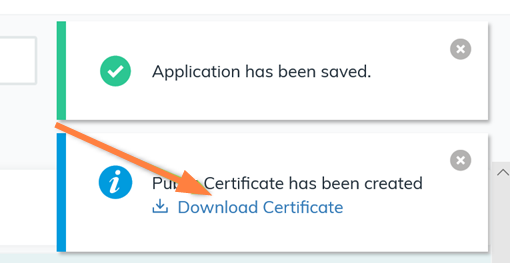
Copy it into your FileCloud in the location for Linux or Windows:
Linux/var/www/html/thirdparty/simplesaml/cert/saml.crt
WindowsC:\xampp\htdocs\thirdparty\simplesaml\cert\saml.crt
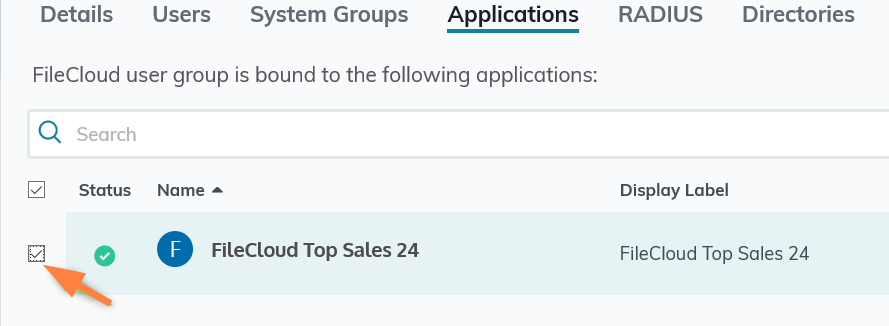
- In JumpCloud, on the Groups screen, click the plus sign to add a new group.
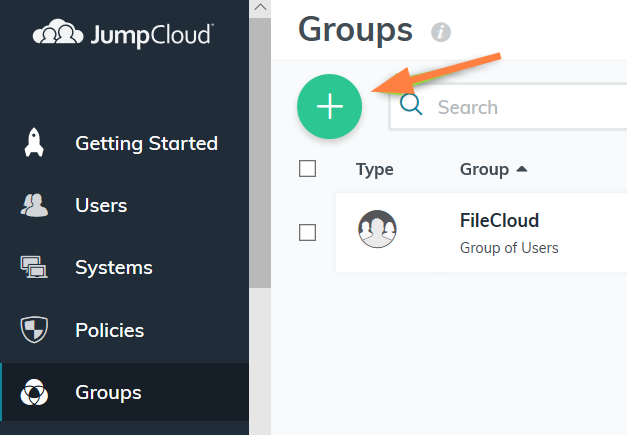
- Enter the group name.
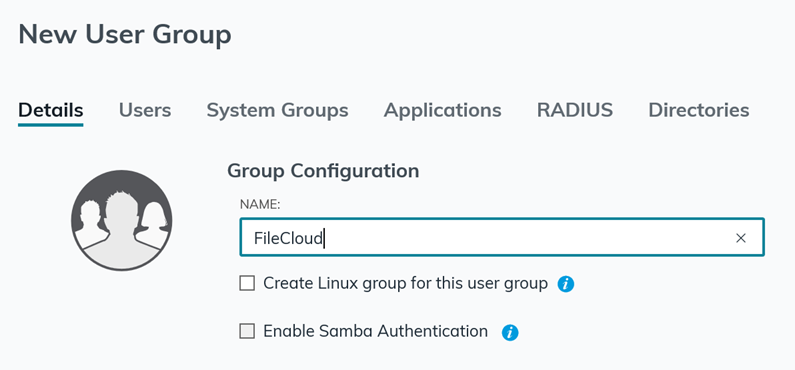
- Enable the group to access FileCloud.
- On the Users screen, click the plus sign to add a new user.
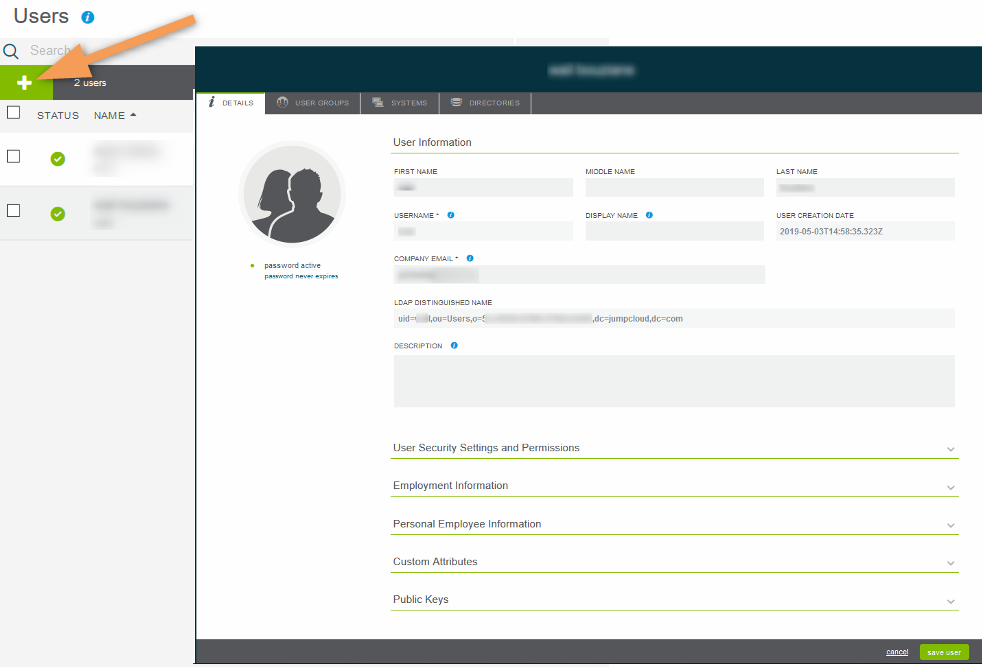
- On the New User screen, click the Details tab and type in the user's information.
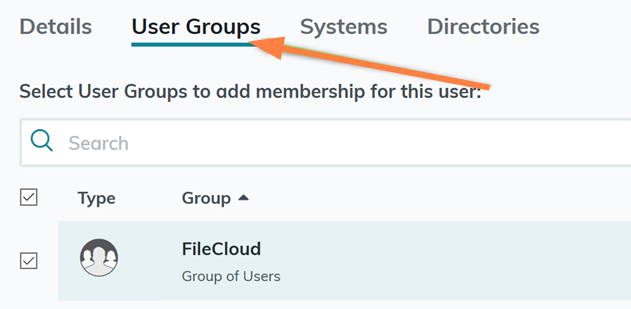
- On the New User screen, click the User Groups tab and add the user to your FileCloud group.
- Click Save User.
- In the FileCloud admin portal's left navigation bar, scroll down and click Settings. Then, on the Settings navigation page, click SSO
 .
.
The SSO page opens. - In Idp End Point URL, type or paste in the same value as the IdP Entity ID that you entered into JumpCloud.
The correct string can also be seen in the metadata xml file: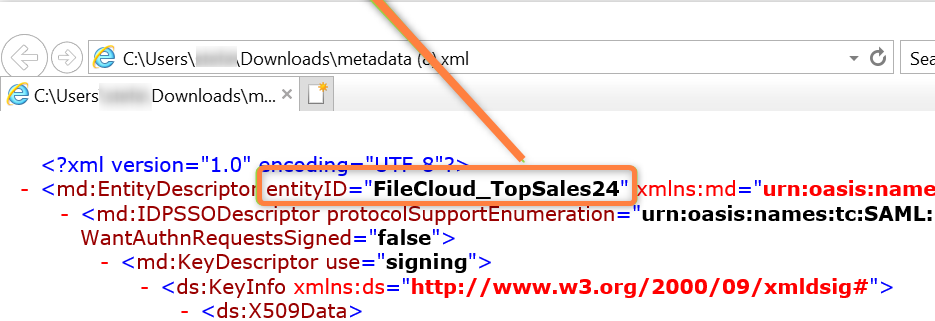
Input the Service Provider Attribute Name information from the JumpCloud configuration screen into the corresponding fields in the FileCloud Settings > SSO tab.
Copy these values from JumpCloud: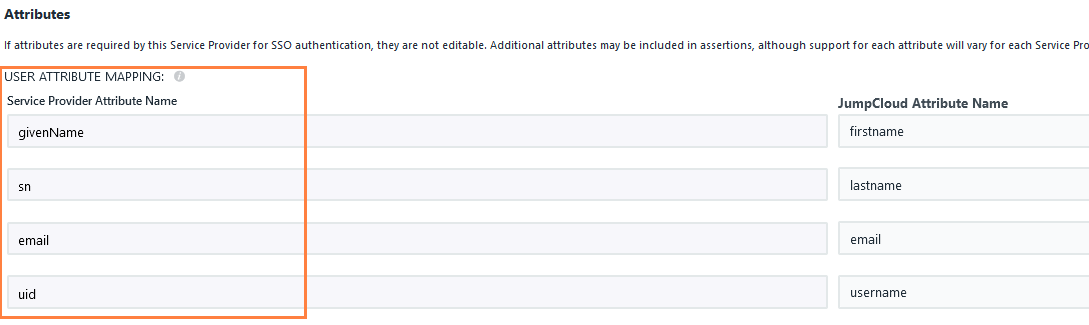
Enter them into the corresponding settings in FileCloud on the Settings > SSO tab.- On the server, open the XML file that contains the metadata you exported from JumpCloud.
Copy the metadata in the file and paste it into the IdP Metadata field in FileCloud.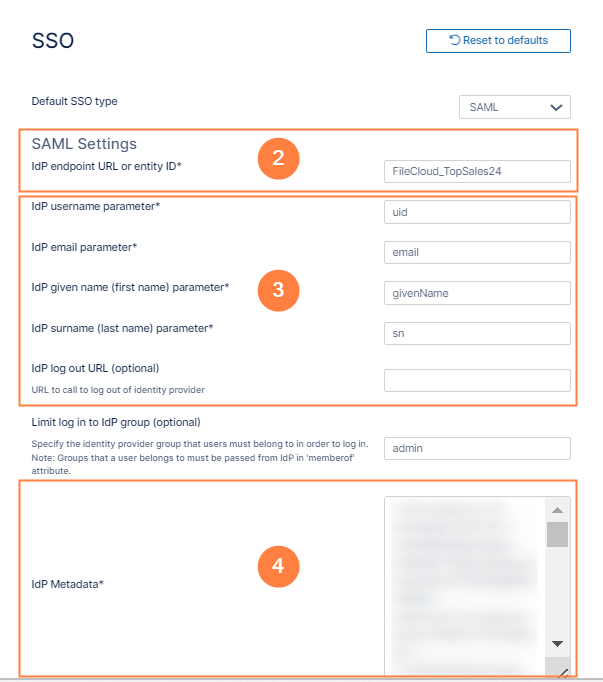
- Fill in the other settings on the page as shown at SAML Single Sign-On Support.
- Click Save and minimize the browser.
Now you can start using single sign-on with JumpCloud from FileCloud.