Applying a Retention Policy to All Files
You may be required to apply a retention policy to all documents imported into FileCloud. If you have a large number of users in your system, the following method is especially useful, since it provides you with an alternative to putting a retention policy on each user's My Files path.
To use this method, you can take advantage of the fact that the Default metadata set is applied to every file, and add an attribute to the metadata set that will always be set to a certain value.
To apply a retention policy to all files:
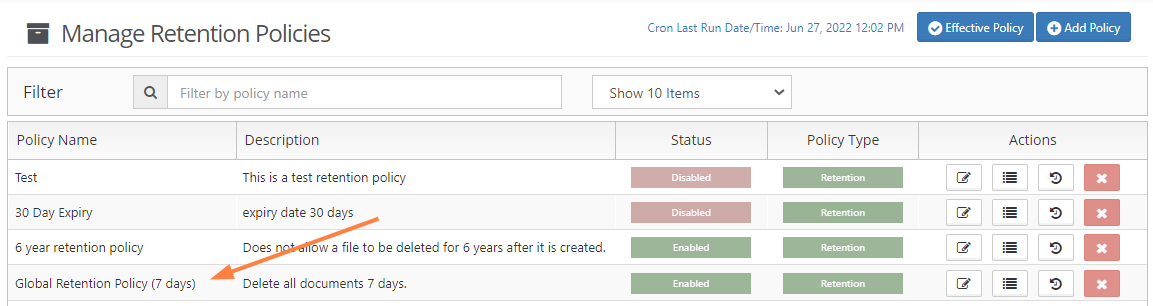
In the example shown here, a 7-day retention policy is applied to all uploaded files. 7 days after a file is uploaded, it is deleted from FileCloud.
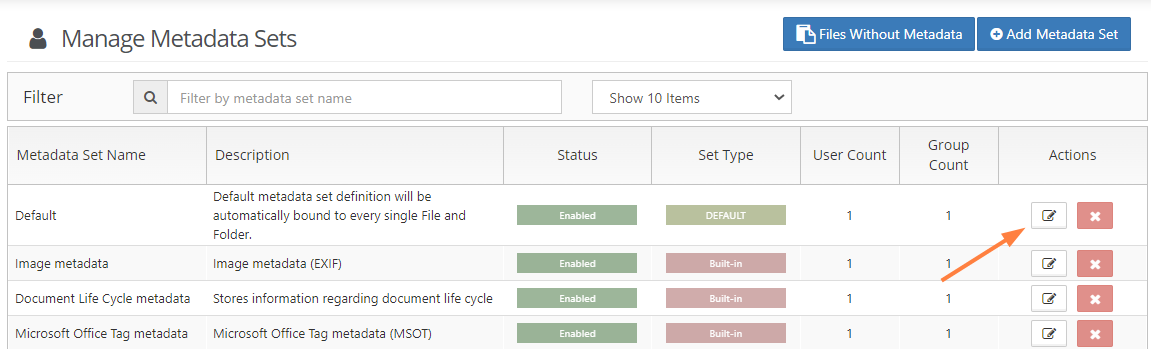
- In the admin portal navigation pane, click Metadata.
The Manage Metadata Sets screen opens. - Click the Edit icon for the Default metadata set.
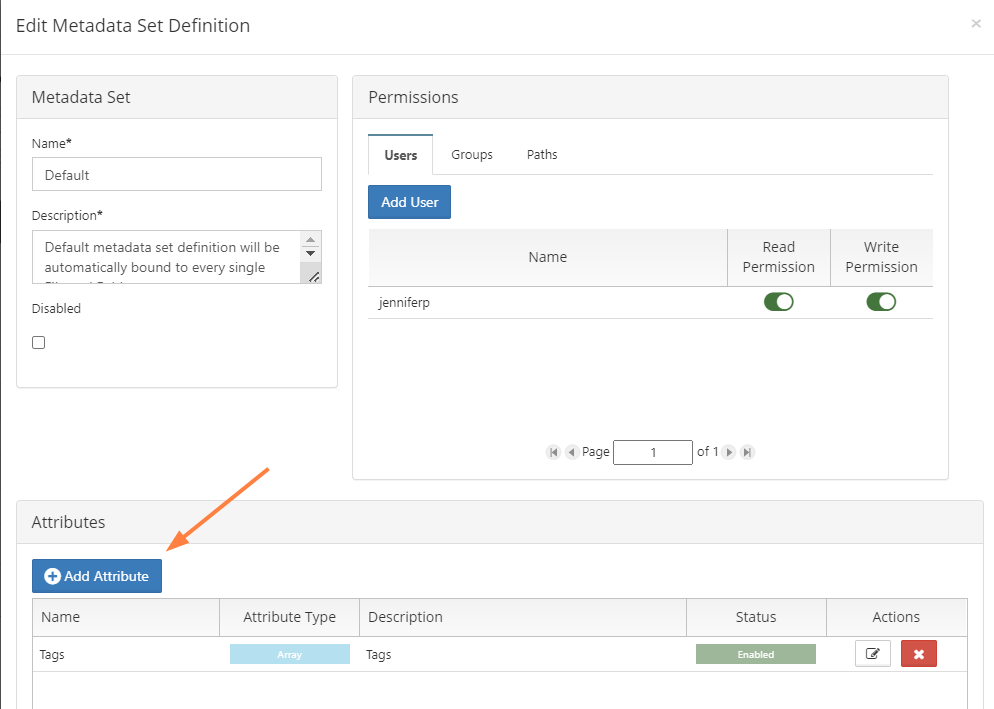
- In the Edit Metadata Set Definition dialog box, click Add Attribute.
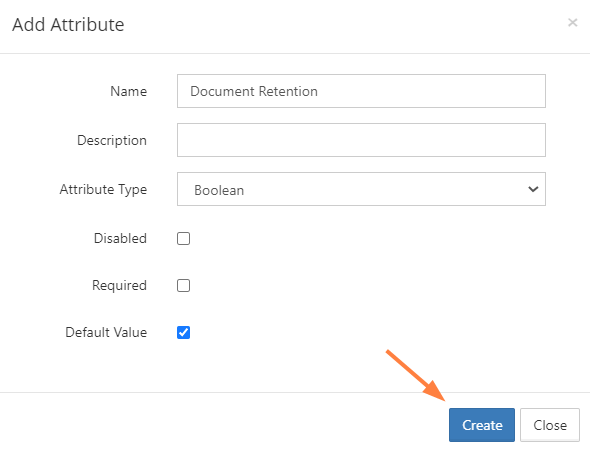
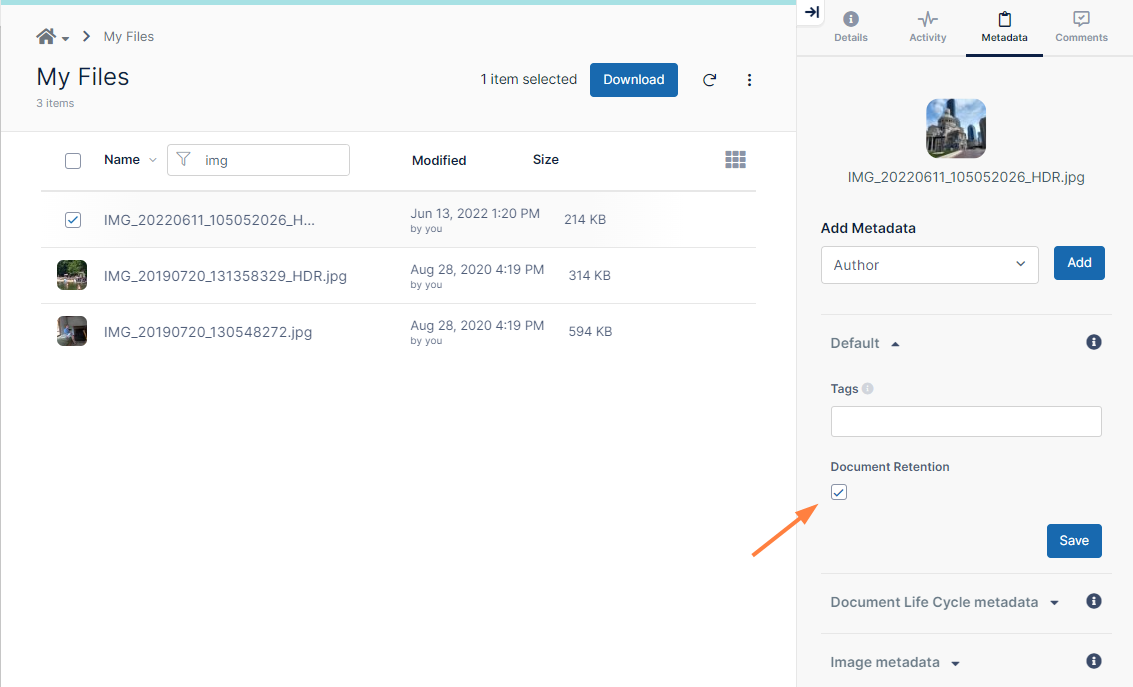
- As long as the attribute has a default value that you don't change, it can be any attribute type. In this example, create a Boolean attribute named Document Retention that has Default Value checked, which sets it to true.
- Click Create, and then click Save in the Edit Metadata Set Definition dialog box to save the attribute in the Default metadata set.
Now the Document Retention attribute, with a value of true, will be applied to every file that is uploaded to FileCloud. - To test that you have set up the metadata correctly, log in to the user portal as any user, upload a file, select it, and view the Metadata tab in the details pane, to make sure Document Retention has a value of true.
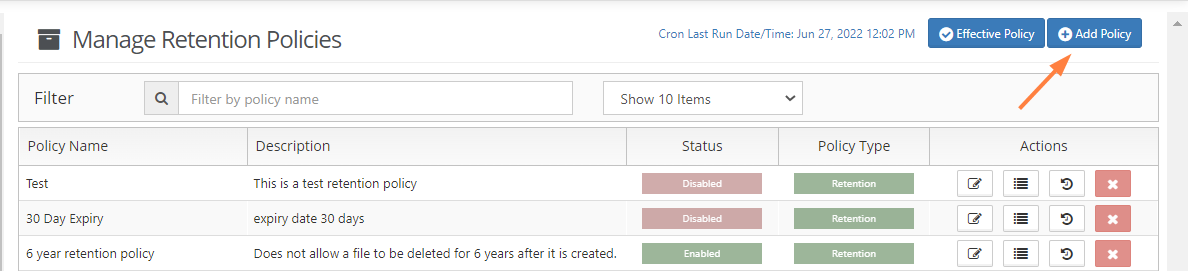
Once you have confirmed that the metadata is being applied correctly, create the retention policy. - In the admin portal navigation pane, click Retention.
The Manage Retention Policies screen opens. - Click Add Policy.
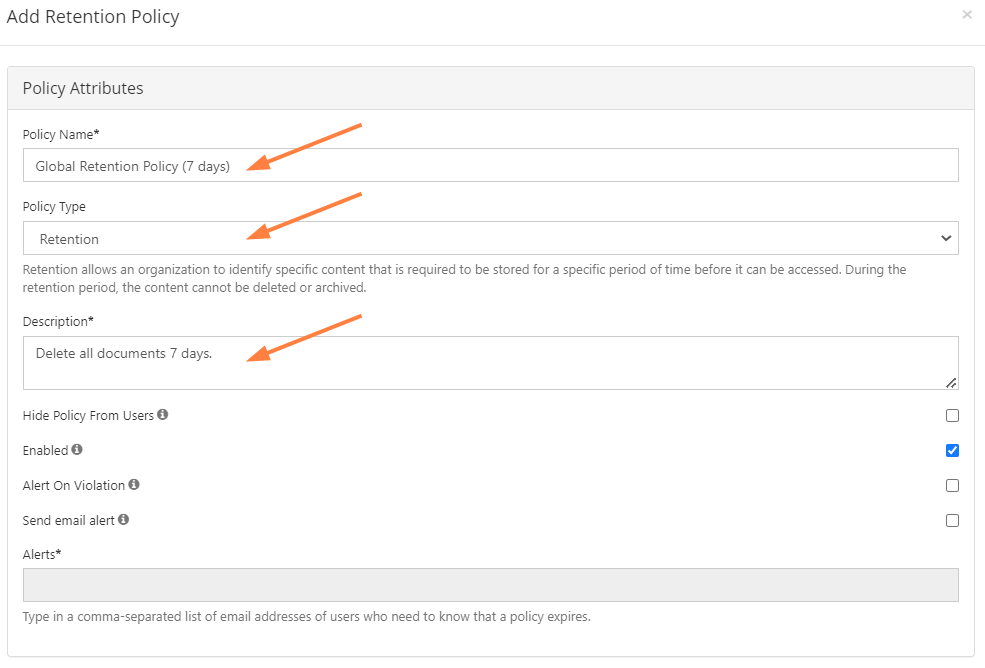
The Add Retention Policy dialog box opens. - In the upper portion, give the policy a name and description and leave the Type of policy set to Retention.
- In the middle portion, click the Metadata tab, and set the condition that the retention policy will apply to each uploaded file.
- In the first drop-down list, choose Default to indicate the Default metadata set.
- In the next drop-down list, choose Document Retention or the name you have given the new attribute.
- Enter the default value you have given the new attribute. For this example, select the Document Retention check box to set it to true.

- Click Add.
The condition is added.
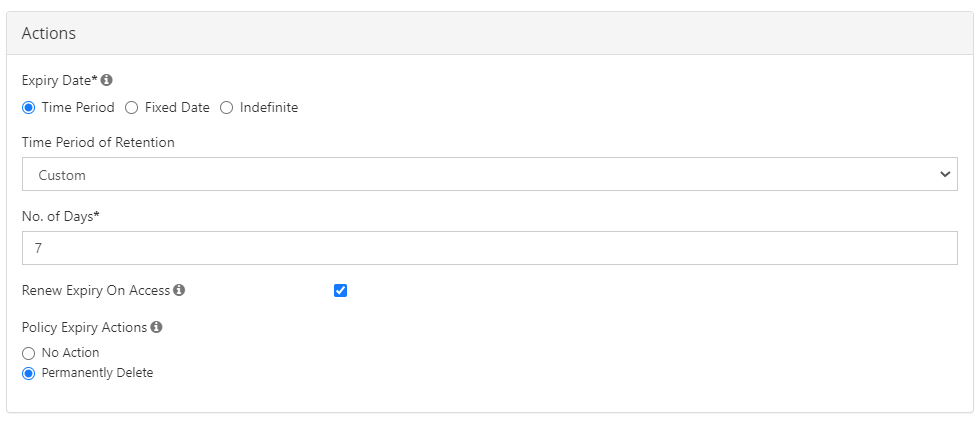
- In the lower portion, enter the details of what the retention policy will do when the condition is true.
- In Expiry Date, choose an option. For this example, choose Time Period since we want all files to be deleted a specific number of days after they are uploaded.
- Since a preset option of 7 days does not exist, in Time Period of Retention choose Custom, and in No. of Days, choose 7.
- In Policy Expiry Options, choose Permanently Delete.
- Click Save.
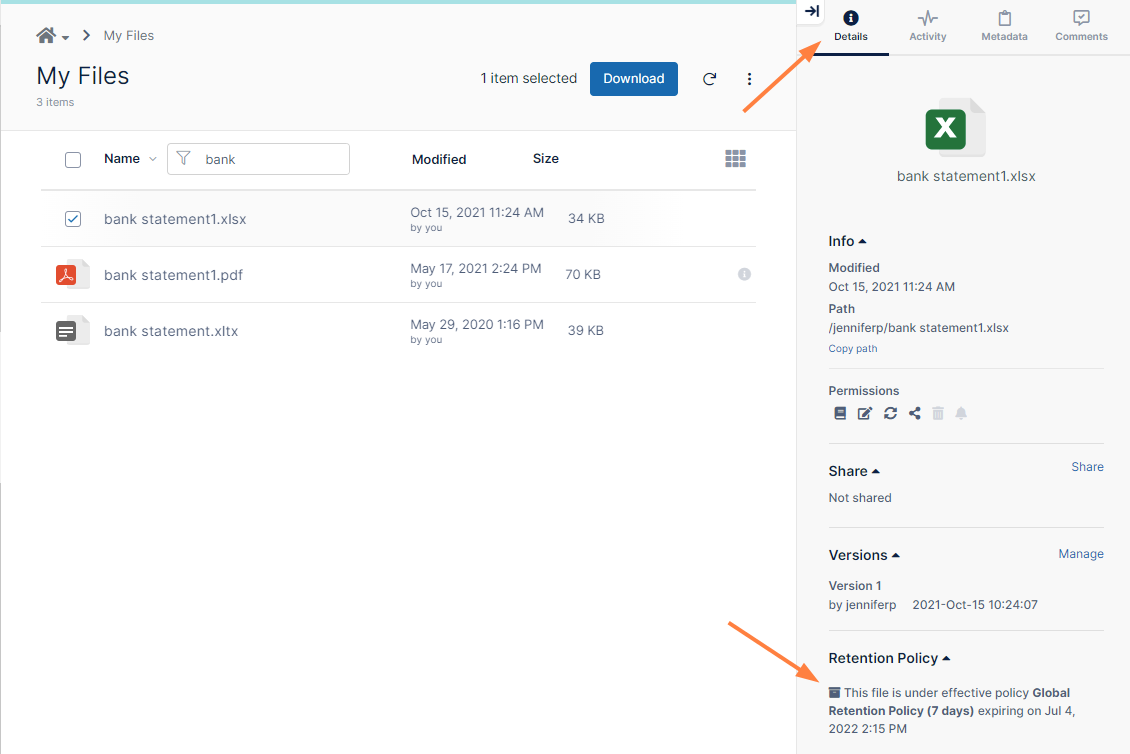
- To test the the retention policy is working properly, log in to the user portal as any user, upload a file, select it, and view the Details tab in the details pane, to make sure the retention policy is applied to the document.