Troubleshoot, Disable, and Uninstall DocIQ

DocIQ is very straightforward to install, configure, and use. If you encounter issues, try using these troubleshooting tips.

Check if DocIQ office integration is enabled in Sync/Drive Path:

  1. Check if the file you opened is in a Sync or Drive folder
  2. Restart Drive or Sync.
  3. In an Office application, such as Word, open File Options
    1. From the menu, select File > More > Options.
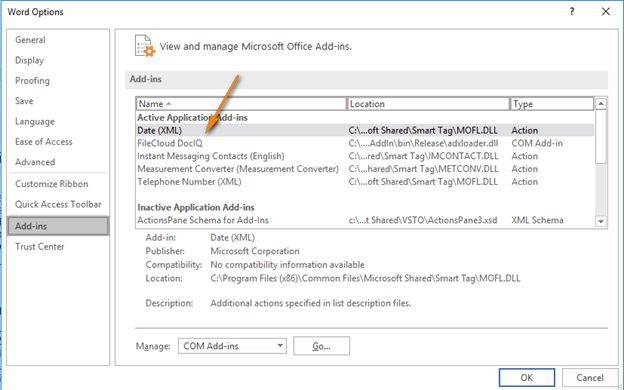
    1. In Add-ins, under Active Application Add-ins verify that FileCloud DocIQ is listed.


This occurs if the Office application is storing DocIQ as an inactive add-on. To fix this problem, activate the DocIQ add-on:

  1. In the Office application, with the file open, select File, then Options.
    An Options dialog box opens:
  2. In the navigation bar, click Add-ins.
  3. Look for FileCloud DocIQ under Inactive Application Add-ins.
  4. If it is listed there, make sure the Manage drop-down list at the bottom of the dialog box displays COM Add-ins.
  5. Click Go.
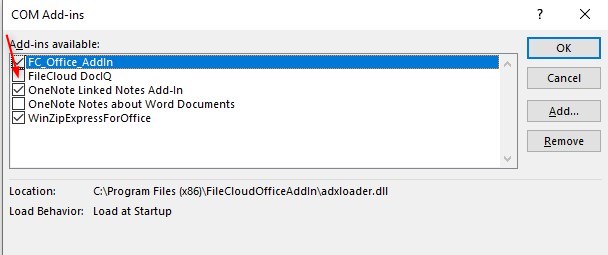
    The COM Add-ins dialog box opens.
  6. Check FileCloud DocIQ.
  7. Click OK.
    The Office document should now display DocIQ.


To temporarily disable DocIQ to troubleshoot other computer issues, see Configure DocIQ.


If you need to, you can uninstall DocIQ in the following ways:
  1. Next to the Start button (), in the search box, type Control Panel.
  2. From the results, select Control Panel.
  3. Select Programs.
  4. Select Programs and Features, and then select DocIQ.
  5. At the top of the list, next to Organize, click Uninstall.


DocIQ will be uninstalled when Sync application is uninstalled.

  1. Next to the Start button (), in the search box, type Control Panel.
  2. From the results, select Control Panel.
  3. Select Programs.
  4. Select Programs and Features, and then select FileCloudSync.
  5. At the top of the list, next to Organize, click Uninstall.

DocIQ will be uninstalled when Drive application is uninstalled.

  1. Next to the Start button (), in the search box, type Control Panel.
  2. From the results, select Control Panel.
  3. Select Programs.
  4. Select Programs and Features, and then select FileCloudDrive.
  5. At the top of the list, next to Organize, click Uninstall.