Using FileCloud for Office with Drive

FileCloud for Office is an MS Office add-in for Word, Excel, and PowerPoint which can be used in both Windows and macOS with FileCloud Sync, FileCloud Drive, and FileCloud Desktop. It is available in FileCloud beginning with version 23.1.

For instructions on how to install FileCloud for Office, see Using FileCloud for Office.

If you have been using FileCloud Drive with DocIQ, see the instructions for previous users of DocIQ at the bottom of this page.

Before using FileCloud for Office with Drive

The first time you install Drive or upgrade Drive to use FileCloud for Office you must:

  • Contact FileCloud Support and request that your cookie same-site value be set to None.

  • Confirm that you trust FileCloud for Office and enable it as shown in the following procedure.

To confirm that you trust FileCloud for Office and enable it:

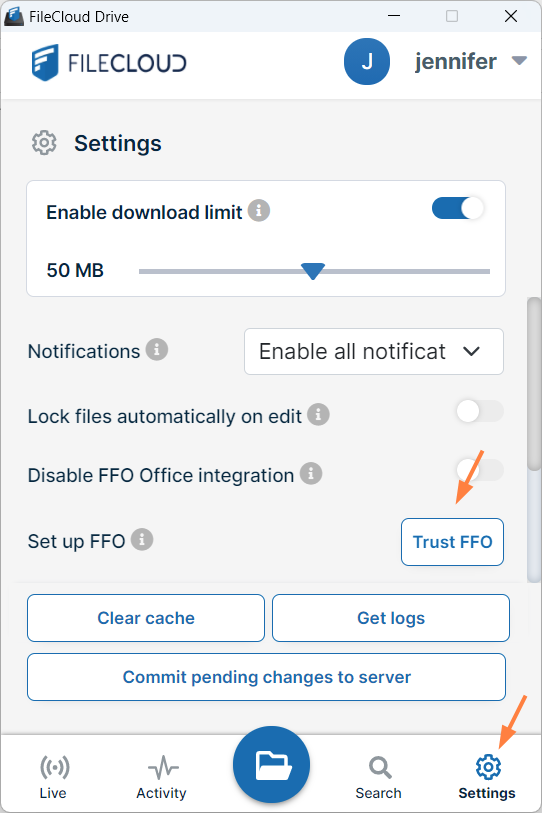
  1. After you log in to FileCloud Drive, click the Settings tab.
  2. Click the Trust FFO button.

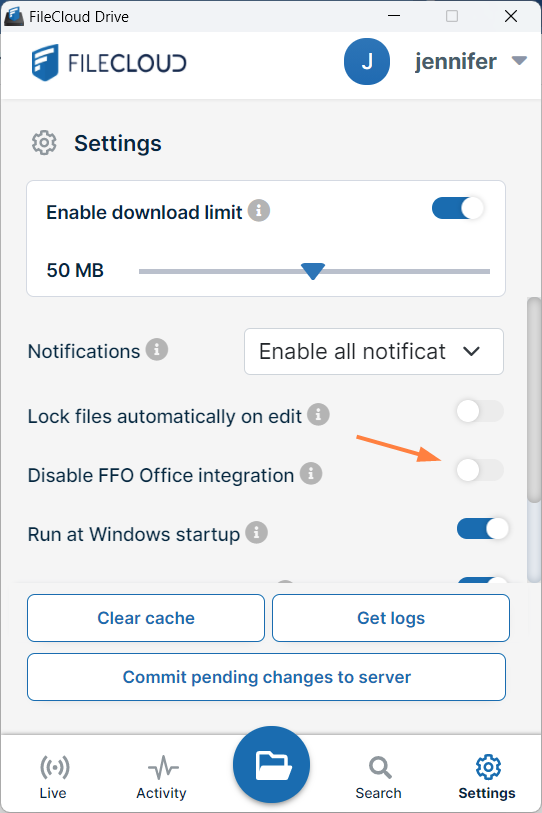
    The Trust FFO button disappears, and Disable FFO Integration remains automatically turned off:
     
    FileCloud for Office is now enabled in Drive, but to use it in Office files, you must attach the add-in to to each type of Office file (Word, Excel, and PowerPoint) in your FileCloud Drive directory.

Working with FileCloud for Office in Drive

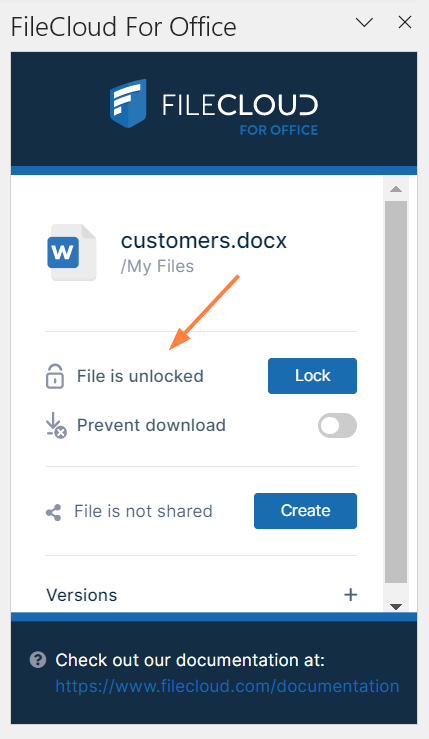
The FileCloud for Office task panel displays information about a file and enables you to:

  • Lock or unlock a file.
  • Prevent or allow download of a file while locked.
  • Share a file.
  • Manage file versions, and view file details and metadata.

Lock or unlock a file

You can use the file locking function in FileCloud for Office to:

  • See if you have a file locked for editing
  • Turn a file lock on or off
  • Prevent or enable downloads of a locked file

If a shared file is not locked when you open it for edit, another user can also open the file and make changes.
To avoid this, by default, FileCloud for Office automatically locks files for editing when they are opened.
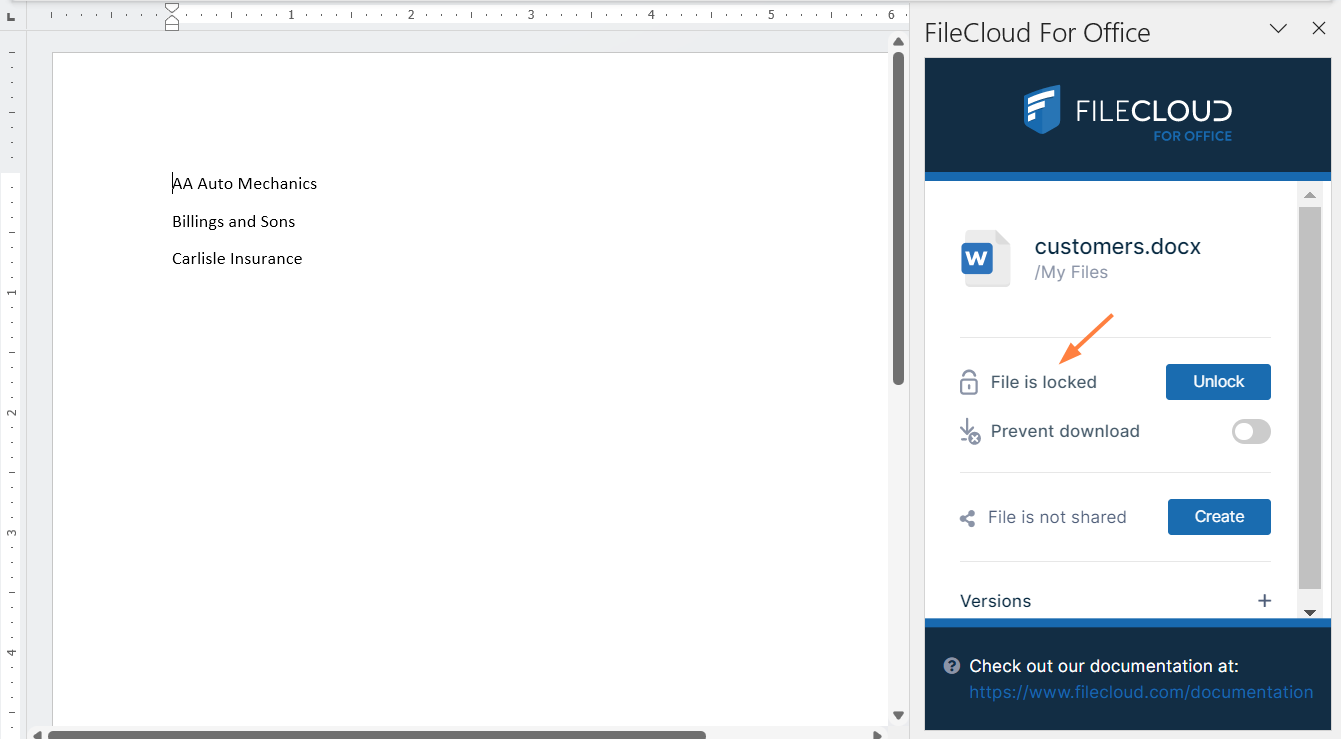
When you open an Office file in your client directory, the FileCloud for Office panel shows File is locked, and by default, users are allowed to download or read the file (Prevent download is disabled).

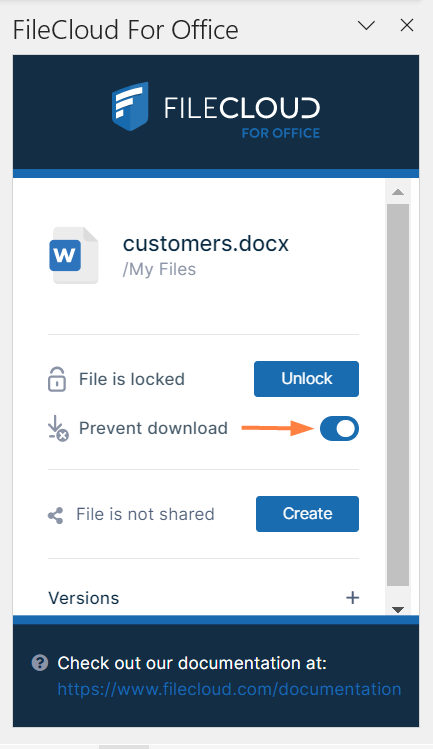
  • To prevent other users from downloading or reading the file while it is locked, click the Prevent download slider.
  • To unlock the file while you have it opened for edit, click Unlock. Now other users can modify as well as view and download the file.
    Note: Prevent download cannot be enabled when the file is unlocked.

The following table describes what each lock status means and how it impacts what you and others you have shared the file with can do with the file.

Lock StatusAccess by lock ownerAccess by others
File is locked (download allowed)Read and modification allowedOnly read is allowed, no modification is allowed
File is locked (download prevented)Read and modification allowedNeither read nor modification is allowed
File is not lockedRead and modification allowedRead and modification allowed

For a locked file with download (read) prevented:

If USER1 has locked (and read blocked) the file:

  • The FileCloud client will not download the file for USER2

However, if USER2 has already downloaded the file in Sync or Drive, then:

  • FileCloud Sync will allow FileCloud for Office to open the file.
  • FileCloud Drive will not allow the file to be opened by USER2, unless Drive has already cached the file.


If an admin prevents file locking after a user has locked a file in a client
:

  • The lock is automatically removed from the file
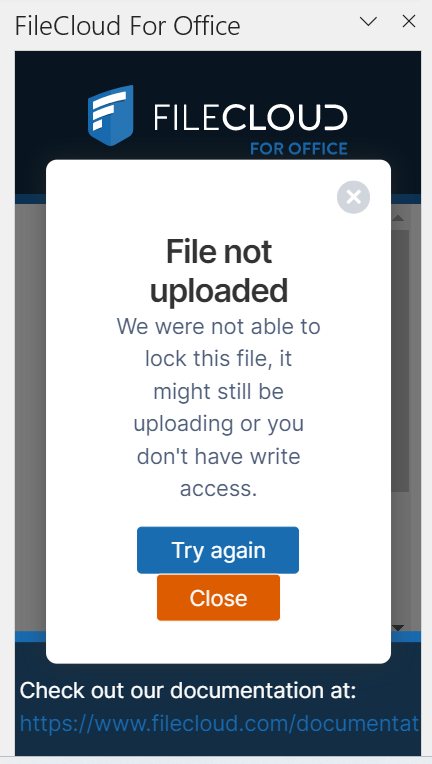
  • Additional files cannot be locked using FileCloud for Office, and when you attempt to lock a file, an error message similar to the following appears:

If you are an admin and want to disable locking, see Managing User Locks.

You can use the following table to understand the status of lock:

Action

Doc IQ Lock

Enabled

Prevent

Download

Lock Status

Before Open

Lock Status

After Open

Lock Status

After close

An unlocked file is opened by USER1

File is not lockedFile is locked (read allowed) by USER1File is not locked
An unlocked file is opened by USER1

File is not lockedFile is not lockedFile is not locked

A file locked by USER1 is opened by USER1

File is Locked (Read Allowed) by User 1File is Locked (Read Allowed) by USER1File is not locked

A file locked by USER1 is opened by USER1

File is Locked (Read Allowed) by User 1File is Locked (Read Allowed) by USER1File is not locked

A file locked by USER1 is opened by USER1

File is Locked (Read Blocked) by USER1File is Locked (Read Blocked) by USER1File is not locked

A file locked by USER1 is opened by USER2

File is Locked (Read Allowed) by USER1File is Locked (Read Allowed) by USER1File is Locked (Read Allowed) by USER1

A file locked by USER1 is opened by USER2

File is Locked (Read Allowed) by USER1File is Locked (Read Allowed) by USER1File is Locked (Read Allowed) by USER1

A file locked by USER1 is opened by USER2

File is Locked (Read Blocked) by USER1File is Locked (Read Blocked) by USER1File is Locked (Read Blocked) by USER1

Share a file

To share a file or folder that is opened with FileCloud for Office:

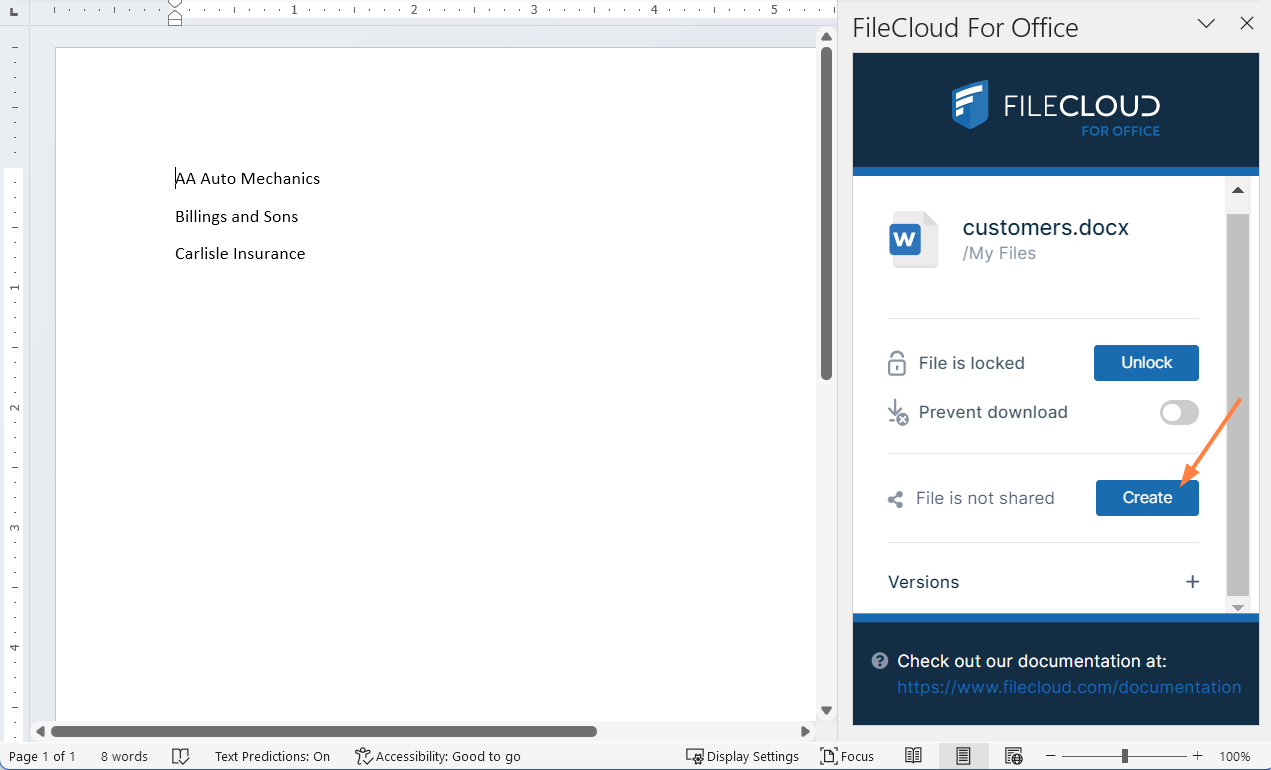
  1. In the FileCloud for Office panel, click Create.

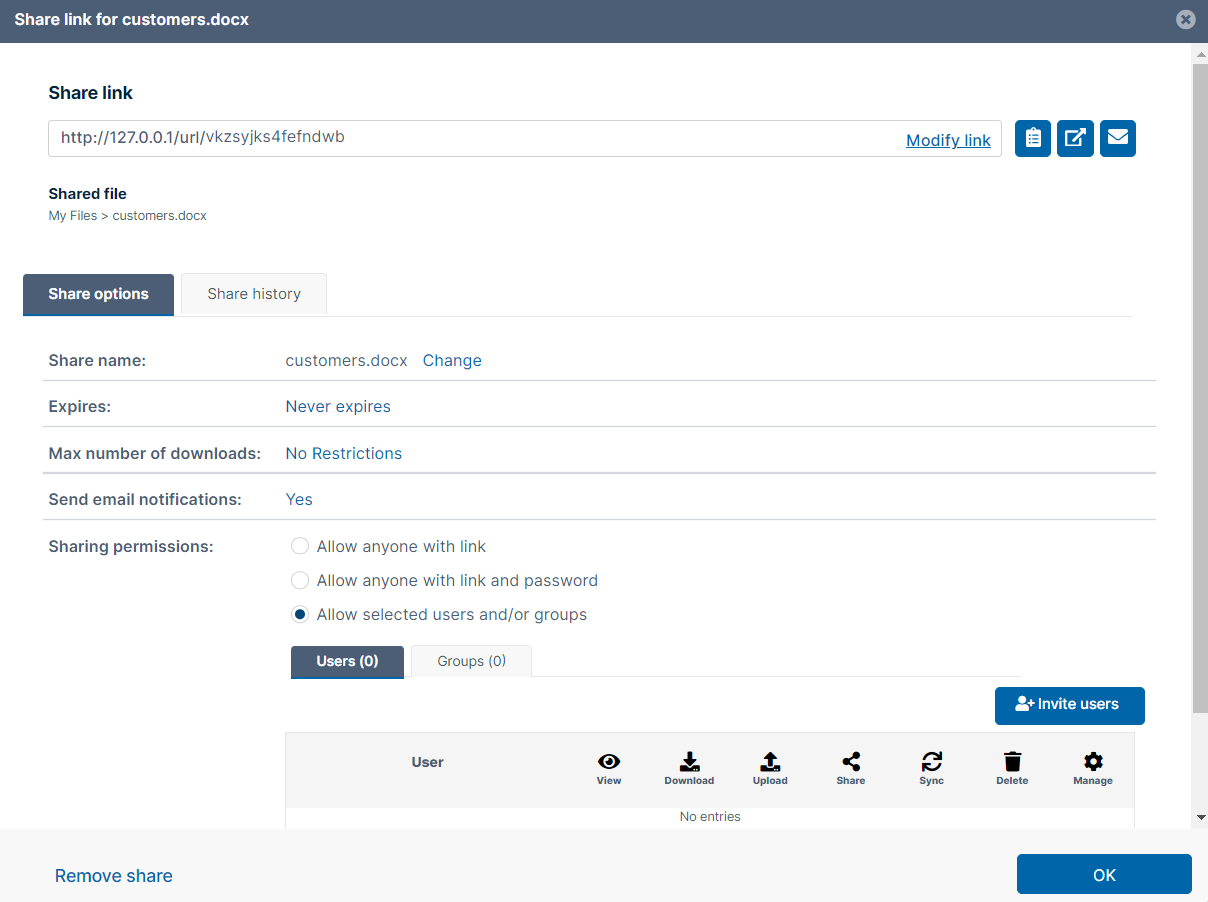
    A Share Link screen that is nearly identical to the one in the user portal opens:
  2. Share the file using the same settings and options that you would for a share in the user portal. See Sharing Files and Folders for help.
    Note: The option for downloading the share QR code, which is available for shares created from the user portal, is not available for shares created in FileCloud for Office.
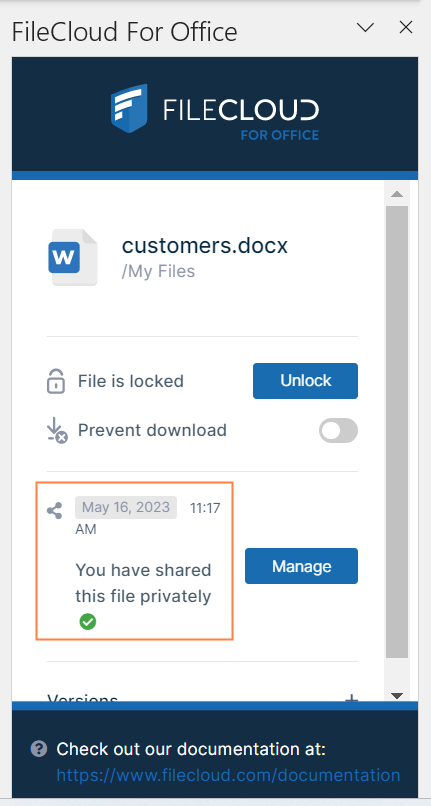
    After you have shared the file, the FileCloud for Office panel displays details of the share:
  3. Click Manage to change the options or permissions in the share.

Download versions, view details and metadata

Versions

To view a file's version information in FileCloud for Office:

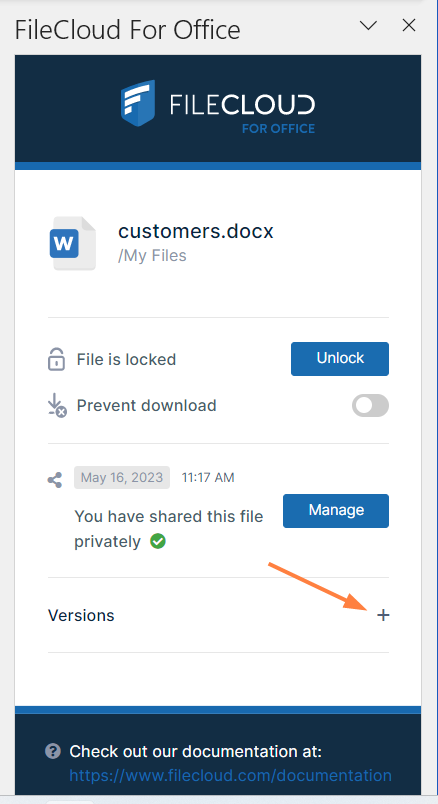
  1. At the bottom of the FileCloud for Office panel, click the + across from Versions.

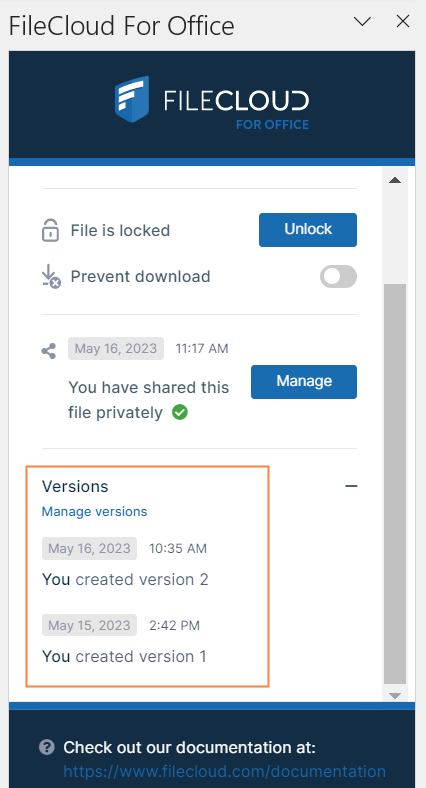
    The expanded Versions section shows you version information about the file.


To download file versions in FileCloud for Office
:

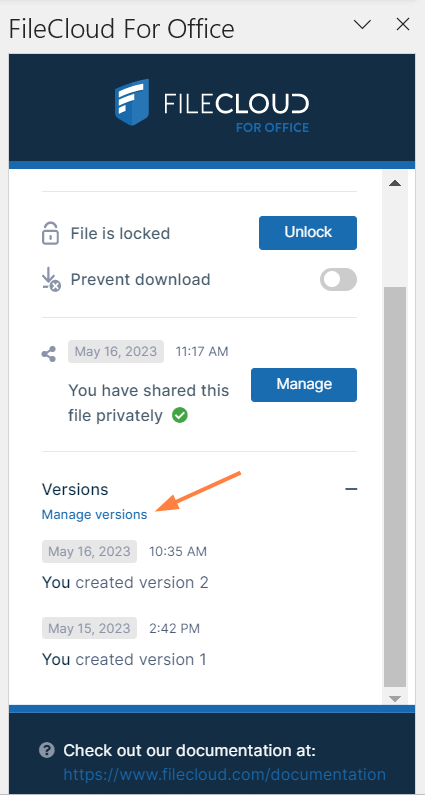
  1. In the Versions section of the FileCloud for Office panel, click Manage versions.

    The Properties dialog box opens to the Versions tab.
  2. Click Download for the version that you want to download, and save it.

Details

To view file details:

  1. In the Versions section of the FileCloud for Office panel, click Manage versions.

    The Properties dialog box opens to the Versions tab.
  2. Click the Details tab.

    The details shown are the filename and type, the last modified date, the path of the file in FileCloud, and your permissions for the file.

Metadata

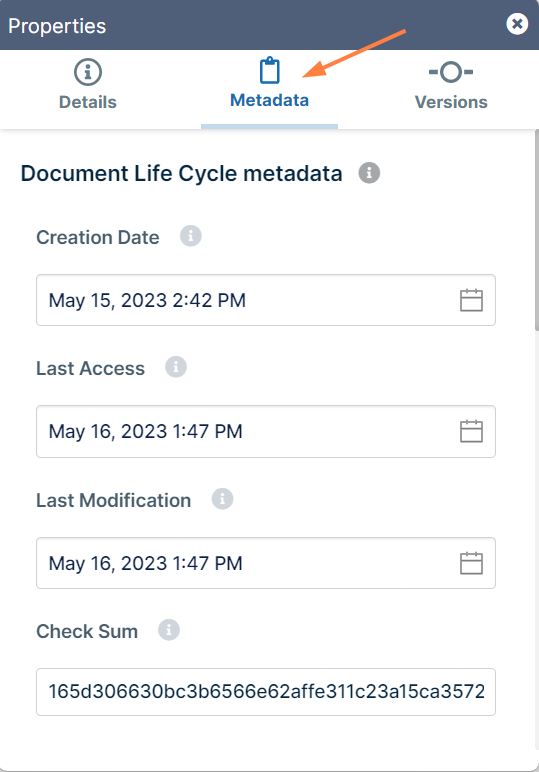
To view metadata information for the file:

  1. In the Versions section of the FileCloud for Office panel, click Manage versions.
  2. The Properties dialog box opens to the Versions tab.
  3. Click the Metadata tab.

    Each metadata set applied to the file is listed with the values for its fields. 

FileCloud for Office log locations

The locations of log files for FileCloud for Office in Windows and macOS are the following:

Windows: %appdata%/FFOServer

macOS:  /Users/[USERNAME]/Library/Preferences/FFOServer

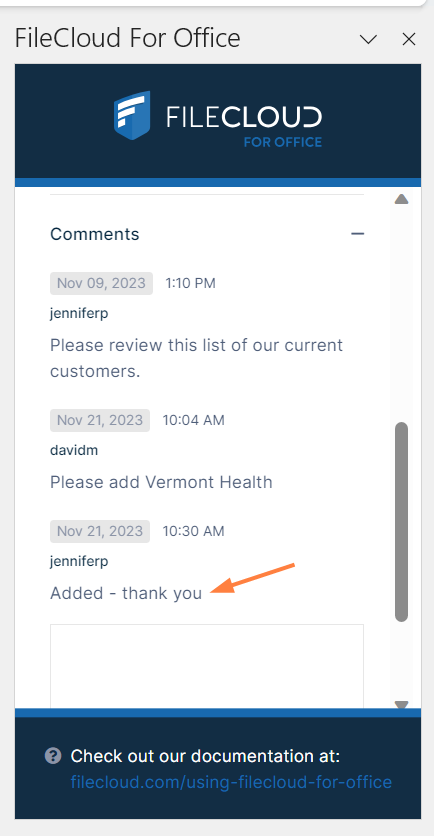
View and add comments

Comments added to files and folders in FileCloud for Office also appear in the user portal and any of the other client apps.

To view and add comments in FileCloud for Office
:

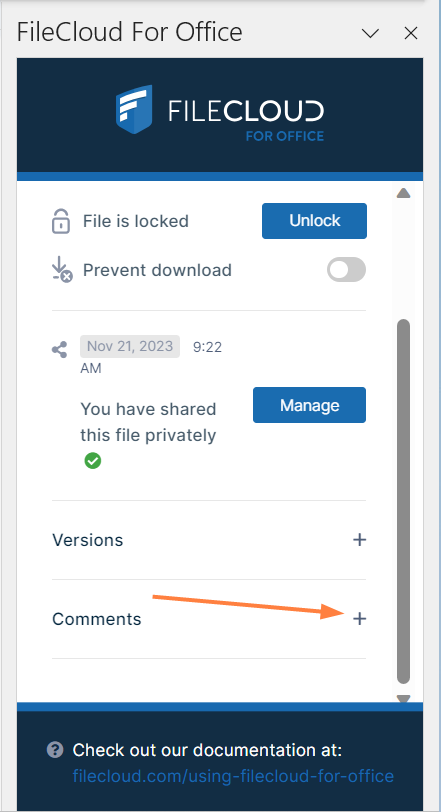
  1. If Comments is not visible in the FileCloud for Office panel, scroll down to the bottom of the panel.
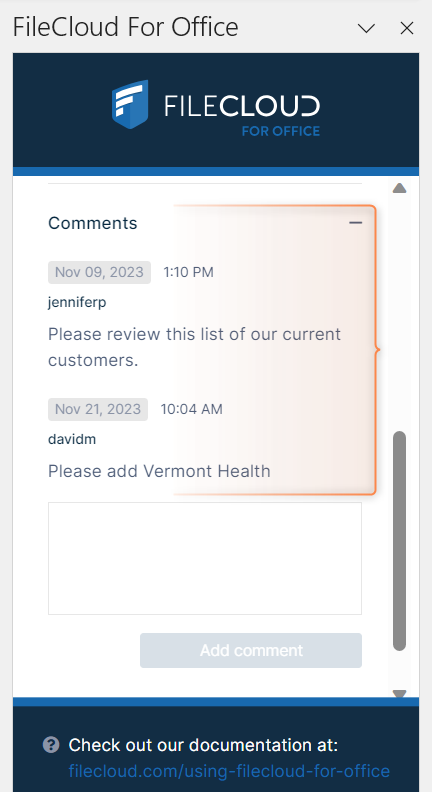
  2. Click the + across from Comments.

    Any existing comments added to the file or folder here or anywhere else in FileCloud appear above the Comments box.
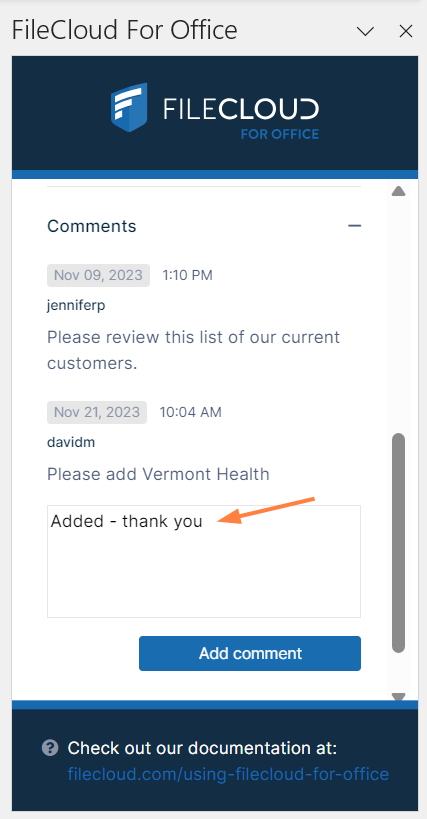
  3. To add a new comment, click inside the Comments box and enter the comment.
  4. Click Add comment.
    The comment is added.


For previous users of DocIQ

If you have never used FileCloud Drive with DocIQ before, the installer will automatically configure Drive for use with FileCloud for Office, and this section does not apply to you.

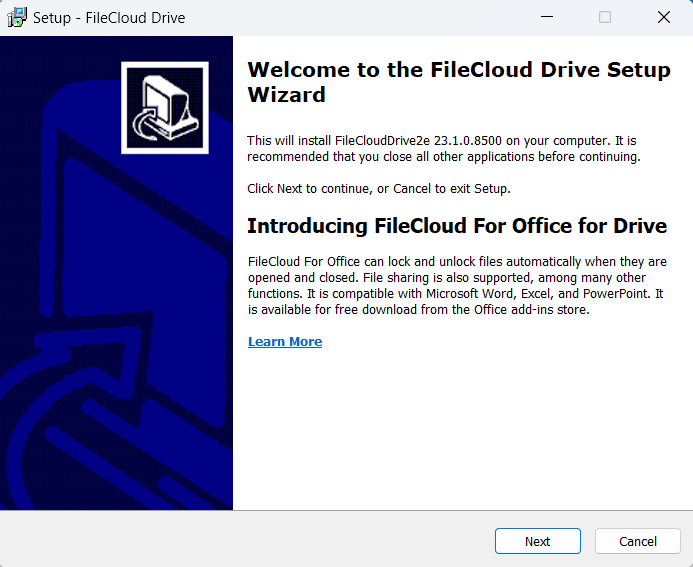
When you run the FileCloud Drive installer, the first screen of the wizard introduces you to FileCloud for Office:


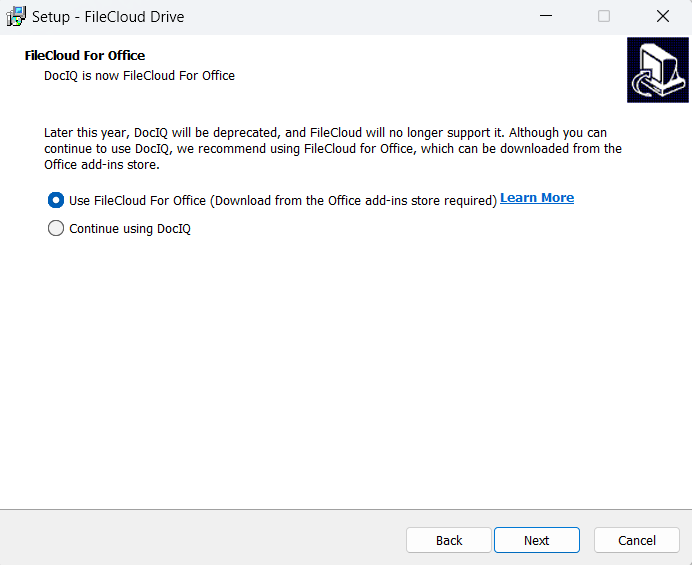
If you have been using FileCloud Drive with DocIQ, the installer prompts you to choose whether you want to continue using DocIQ or switch to FileCloud for Office (DocIQ will be deprecated in the future).

 
Choose whether you want to use FileCloud for Office or DocIQ. If you choose FileCloud for Office, you are also required to install an add-in.
The installer configures your Drive installation to function with the option you have chosen.