Install FileCloud License
Your FileCloud license is a document that provides legally binding guidelines on the use and distribution of your newly installed FileCloud software.
Obtaining a FileCloud License
The length of access and site configuration will vary depending on your license type.
There are two basic forms of FileCloud licenses:
| License Type | Duration | Features | Availability |
|---|---|---|---|
| Trial (free) | Temporary 30 days for a server license |
| Server (Self-host) Online (Hosted by us) |
Production | Permanent based on length paid for Usually 1 year |
(URL accessibility from within your company and outside access managed by Administrators) | Server (Self-host)
|
![]() For more information, read the license descriptions and Key Features on the FileCloud Pricing page.
For more information, read the license descriptions and Key Features on the FileCloud Pricing page.
![]() To purchase a license, see License Purchase and Renewal
To purchase a license, see License Purchase and Renewal
![]() For a trial license, go to https://www.filecloud.com/#hostedTrial and follow the instructions in the wizard.
For a trial license, go to https://www.filecloud.com/#hostedTrial and follow the instructions in the wizard.
When you register on the FileCloud web site to access the installation software, you should receive your trial license, although it still needs to be installed.
- If you already downloaded your license, proceed to the steps for installing it.
- If you did not download your license yet, use the next procedure to download it, and then proceed to the steps for installing your license.
Downloading your License
To download your license:
- Navigate to https://portal.getfilecloud.com/ui/user/index.html
- Type in the registered email and the password provided to access the license portal.
The license portal opens to the dashboard, where it lists all of your licenses.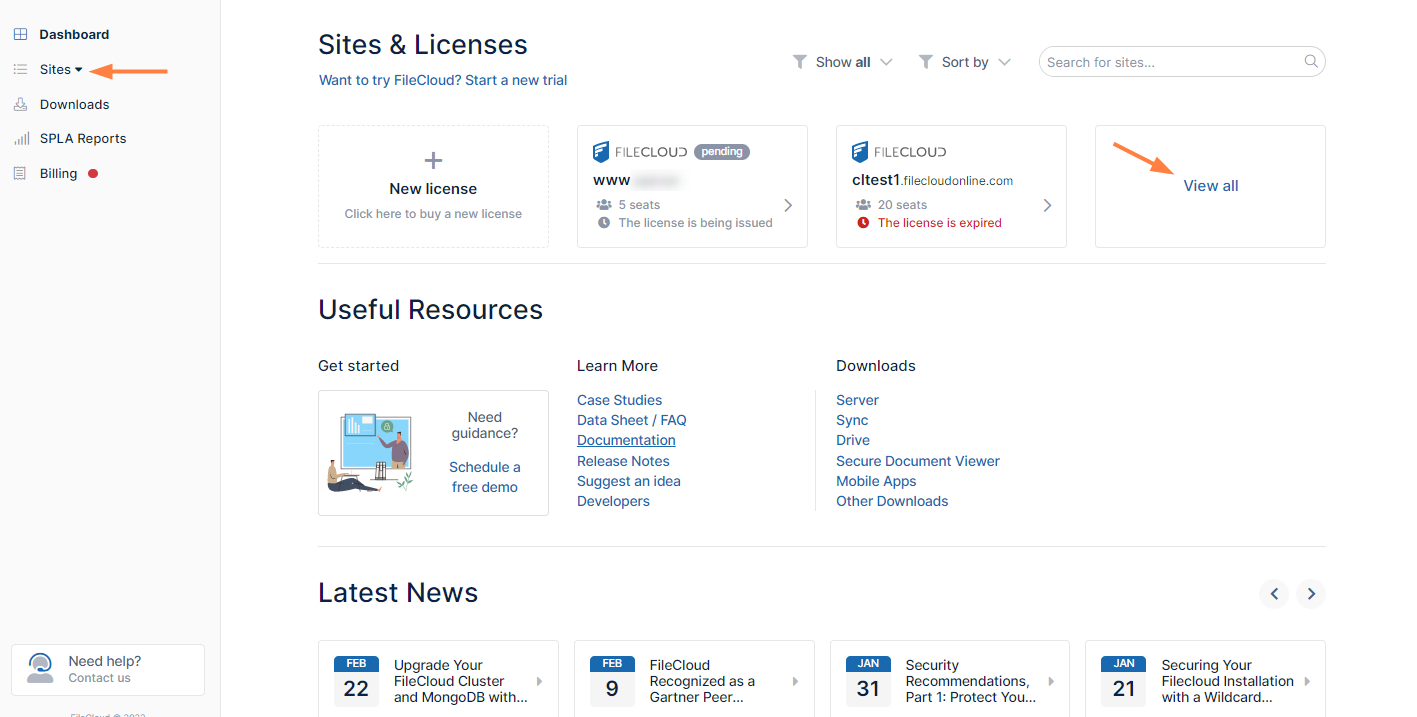
- If you don't see the license you want to download listed, click View all to see all of your licenses. (You can also expand Sites in the navigation pane to access links to all of your licenses).
- Click the license that you want to download.
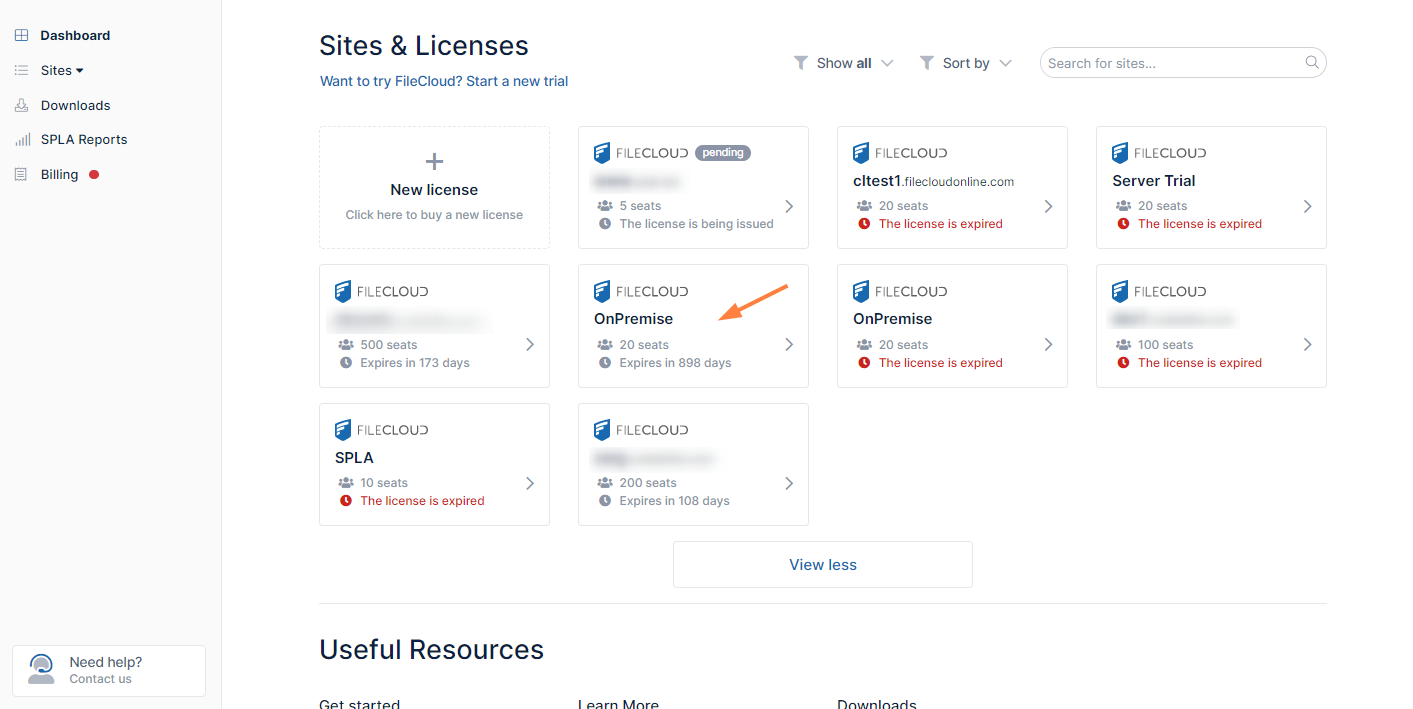
- The license is stored on your server as license.xml.
The ability to install license components such as SALESFORCE is available in FileCloud Server version 18.2 and later.
Installing Your License
You can operate FileCloud Server using any of the license types.
- If you do not need to use individual additional components, such as SALESFORCE, and Pattern Search, you can use an Essentials license.
- However, if you need to use individual additional components, such as SALESFORCE, and Pattern Search, then you must use an Advanced or Service Provider license.
There are multiple places where you can install your FileCloud license:
- Admin alert dialog box
- The dashboard's License Information widget
- The admin portal's License settings page.
It doesn't matter which one of these places you use; they all perform the same task.
After installation, to update or manage licenses, use the dashboard's License Information widget or the admin portal's Settings > License tab.
Admin Alert Dialog
During initial setup, when you log in to the admin portal, you see the Admin Attention Required dialog box, which allows you to upload your license.xml file and apply the license.
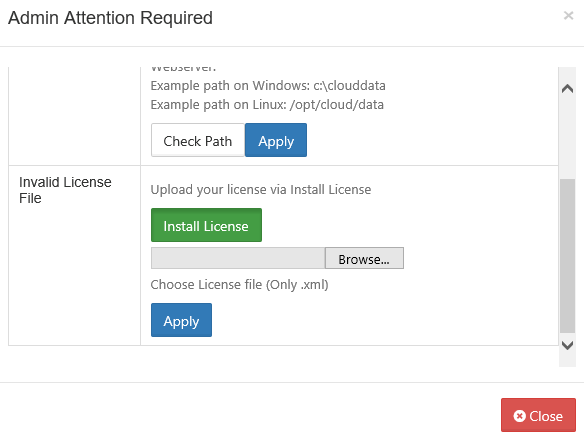
To install your license from the Admin dialog:
- In the Invalid License File row, click Install License.
- In the new section that appears, click Browse.
- Locate the license.xml file, and then click Apply.
- The installed license appears in green under the textbox.
Dashboard
If you close the Admin dialog without installing a license, you can always use the FileCloud dashboard to manage your licenses. You can also use it to update a license.
The dashboard opens the same window that opens when you click Settings > License.
To install your license from the Dashboard:
- Log in to the admin portal.
- In the dashboard's the License Information widget, click Manage.
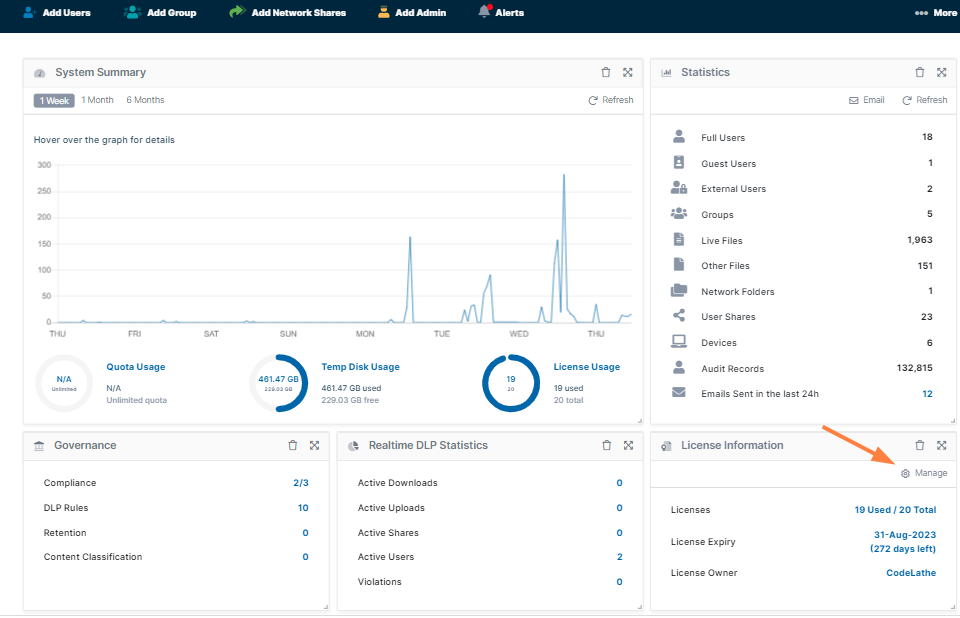
The dashboard opens the same window that opens when you go to the License settings page.
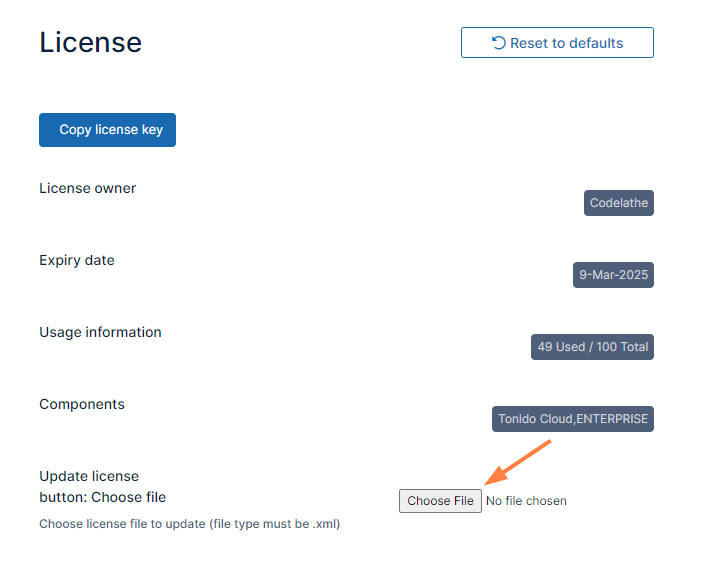
- On the License page, click the Choose File button.
- Select the license.xml file and click OK.
- On the License page, click Save.
If you have hosts available for accessing FileCloud in addition to the one listed in Server URL, your FileCloud installation log may display Not allowed host errors for those hosts.
To avoid getting Not allowed host errors:
- Open cloudconfig.php at
Windows: XAMPP DIRECTORY/htdocs/config/cloudconfig.php
Linux: /var/www/config/cloudconfig.php
Add the following, replacing the Server URLs with your own.
define("TONIDOCLOUD_ALLOWED_HOSTS", "mycompany.store1.com,mycompany.store2.com,mycompany.store3.com");
Also see: