Example Setup: User-enabled Notifications on Folders
The company has three product offering categories:
- Internet Only
- TV Only
- Internet + TV
and it has three pricing plans:
- Corporate
- Family
- Individual
The company has a Team Folder with information that is available to all sales reps on each product offering and pricing plan. All sales reps see the following under Team Folders: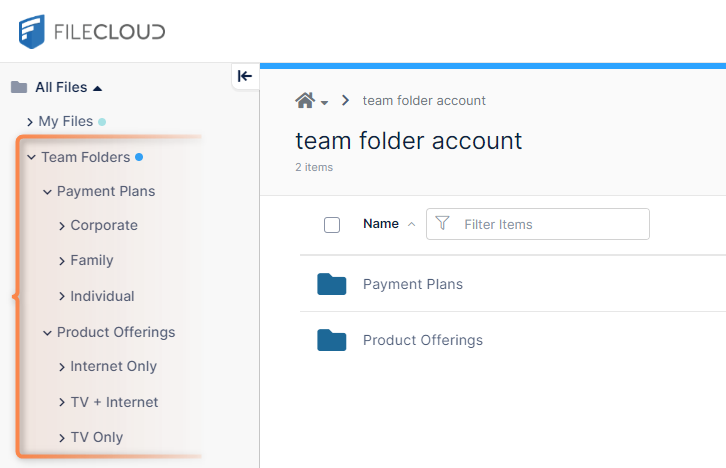
Each sales representatives works with a specific payment plan and product offering and only needs notifications about the product and pricing plans they work with, and do not want to receive updates about other offerings.
Therefore, as the FileCloud admin, you want each sales rep to be able to customize their file change notifications depending on which campaigns or pricing plans they are currently working with, so they know immediately when these product offerings and prices change. In addition, you want to give sales reps the opportunity to eliminate notifications about information they are not interested in.
After you configure these capabilities, each sales rep must log in to the user portal and choose the paths of the Team Folders that pertain to them and add notifications to them.
To configure these settings
These are the steps you (the admin) use to set up the notifications according to these requirements:
- To enable email notifications globally, open the Notifications settings page.
- In the FileCloud admin portal's left navigation bar, scroll down and click Settings. Then, on the Settings navigation page, click Misc
 .
. - In the inner navigation bar on the left of the Settings page, expand the Misc menu, and click Notifications, as shown below.
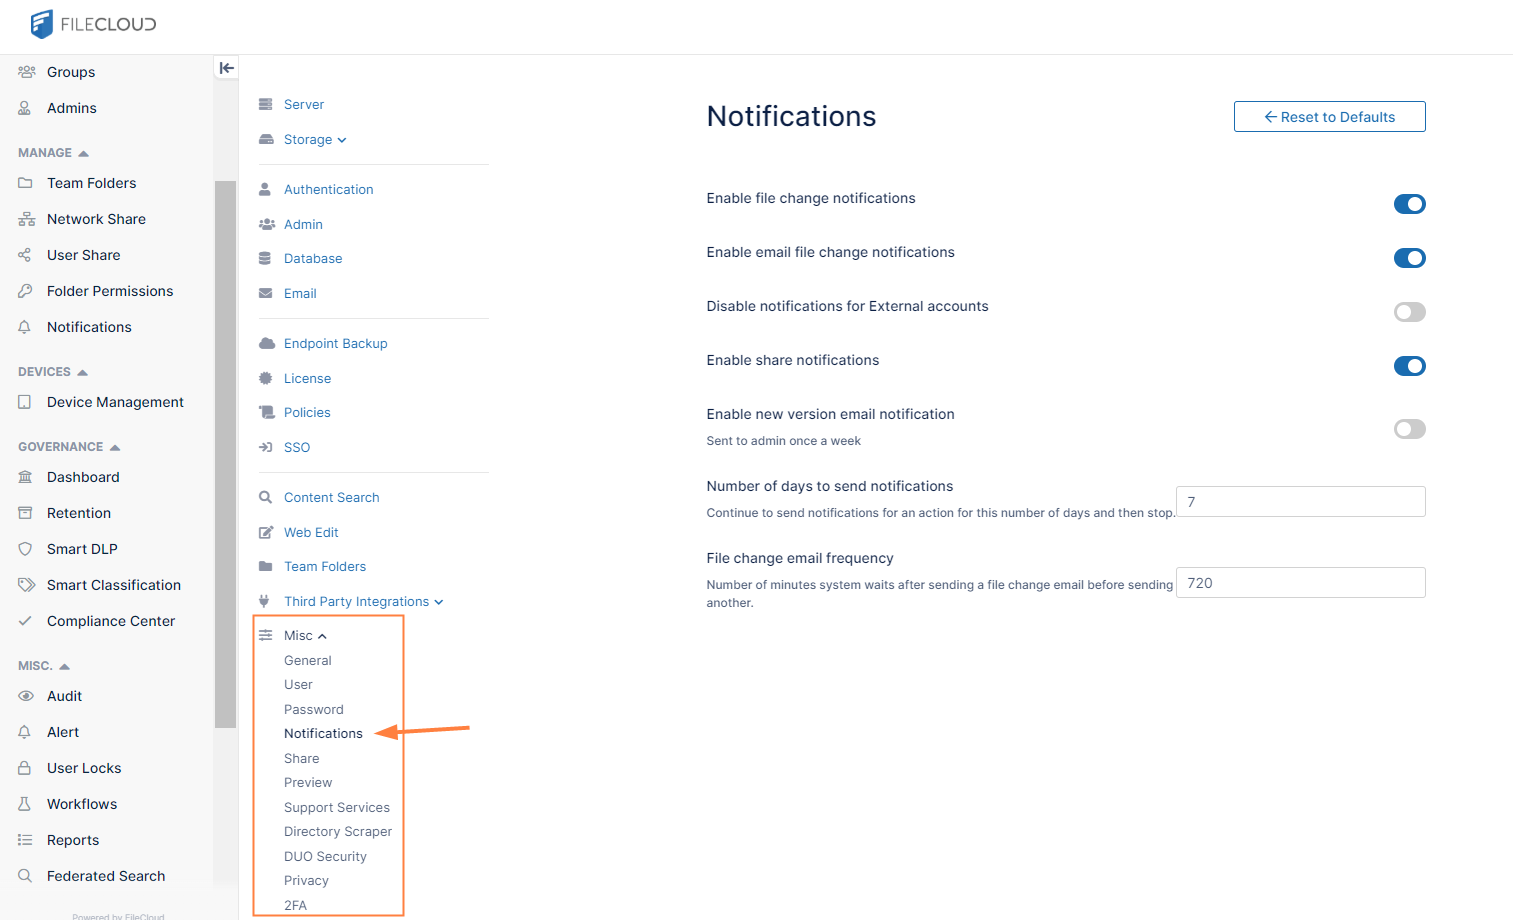
The Notifications settings page opens.
- In the FileCloud admin portal's left navigation bar, scroll down and click Settings. Then, on the Settings navigation page, click Misc
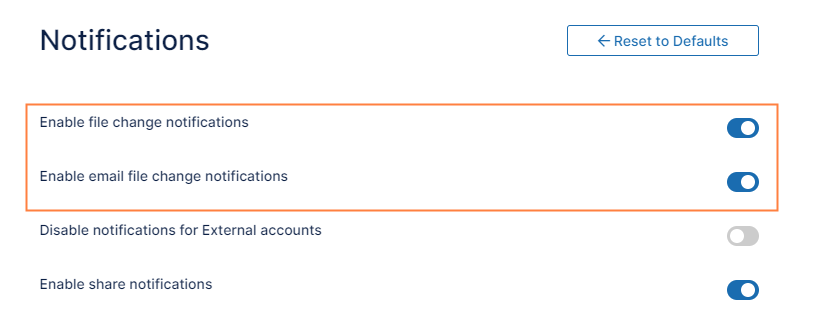
- Make sure Enable file change notifications is enabled. if it is not enabled, Enable email file change notifications is not available.
- Enable Enable email file change notifications.
- In the FileCloud admin portal's left navigation bar, scroll down and click Settings. Then, on the Settings navigation page, click Policies
 .
.
The Policies settings page opens. - Edit the policy assigned to the sales reps.
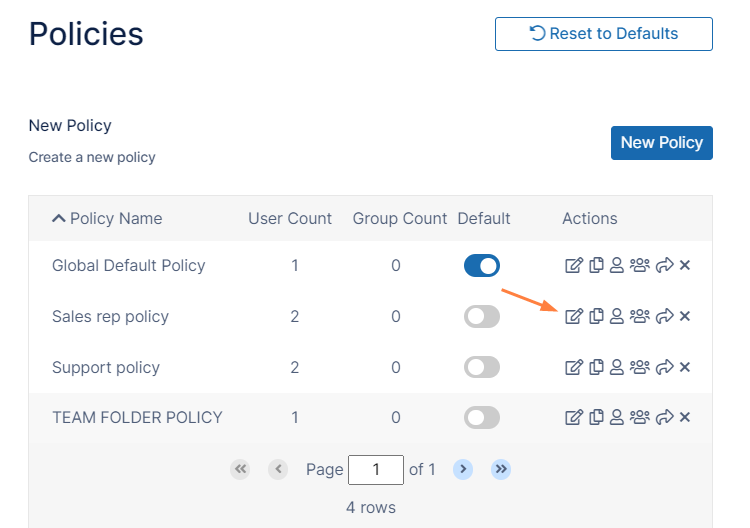
- Set Disable Notifications and Disable User Override to off.
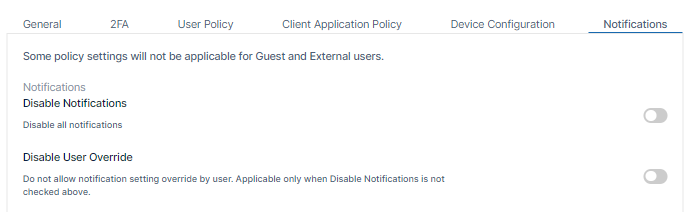
- Scroll down so that you can view the individual Disable Notifications settings, and set all of the Disable Notification settings to on.
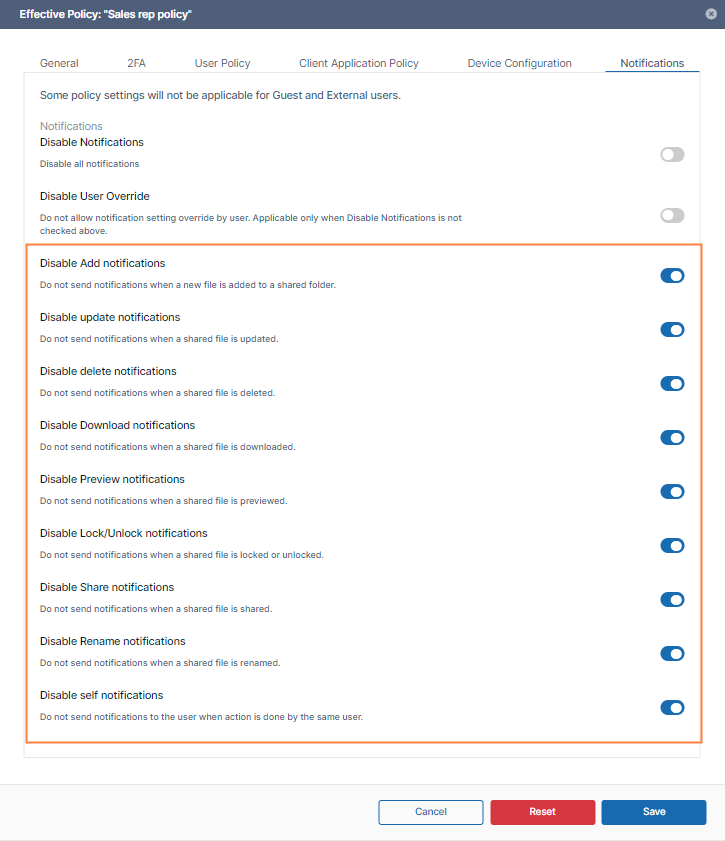
- Save your changes.
How a Sales Rep sets up notifications about information particular to their clients:
In this example, the sales rep only works with corporate customers who purchase internet only.
Instructions for the sales rep to configure notifications for just the Corporate and Internet Only Team Folders:
- Log in to the user portal and go to Team Folders.
- In the Payment Plans folder, right click the Corporate sub-folder, and choose Notifications.

Notifications settings for the Corporate Team Folder open. - Select Use my own notification settings.
- Check the actions that you want to be notified about in the folder (for example Upload, Delete, Rename, and Update).
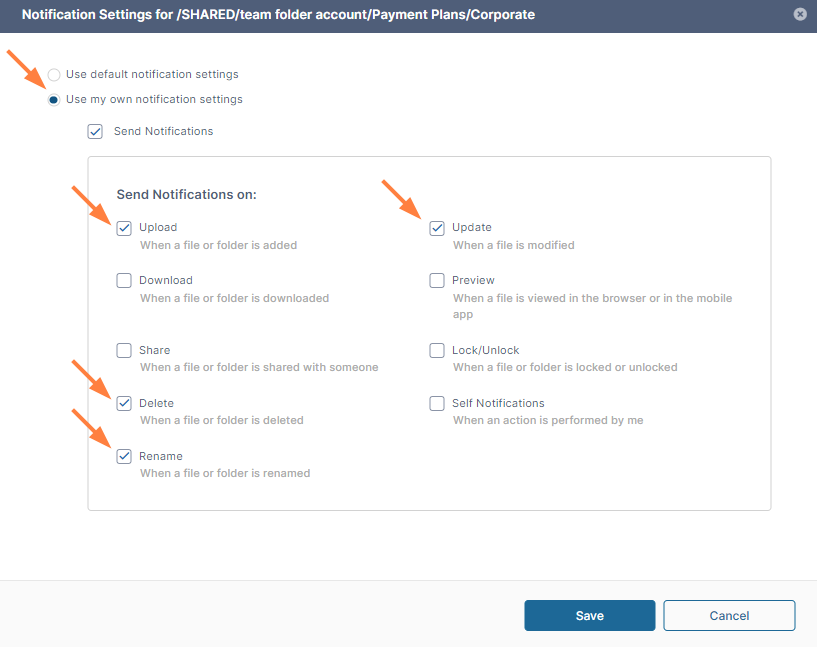
- Click Save.
- Navigate to the Product Offerings/Internet Only folder, and repeat steps 2 through 5, above, to set notifications for the folder.
When content is changed in one of the folders:
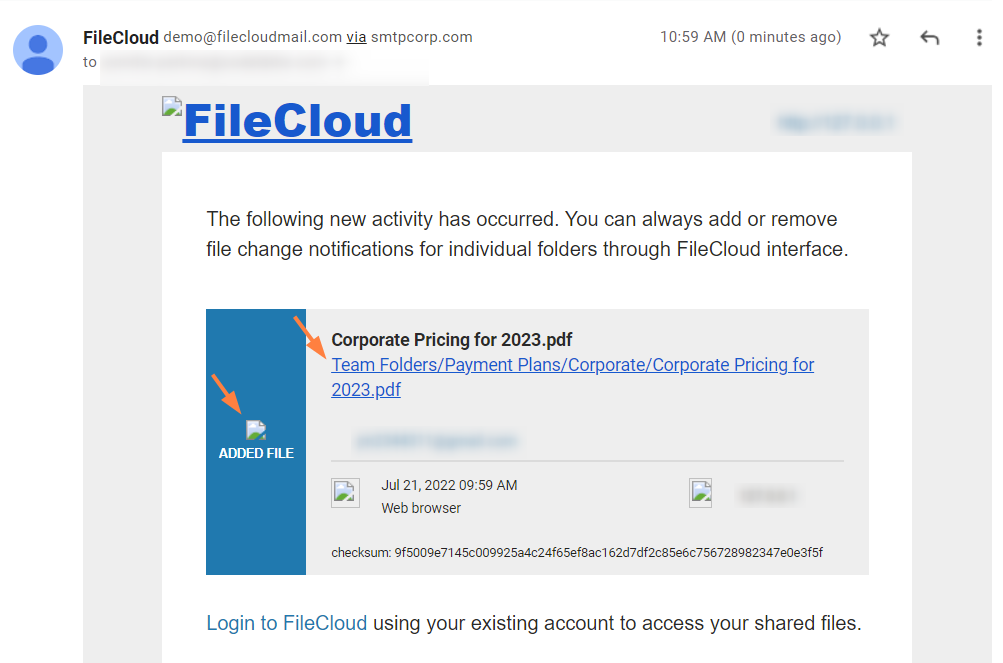
If content is added to the Corporate or Internet Only Team Folder, the sales rep who set up notifications for those folders receives an email similar to the following:
If content is modified in any of the other Team Folders, the sales rep does not receive notifications about them.