SIEM Integration with Splunk Enterprise
You can set up FileCloud’s SIEM Integration feature with your Splunk server to receive audit logs and send event alerts to the administrator’s email.
Splunk Server Configuration
To configure Splunk server to receive data inputs from FileCloud through a designated TCP port and a specified source type, create a TCP Data Input entry that specifies the port that receives messages from the FileCloud and create a custom source type for FileCloud..
- Log in to Splunk.
- Click Add Data.
- In the TCP row, click Add new.
An Add Data wizard opens. - In the Select Source screen, in Port, enter the port that will receive messages from FileCloud.
In Source name override, enter a name for the FileCloud server.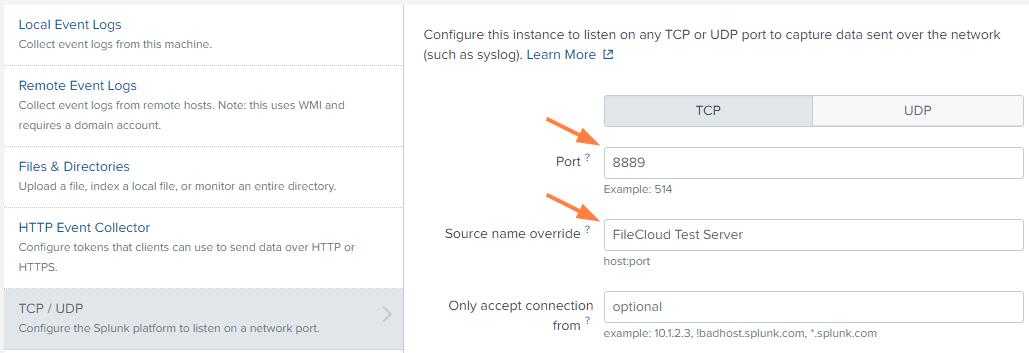
- Go to the next screen.
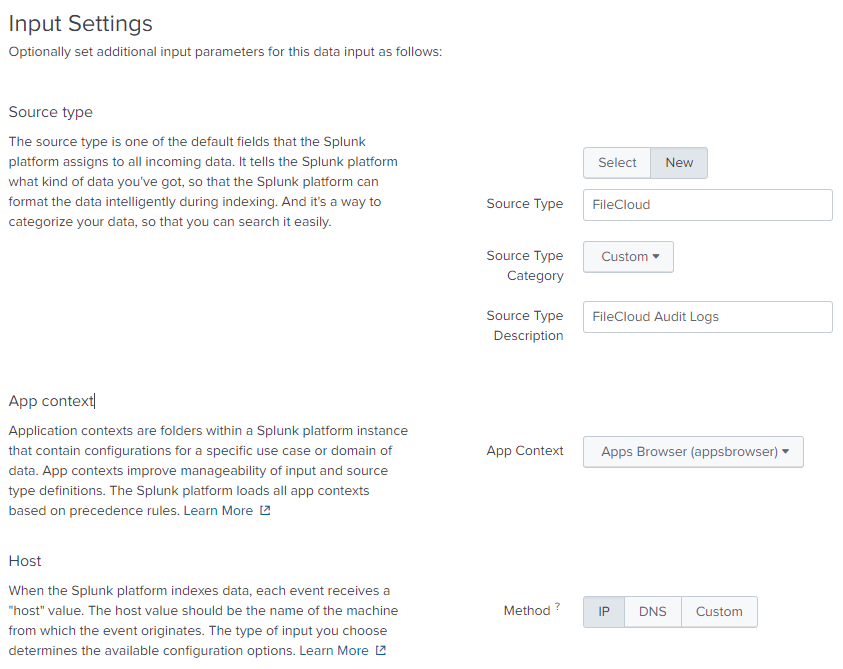
- In the Input Settings screen, enter the following settings:
- Click New.
- In Source Type,enter FileCloud.
- In Source Type Category, choose Custom.
- In Source Type Description, enter FileCloud Audit Logs.
- In App Context, choose Apps Browser (appsbrowser).
- For Host, choose one of the following:
- IP - Uses IP address of the host where the event originated.
- DNS - Uses Doman Name Services (DNS) to convert the IP address to a host name that events are tagged with.
- Custom - When you click this option, a Host field value field appears. This option uses the value you enter in Host field value to tag events.
- Set Index to Default.
- Go to the next screen in the wizard, Review, and check your settings.
- Click next to complete your TCP Data Input entry configuration.
Setting up FileCloud to connect to the Splunk Server
Once the TCP Data Input entry is configured in Splunk, configure the SIEM Integration settings in FileCloud.
- Go to the SIEM settings page.
- In the FileCloud admin portal's left navigation bar, scroll down and click Settings. Then, on the Settings navigation page, click Third Party Integrations
 .
. - In the inner navigation bar on the left of the Third Party Integrations page, expand the Third Party Integrations menu, and click SIEM, as shown below.
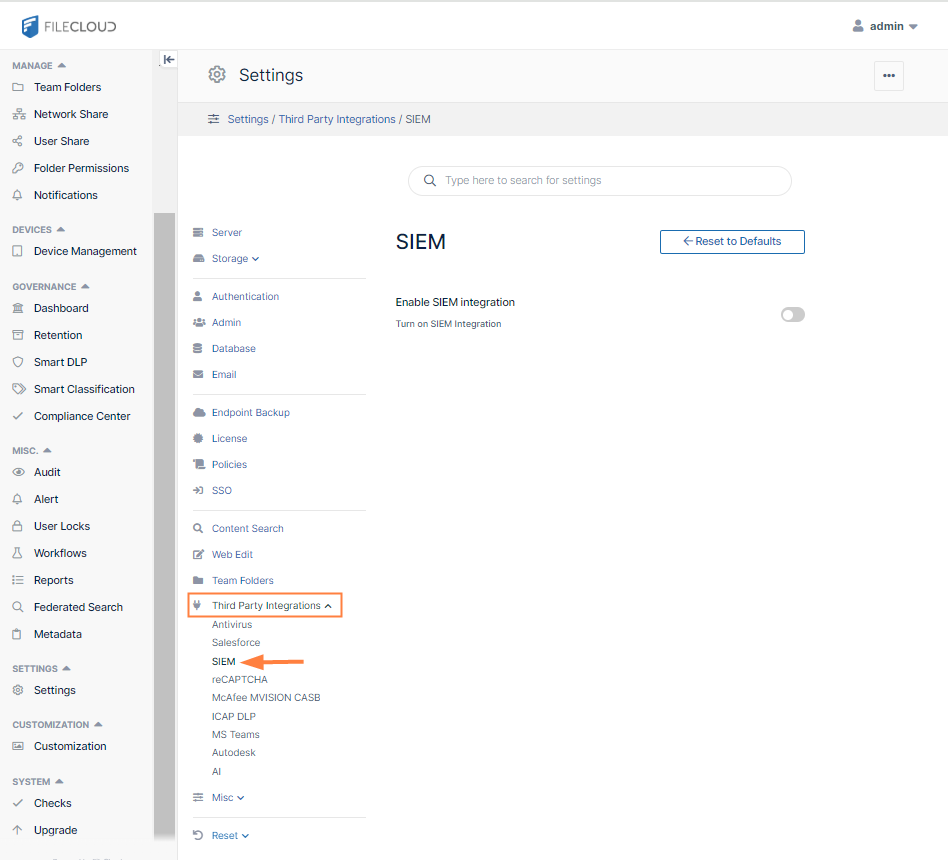
The SIEM settings page opens.
- In the FileCloud admin portal's left navigation bar, scroll down and click Settings. Then, on the Settings navigation page, click Third Party Integrations
- To activate SIEM integration, click the grayed out Enable SIEM integration button.
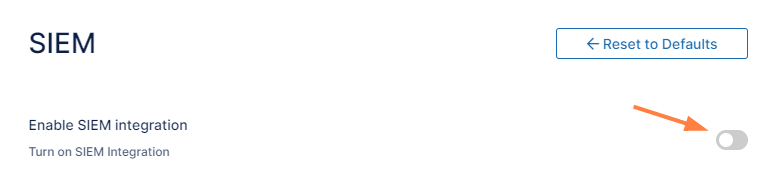
SIEM integration fields appear. - In SIEM Integration Method, choose TCP Receiver.
In SIEM Server Host, enter the IP address or the hostname of the Splunk server.
In SIEM Server Port, you may enter a unique port that is not currently used by the Splunk server for sending messages.
For the other settings, see SIEM Integration.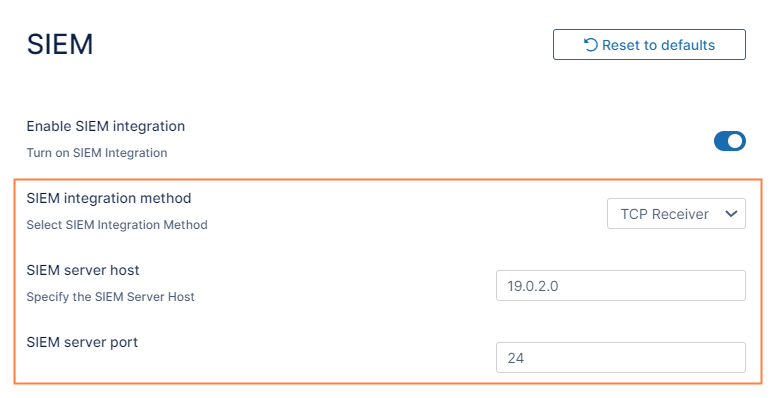
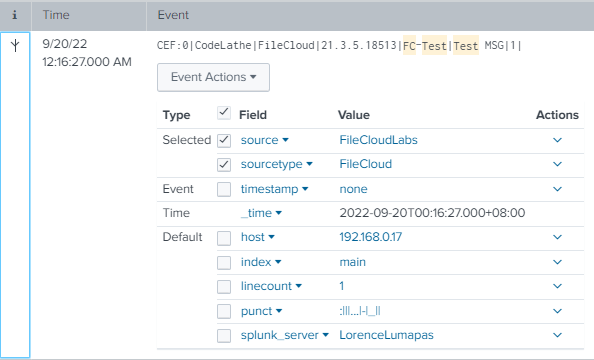
- Validate your configuration by clicking the Test Connection, Send Test Message, and Validate Mappings buttons. The Send Test Message button should send a test connection to the Splunk server, for example:
NOTE: Additional fields can be added by modifying the mappings from the auditmap.php and systemalertsmap.php files in FileCloud. See Managing SIEM Mappings for more information.
Setting up FileCloud event alerts in Splunk
- Run a search for the event type from the Splunk Search screen and confirm that you get the expected data from the results.
- In the upper-right corner, in the Save As drop-down list choose Alert:
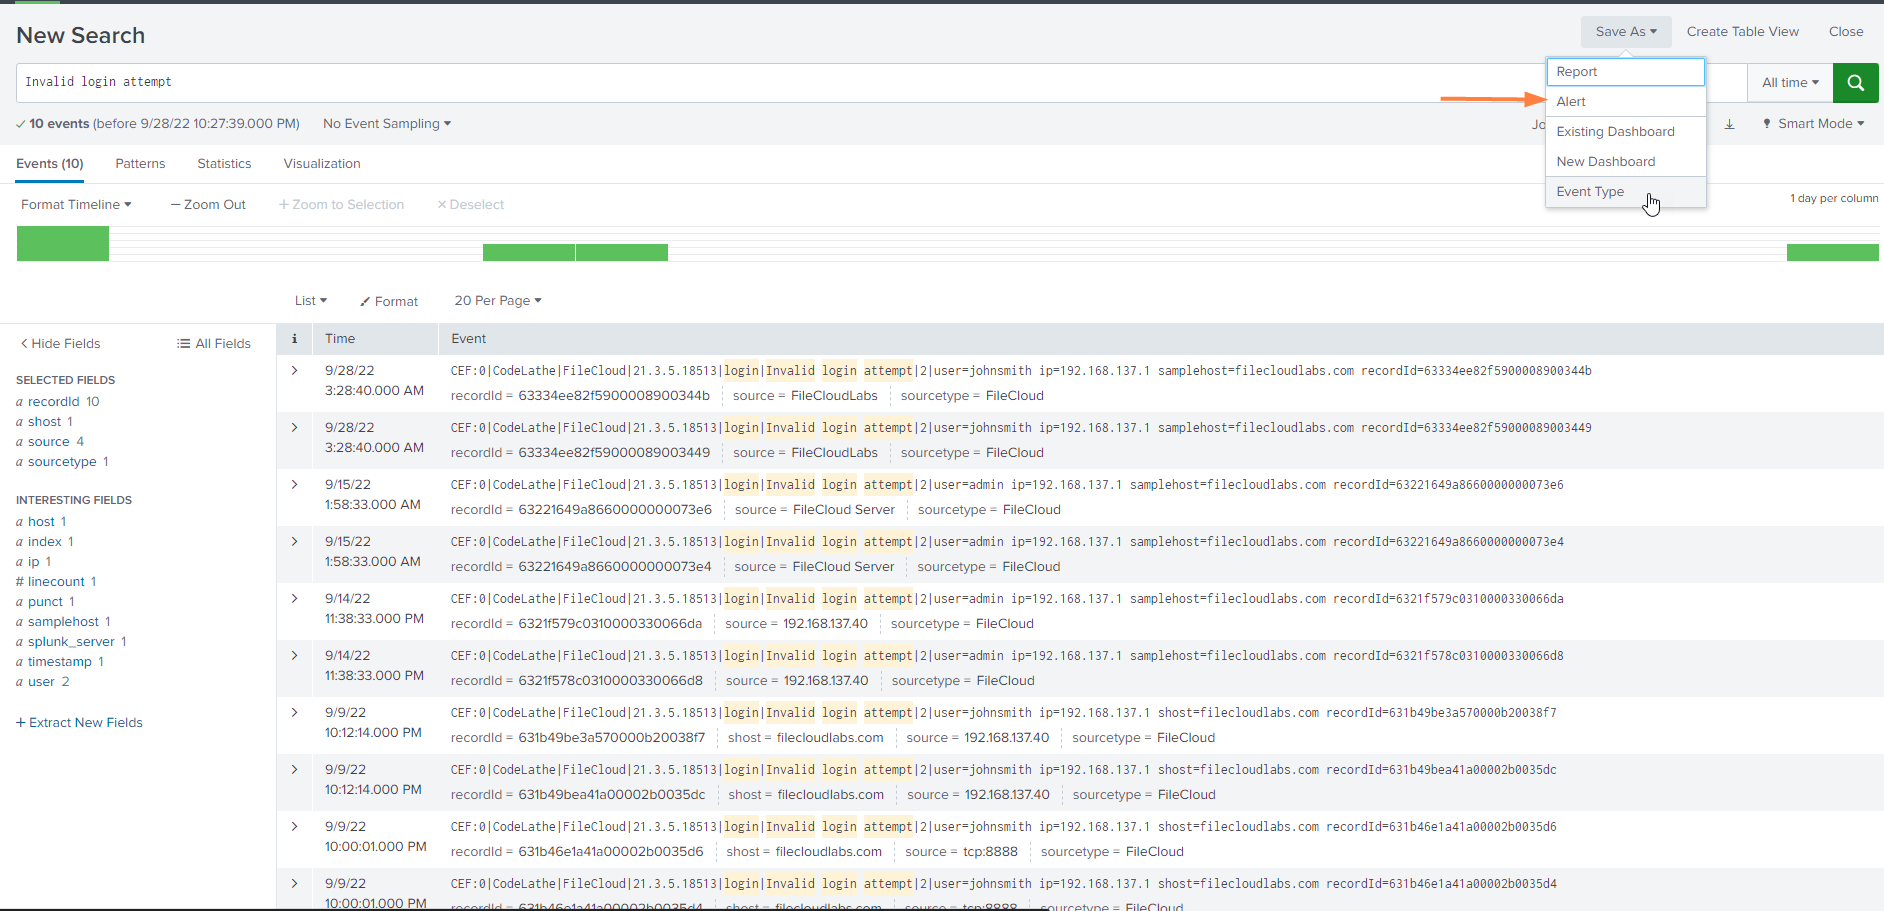
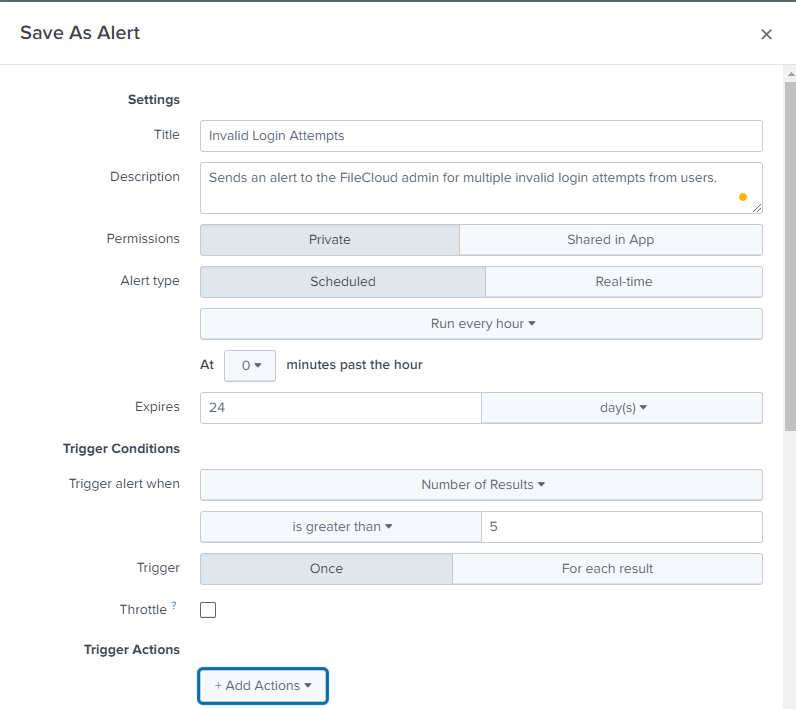
The Save As Alert dialog box opens. - Fill in the fields. Enter the following fields as indicated:
- Alert Type - Choose Scheduled to search for alert events on a schedule. Choose Real-time to trigger an alert when an alert event occurs.
If you choose Scheduled, also choose a frequency in the drop-list below it. - Trigger alert when - Choose Number of Results, and enter a number.
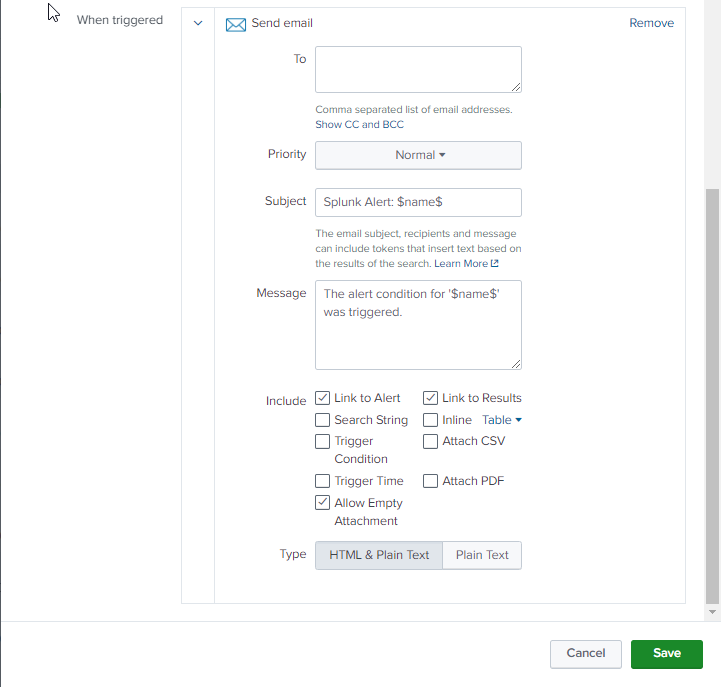
- In Trigger Actions, click Add Actions, and choose Send email as the action that is triggered by an alert.
- In To, enter the recipient of the email.
- Alert Type - Choose Scheduled to search for alert events on a schedule. Choose Real-time to trigger an alert when an alert event occurs.
- Click Save.
- Test to confirm that alerts are received by the mail in To, above. Below is an example of an email alert sent from Splunk.
