Sharing Files Privately in Sync
When you share a file privately, you share it only with existing FileCloud users or groups, but you can invite a new user to create a FileCloud account and then access the share.
Sharing files privately:
- Provides more security than sharing files publicly.
- Is useful when you only have a small number of people you want to share with.
- Requires the user to log in with a FileCloud account to access the file on the User Portal.
Users have the following permission options in private shares:
Permission | Description |
|---|---|
| Read permitted | Read permission allows users to view, browse and download files. Removing read permission removes the user from the share completely. |
| Download permitted | Download permission allows the user to download and save the file. |
| Share permitted | Share permission allows the user to share your file with other users. |
To share files privately in Sync
The procedure for sharing a file privately from the Sync folder in content explorer is nearly identical to the procedure for sharing a file privately from the user portal, Only the first few steps for selecting the file and choosing to share it are different.
Initial steps for sharing a file from Sync:
- In your system tray, right-click on the Sync icon and choose Open.
- At the bottom of the the mini-dashboard, click the folder icon.
Your Sync folder in file explorer opens.
- Navigate to the file or folder you want to share, then right-click on it and choose Show More Options. In the next menu choose FileCloud Sync > Share Link.
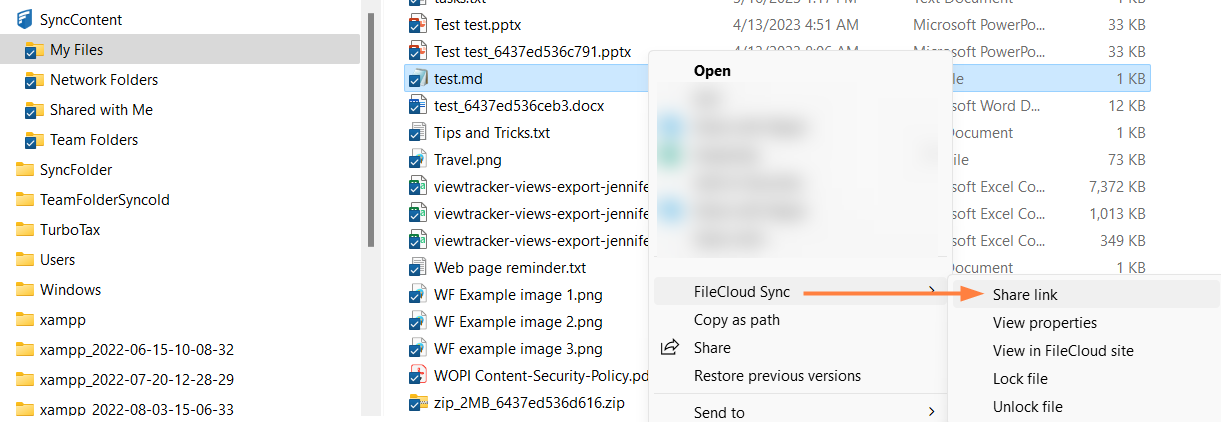
The Share link dialog box opens. By default, the file is shared privately. - Go to Sharing Files Privately and continue from Step 2.