Using Variables in Workflows


You can make your workflows more robust by adding variables to them, for example, to:

  • Insert a new file into a folder named with the current date.
  • Send an email to a reviewer with the name and path of a file that requires review.
  • Send an email with the share name and share owner to an auditor when a share is approved.

You can either create custom variables or use file, user, or system metadata as variables (for example, file size, file creator username, and current date). 

Adding a variable to a parameter value

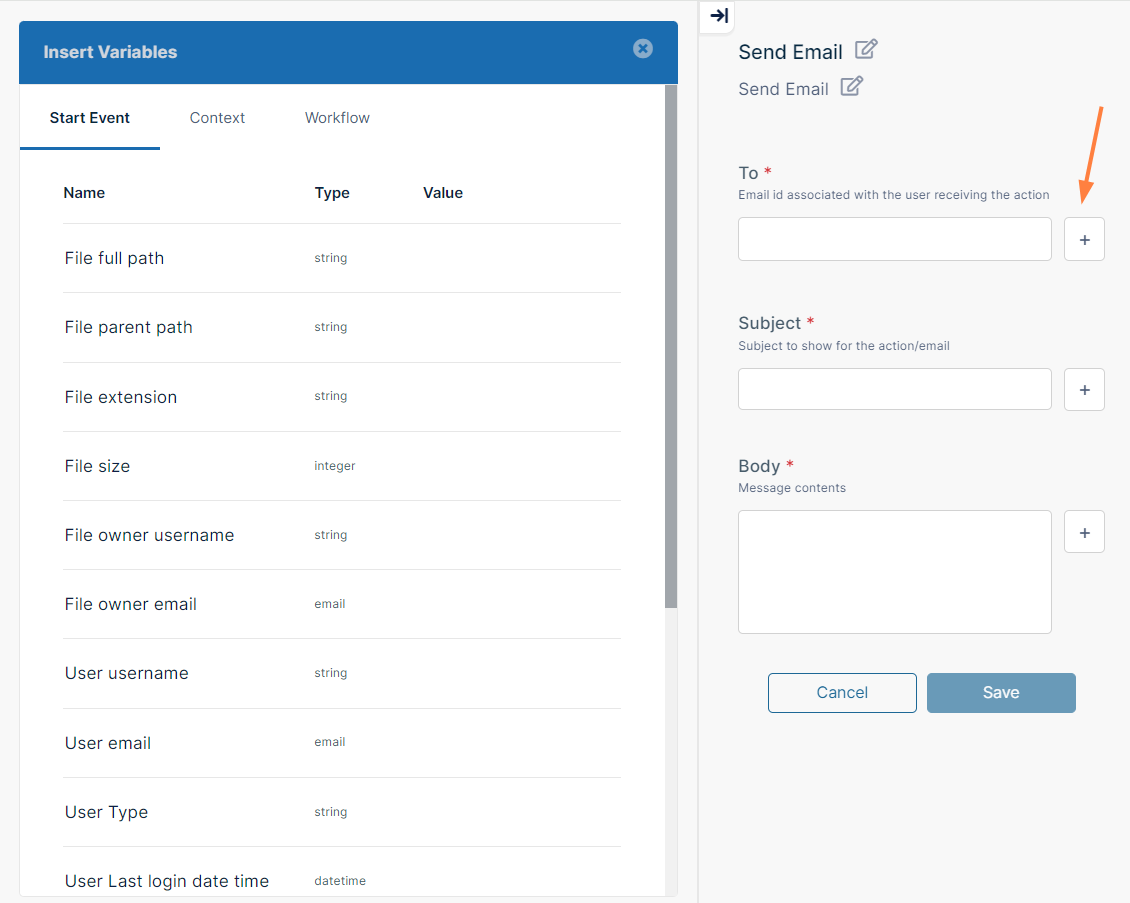
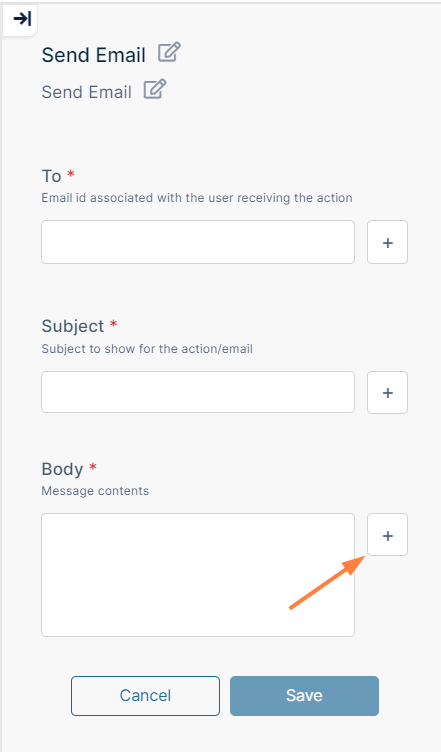
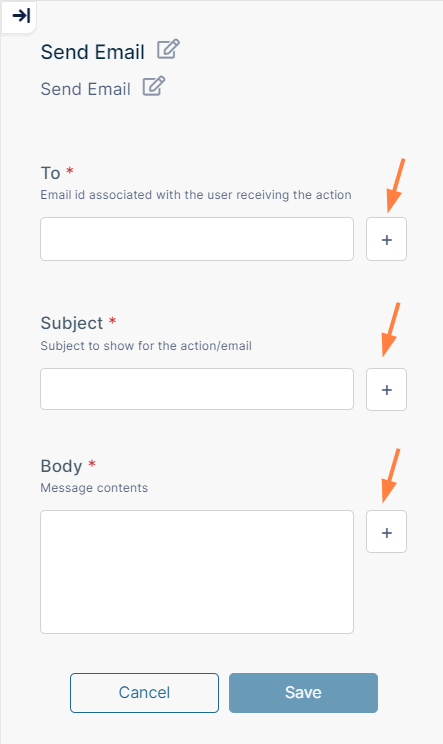
If you can include a variable as the value of a workflow parameter, the field appears with a + button next to it:

  1. Next to the field, click the + button.
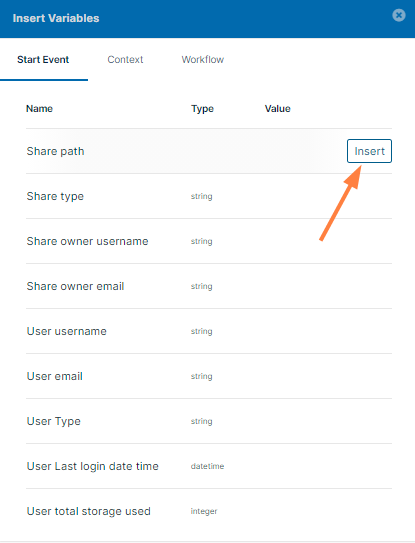
    The Insert Variables dialog box opens next to the parameters panel. By default, the Start Event tab is selected.
  2. Choose the tab containing the variable you want to add.
    • Variables on the Start event tab use values taken from the file triggering the workflow event, the user who created the workflow, and the user who triggered the workflow. 
      Note: User is the user who created the workflow; Start user is the user who triggered the workflow.
    • Variables on the Context tab use values taken from the system's current date and time and the workflow name. They also enable use of randomly generated numbers as variables.
    • Variables on the Workflow tab are custom variables created by you. For more information, See Creating and using custom variables, below.
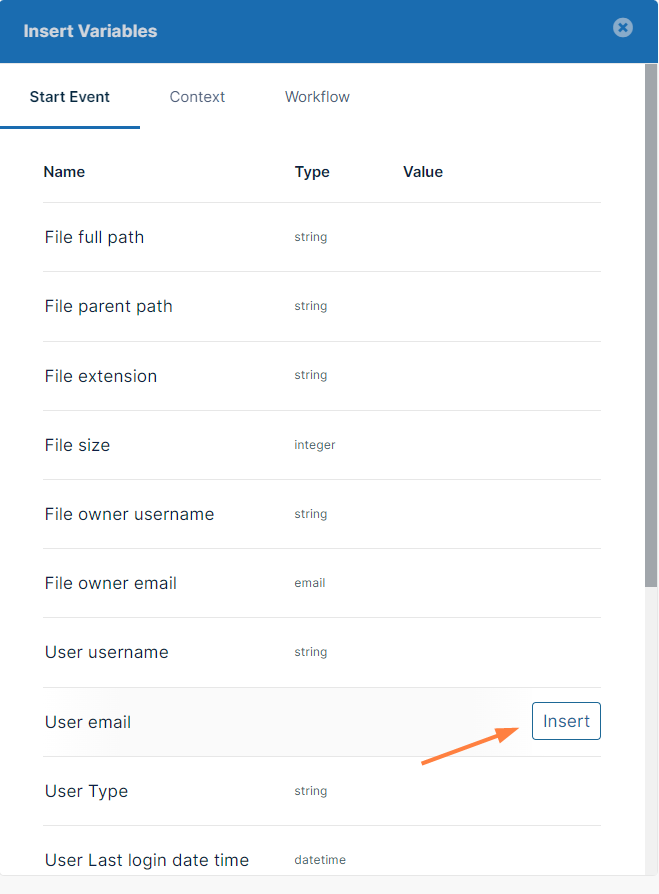
  1. Hover over the variable you want to add.
    An Insert button appears in its row.
  2. Click the Insert button.
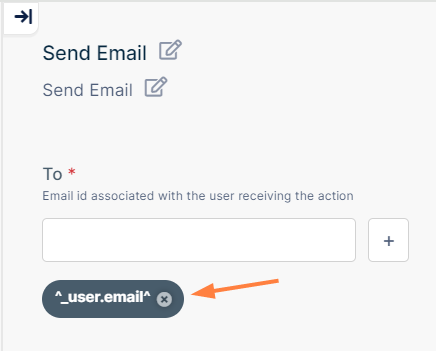
    The variable is added to the field:

    Note: you may add multiple variables to a field, or a combination of user-entered values and variables.


Creating and using custom variables

Custom variables are defined and given values in your workflow and are only available in that workflow.

  1. After you add a step to a workflow, click the + button next to a parameter.

    The Insert Variables dialog box opens.
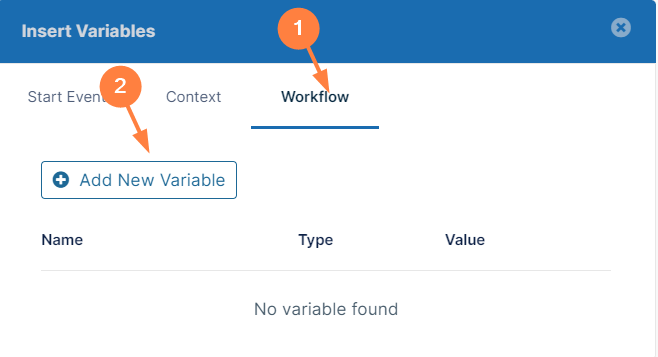
  2. Click the Workflow tab.
  3. Then click Add new variable.
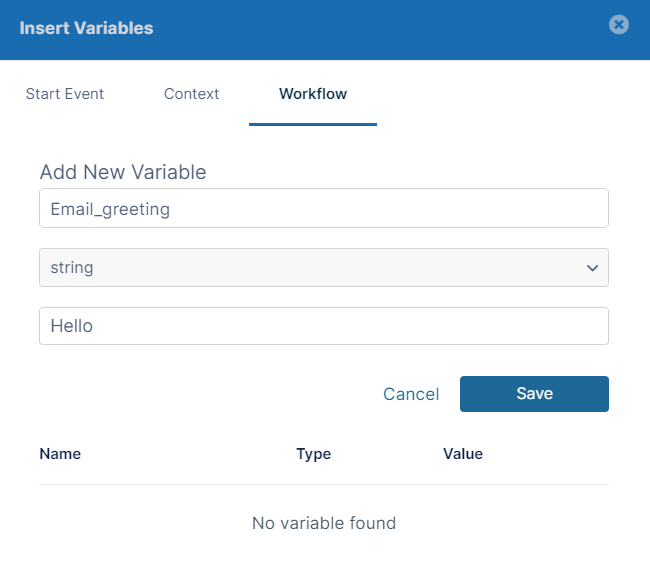
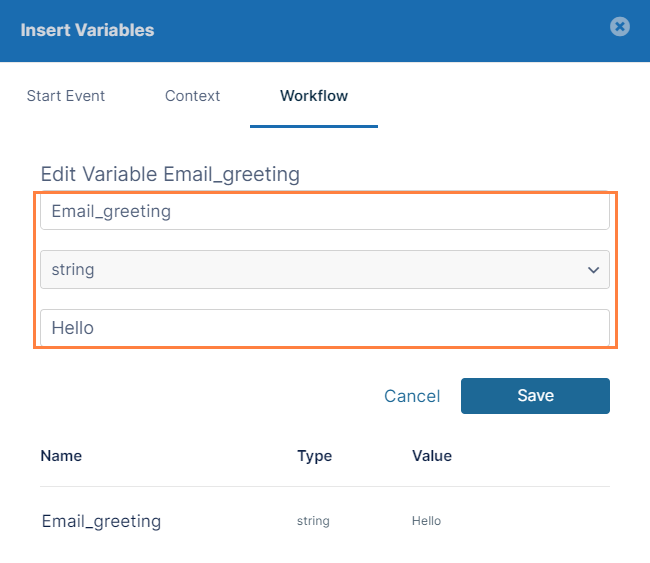
  4. Enter values into the new variable fields, then click Save.
    Note: Spaces are not allowed in the variable name.
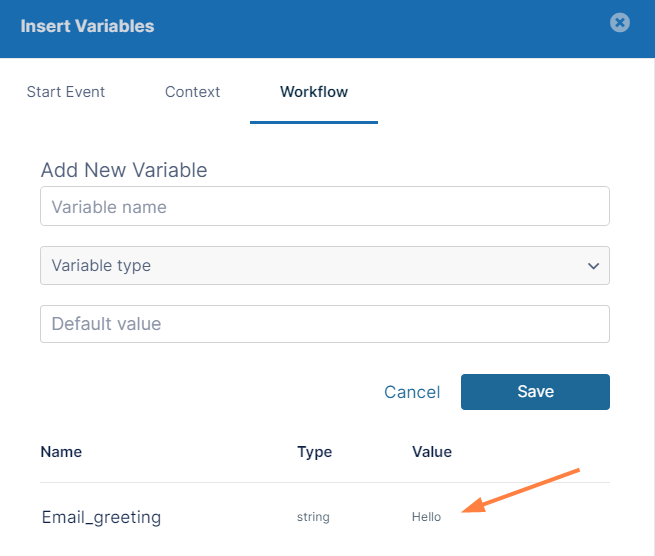
  5. The variable is saved and listed at the bottom of the dialog box.
  6. Add additional custom variables or close the dialog box.
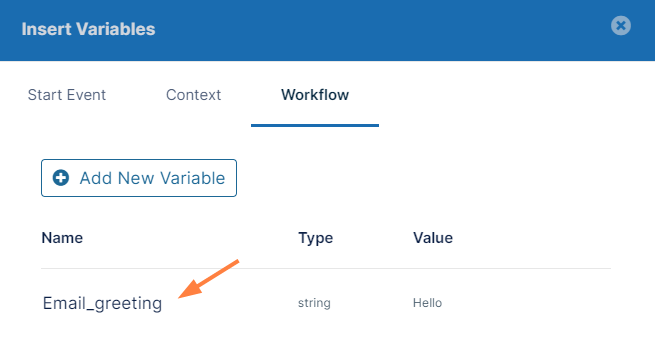
    Now, when you click the + button next to a parameter and the Insert Variables dialog box opens, if you click the Workflow tab, the new variable is available for you to insert:

Before you can use a custom variable in a workflow parameter, you must give it a value within the workflow. 

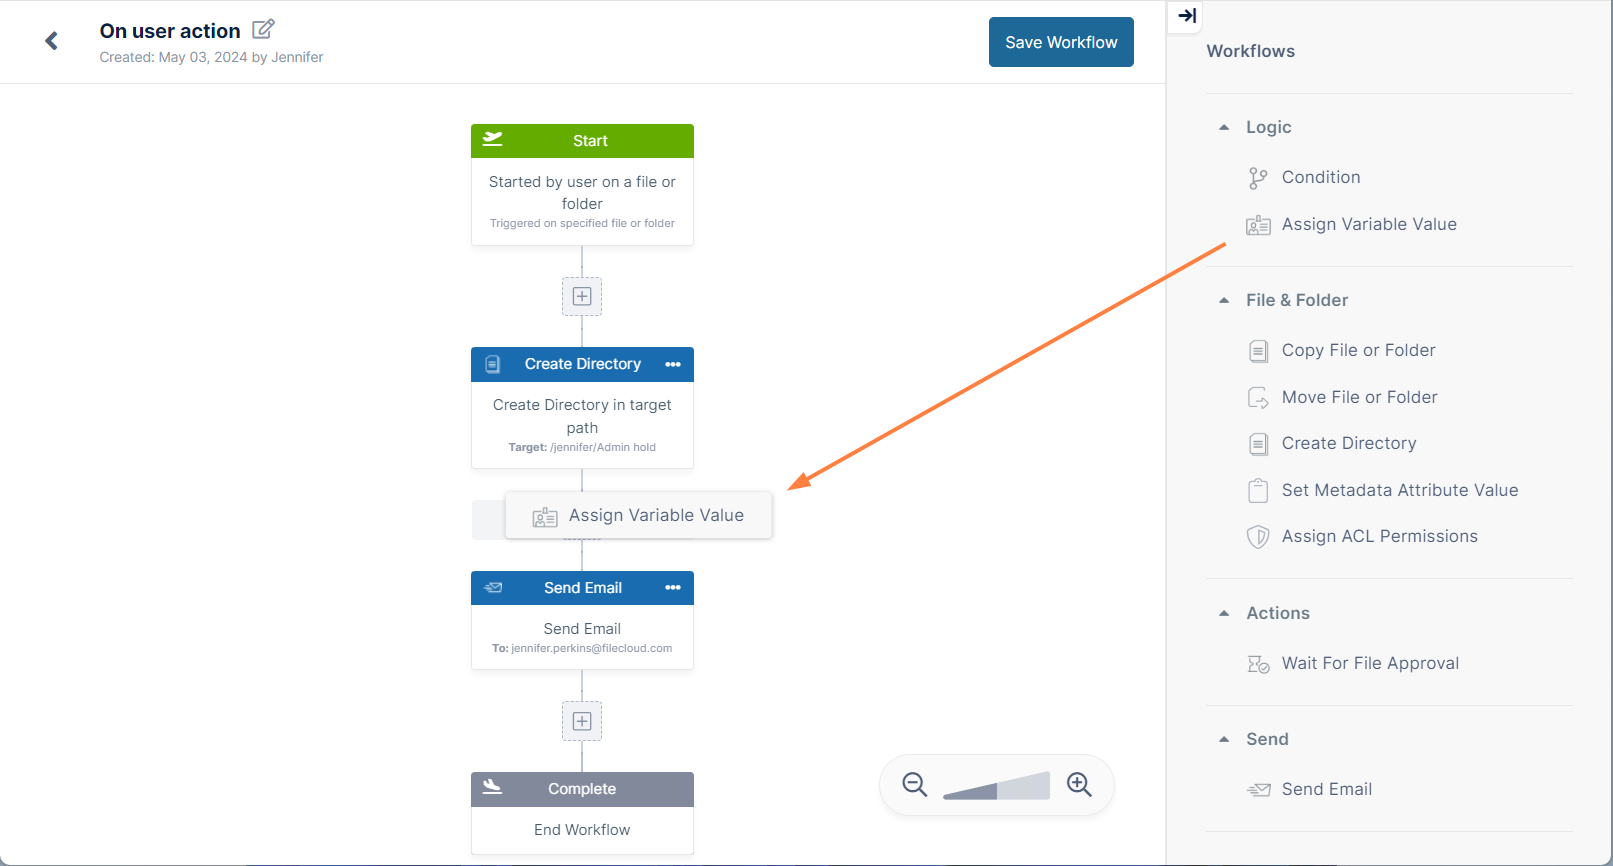
  1. Drag and drop an Assign Variable Value node onto the workflow before the step that uses the custom variable.

    The right panel displays the parameters for the variable.
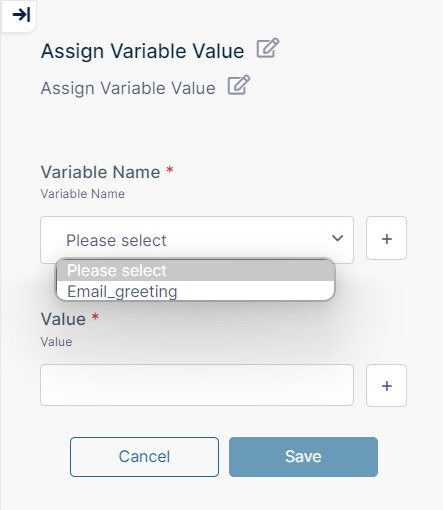
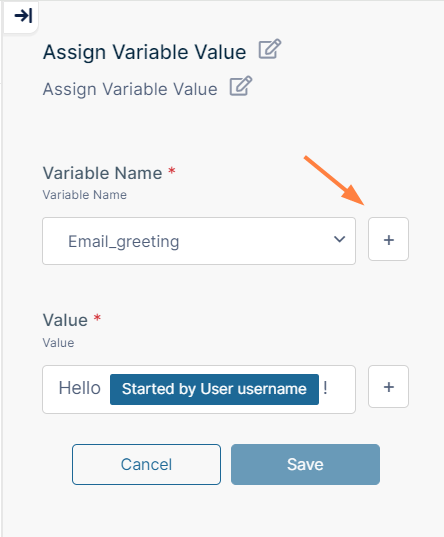
  2. Click the down arrow in Variable Name.
    All of the variables that you have defined appear.
  3. Select the variable that you want to assign a value to.
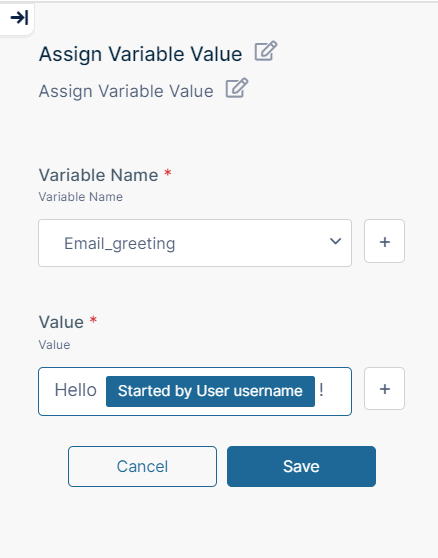
  4. In Value either type in a value or click + and enter another variable as the value, or use a combination of both, as in the following screenshot.
  5. Click Save.
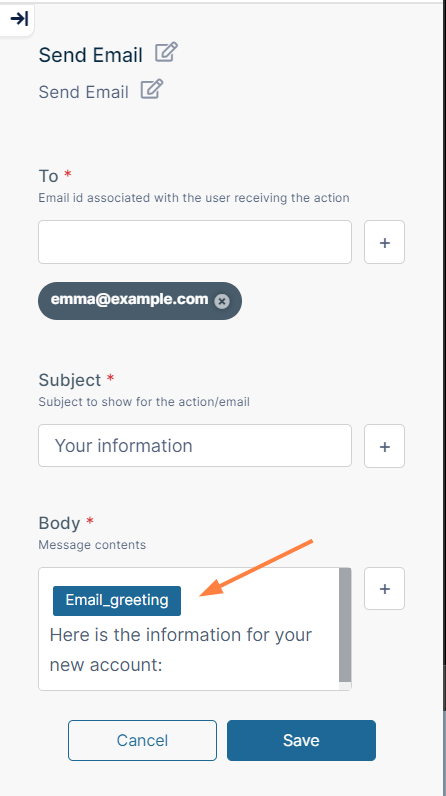
  6. Now insert the variable into other parameters in the workflow by clicking + and selecting it from the Insert Variables dialog box, as you would with a system variable.

To edit a custom variable:

  1. In the workflow, click + next to any parameter in any node.
  2. If the Workflow tab is not already selected, click it.
  3. Hover over the row for the variable and click the Edit icon.

    The fields for the variable open.
  4. Make any changes to the values in the fields.
  5. Click Save.
    The variable only applies to this workflow, and therefore, is only changed in this workflow. If a variable with the same name exists in another workflow, it is not modified.

To delete a custom variable:

  1. In the workflow, click + next to any parameter in any node.
  2. If the Workflow tab is not already selected, click it.
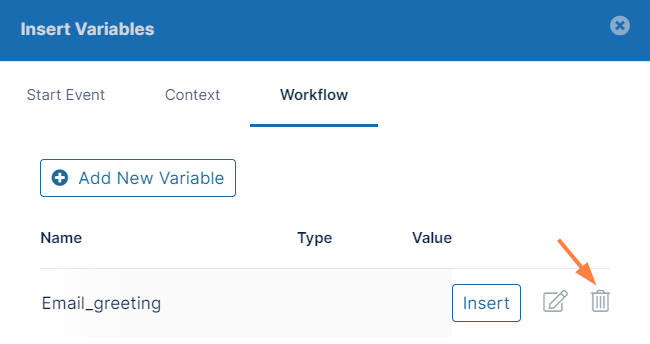
  3. Hover over the row for the variable and click the Delete icon.
  4. Click Save.
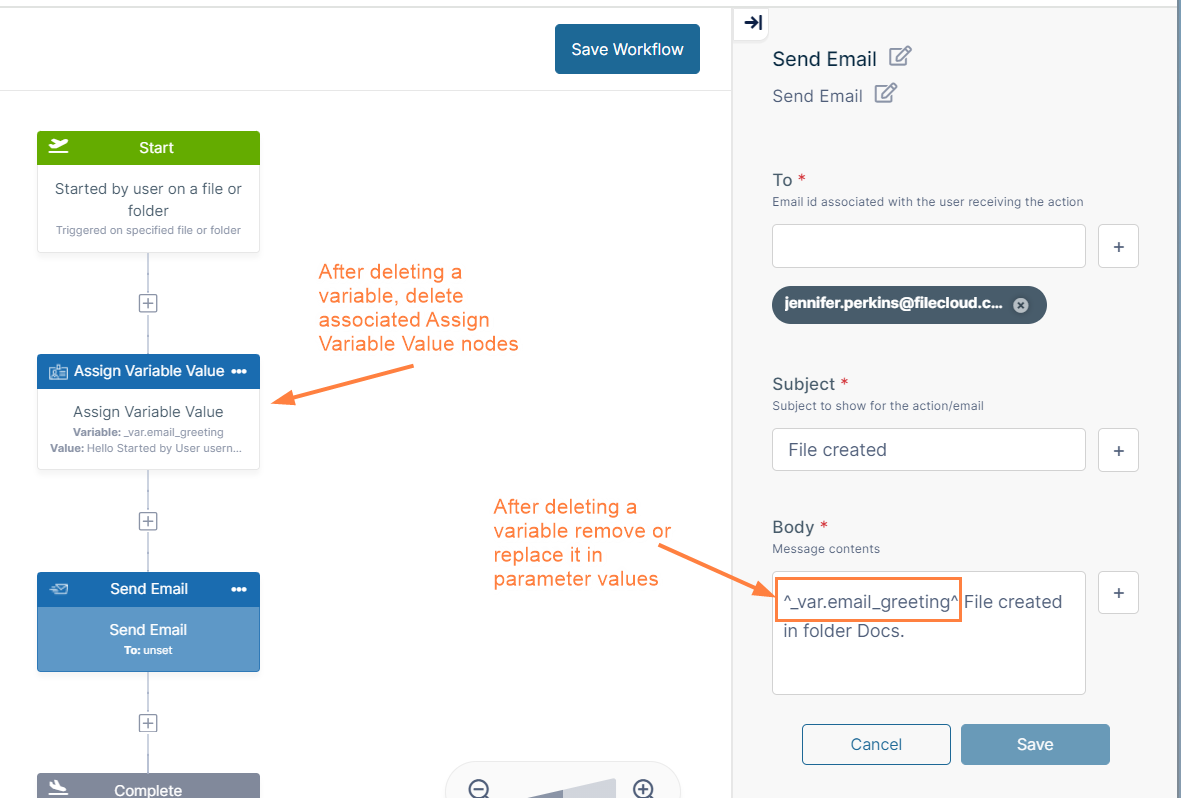
  5. In the workflow, remove any Assign Variable Value that references it, and also remove or replace it in parameter values. (It will now appear in parameters not as a tag but as ^_var.[variable name]^.)

    The variable only applies to this workflow, and therefore, is only deleted from this workflow. If a variable with the same name exists in another workflow, it is not deleted.

Examples

The following procedures show you how to set up some of the scenarios described at the top of this screen, but these are only a starting point.  Use variables to add any functionality and information to your workflows that is useful to you.
Here, we'll show you how to make it easy to find files created on certain dates by storing them in folders named with the create date. This could be useful, for example, if you want to keep track of when certain files were uploaded to a team folder.

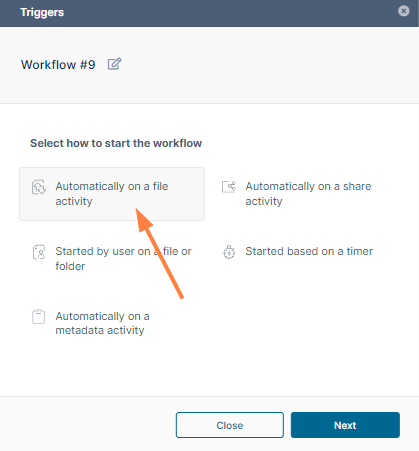
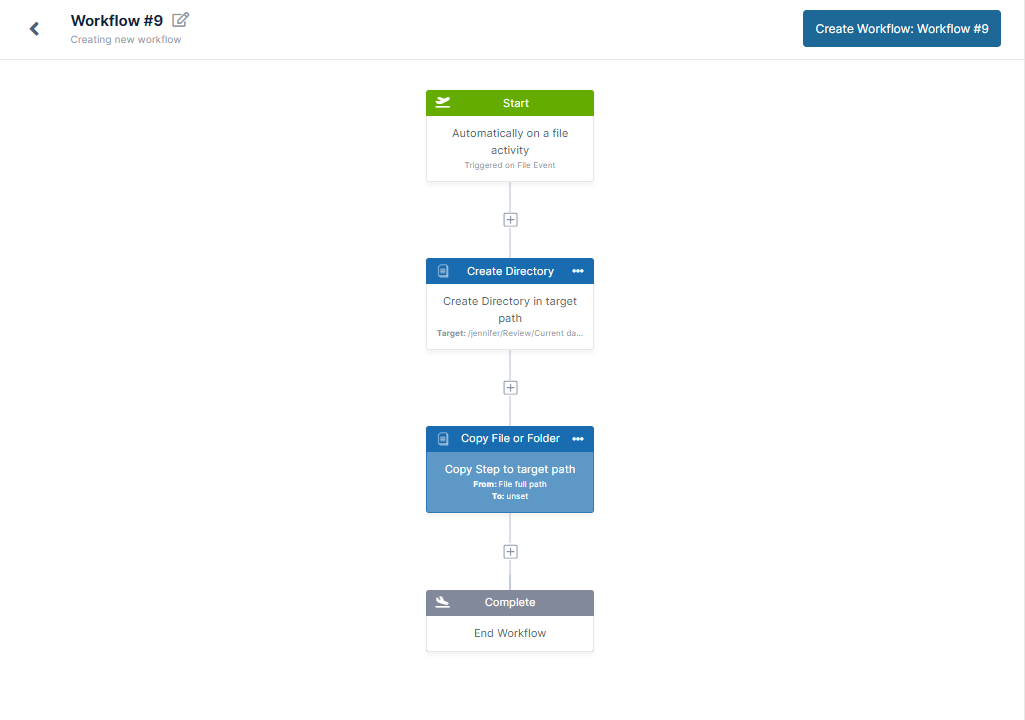
  1. Initiate the workflow by choosing the trigger Automatically on a file activity.
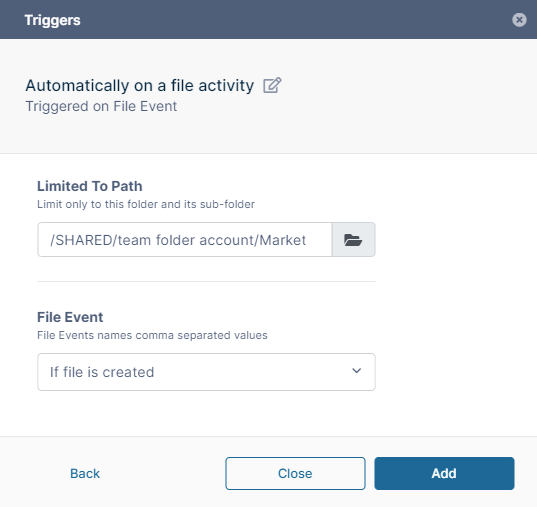
  2. In Limited to Path, choose the folder path where the files are uploaded or created and in File Event, select If a file is created, and click Add.

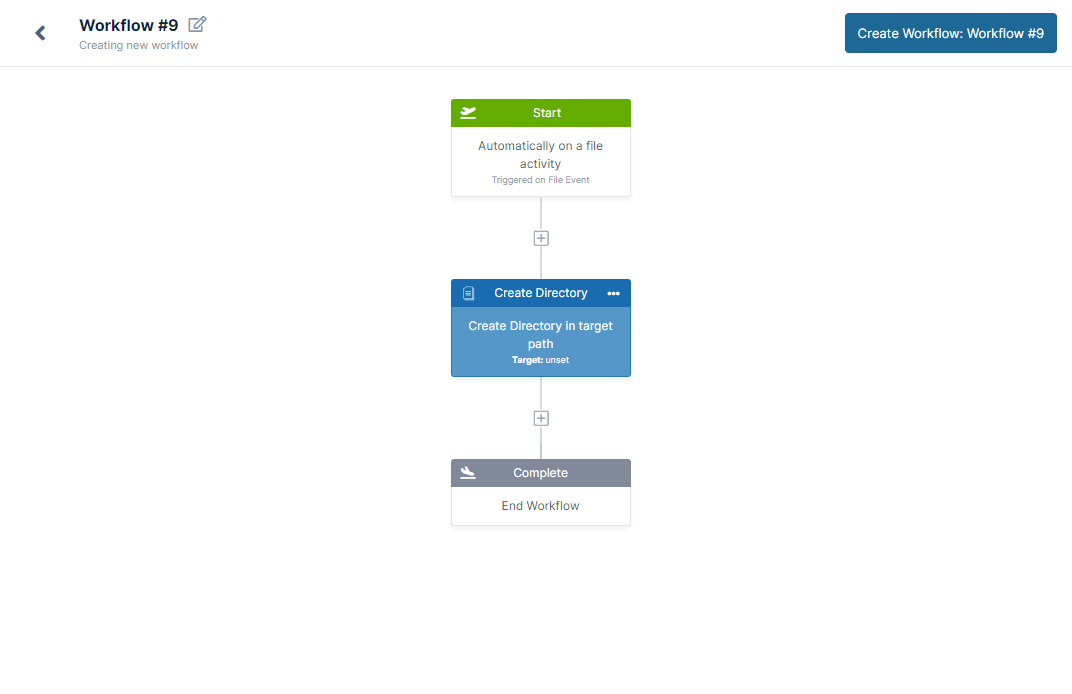
  3. Drag and drop a Create Directory step onto the workflow.
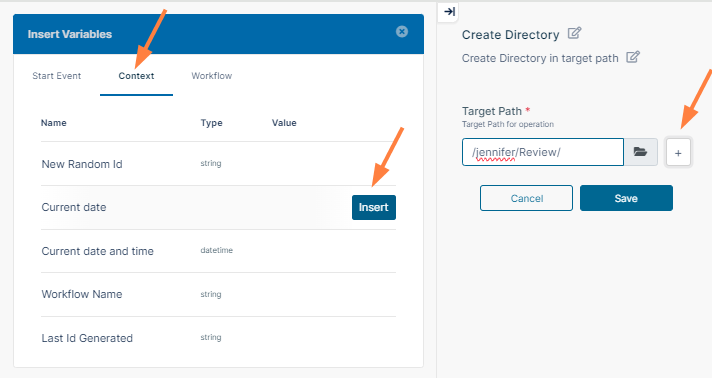
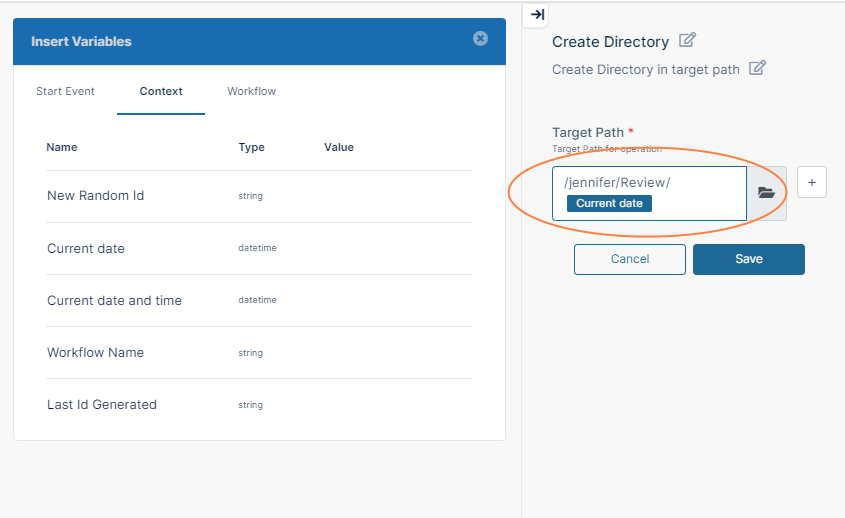
  4. Set the Target Path to the parent path where you want the file to be copied, and then add "/", and then click +.
    The Insert Variables box opens. 
  5. Click the Context tab, then hover over Current date and click Insert.

    Current date is inserted after the parent path.
  6. Click Save to save your Target Path.
  7. Drag and drop a Copy File step onto the workflow after the Create Directory step.

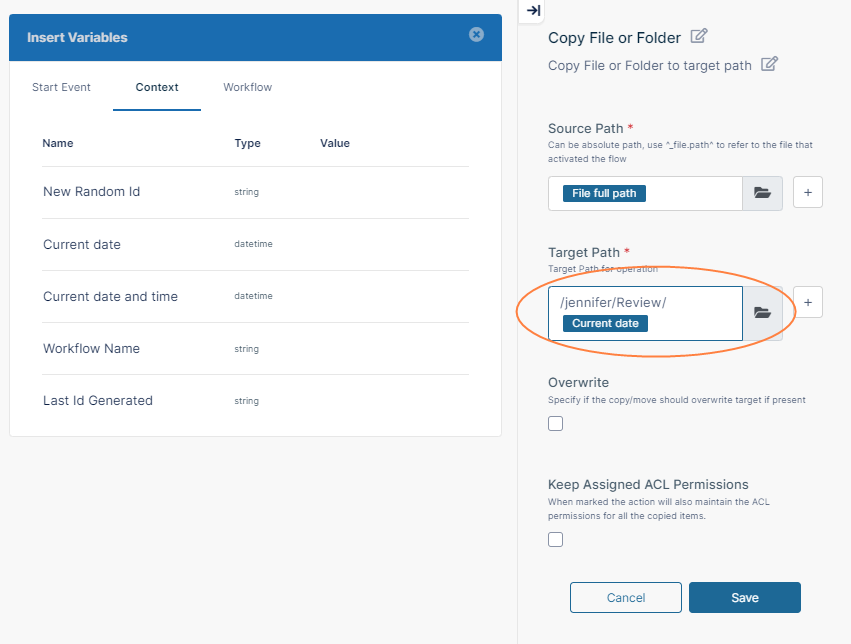
    In Source Path, File full path is automatically entered. It is equal to the path entered in the Workflow trigger.
  8. Set Target Path to the exact value that you used for Target Path in the Create Directory step (choose the parent target path and add "/", then click + and insert the Current date variable.
  9. Click Save to save your parameters.
  10. Give your workflow a name, and click Save Workflow.

Let's see how this works when we upload a file into the source path. In the following video, we add the file About FileCloud to our Marketing team folder. We can see that the workflow functioned correctly - it added a folder named with the date to the My Files/Review folder and copied the About FileCloud folder into it. 

In this example, after a share has been approved, we'll have a workflow send an auditor a notification that includes the name of the share and the share creator.

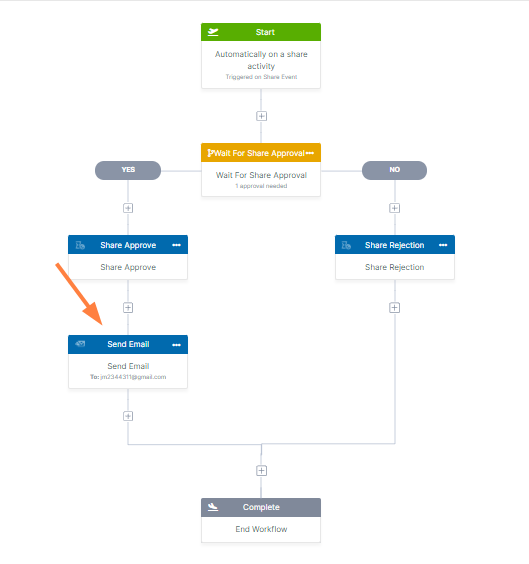
  1. Create a Share Approval workflow.
  2. Edit the workflow, and add a Send Email step after the Share Approve step.
  3. In To, enter the email address of the auditor.
  4. In Subject, enter a descriptive subject, such as Information has been shared.
  5. In Body, enter The share, and click +.
    The Insert Variables dialog box opens.
  6. In the Start Event tab, hover over Share path, and click Insert.

    The variable Share path is inserted into Body.
  7. After Share path, type has been shared by, then click + again.
  8. In the Start Event tab of the Insert Variables dialog box, hover over Share owner username, and click Insert.
    The Body of the message is complete. 
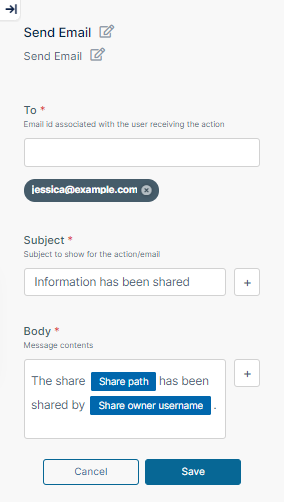
    The parameters for the Send Email node appear as:


  9. Click Save under Body.
  10. Give your workflow a name, and click Save Workflow.

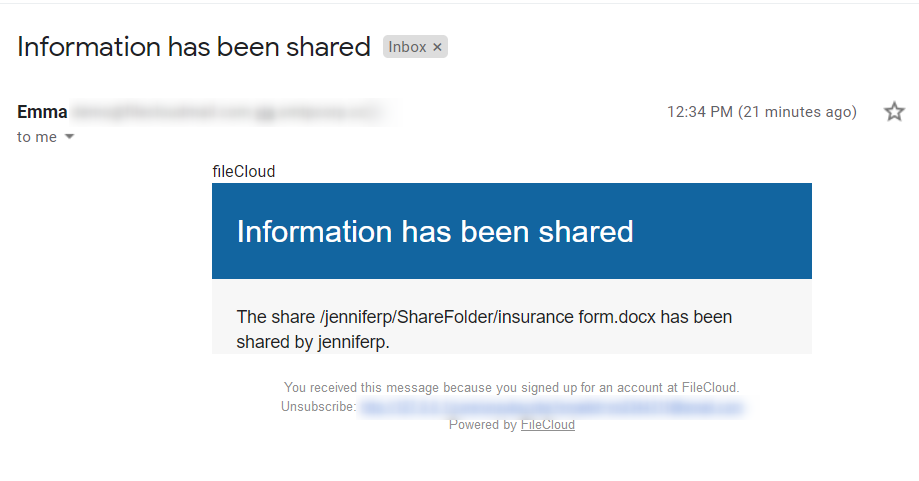
When an approver approves a share, the following email is sent to the auditor in the To address. It includes the share path including the filename and the share owner.