Upgrade Notes for FileCloud 23.232 or Later
Backwards Compatibility Notes
You cannot upgrade Windows and Linux using the Admin Portal.
Beginning with Version 21.1, the files to download when upgrading with the Windows Update Tool have changed. The new files are listed below under Upgrade for Windows and with the full upgrade procedure in the documentation page Upgrade using Update Tool (Windows Only).
Upgrading
As always, make a full backup of your existing installation before upgrading.
If your installation of FileCloud uses admin portal user access restrictions, please see Restricting Access To Admin UI Based On IP Addresses for updated instructions.
Upgrade instructions for Windows
For all upgrades, once upgrade is complete, refresh the browser using CTRL-F5 to clear any prior setup information from the cache.
You can use the Windows Upgrade tool to do a full upgrade.
Beginning with FileCloud 21.1, there are new files to download which are listed in the updated steps 1-3 of the upgrade procedure, below.
Download the FileCloud Windows Update Tool from https://patch.codelathe.com/tonidocloud/live/installer/cloudupdatetool.zip
Extract all files from cloudupdatetool.zip into a folder.
- Download the following files and copy them to the extracted folder (the cloudupdatetool folder)
- FileCloud Windows Preupgrade Package from https://patch.codelathe.com/tonidocloud/live/installer/filecloudpreupgrade.zip
- FileCloud Windows Preupgrade XML - Right-click and save the file https://patch.codelathe.com/tonidocloud/live/installer/filecloudpreupgrade.xml
- FileCloud Windows Update Package from https://patch.codelathe.com/tonidocloud/live/installer/filecloudupdate.zip
- FileCloud Windows Update XML - Right-click and save the file https://patch.codelathe.com/tonidocloud/live/installer/filecloudupdate.xml
Now, go to Upgrade using Update Tool (Windows Only) and proceed from Step 4.
Upgrading systems that use ServerLink
To upgrade systems running ServerLink, the following steps should be taken:
- Before upgrade, ensure all ServerLink nodes are fully synced and are at the same state.
- Make backups of all nodes as needed
- Upgrade the primary node first.
- Upgrade each secondary node after upgrading the primary node.
- Start up all nodes
FC Push Service Configuration
In FileCloud version 23.1, a Push service was added to allow clients (in particular, FileCloud Desktop) to receive server-initiated notifications (for example, file upload, share). Upgrading to FileCloud 23.1 or higher on systems running with MongoDB replica set or standalone MongoDB require the push service env file to be updated based on the MongoDB configuration.
To configure the Push service in Linux:
Open and edit the .env file from path: /opt/fcpushservice/
vi /opt/fcpushservice/.env
Update the MongoDB connection string:
FCPS_DB_DSN=mongodb://dbuser:passw0rd1@dbserver01,dbserver02,dbserver03:27017
Restart the fcpushservice.
systemctl restart fcpushservice
- Open the file xampp\pushservice\.env for edit.
Update the MongoDB connection string to:
FCPS_DB_DSN=mongodb://dbuser:passw0rd1@ dbserver01, dbserver02, dbserver03:27017
Restart the Push service in the FileCloud control panel.
Upgrade environments using Solr and Solr+OCR
Windows
- Upgrade FileCloud
- Upgrade OpenJDK to version 11.
- Download Open JDK 11.02+9 from https://jdk.java.net/archive/.
- Create a new folder in the C: drive.
(In the example screenshot, jdk-11.0.2 is the name of the new folder.)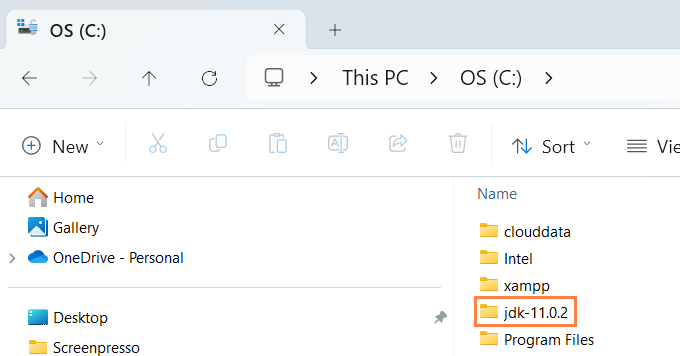
- Extract the Open JDK file you downloaded into the new folder.
- Set JAVA_HOME to the new version's path.
Setting the path and environment variables will differ depending on the version of Windows you have on your computer. These instructions were designed for Windows 11.
 Administrator privileges are required to modify the path and environment variables.
To set the JAVA_Home path:
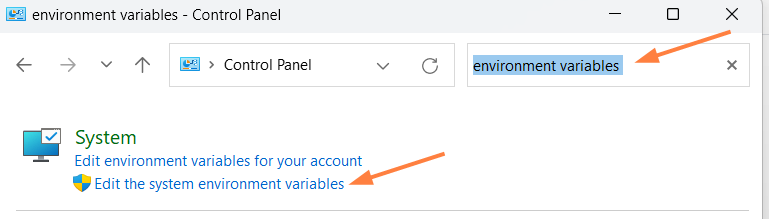
- Open the Windows Control Panel.
- Enter environment variables in the search bar.
- Click Edit the system environment variables.
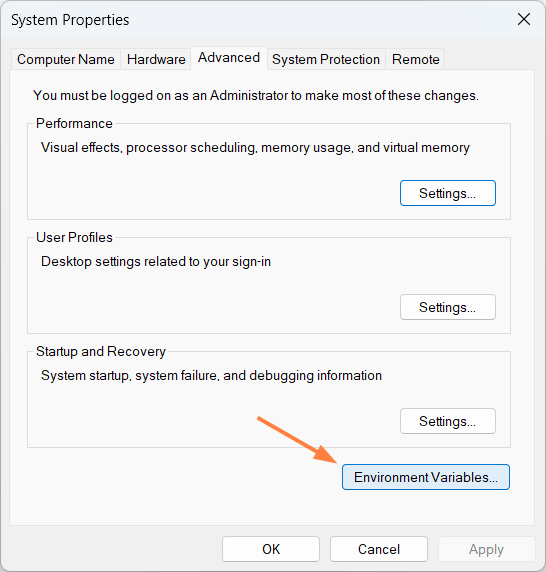
- In the System Properties dialog box, click Environment Variables.
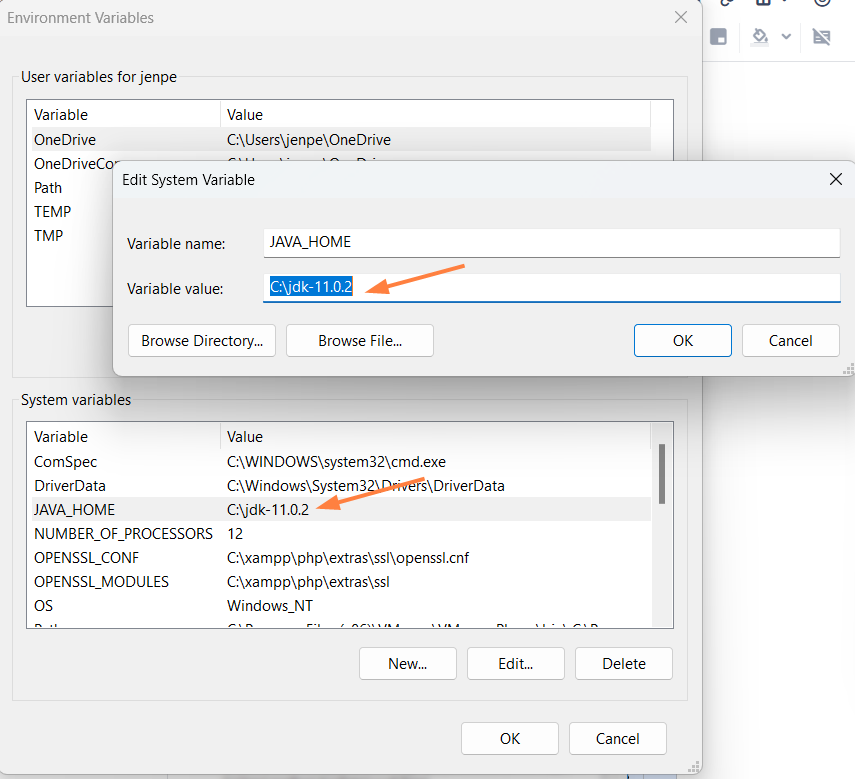
The Environment Variables dialog box opens. - In the System variables box, Click JAVA_HOME, and then click Edit.
The Edit System Variable dialog box opens. - Change Variable value to the address of the folder you created for jdk, and click OK.
- In the Environment Variables dialog box, click OK.
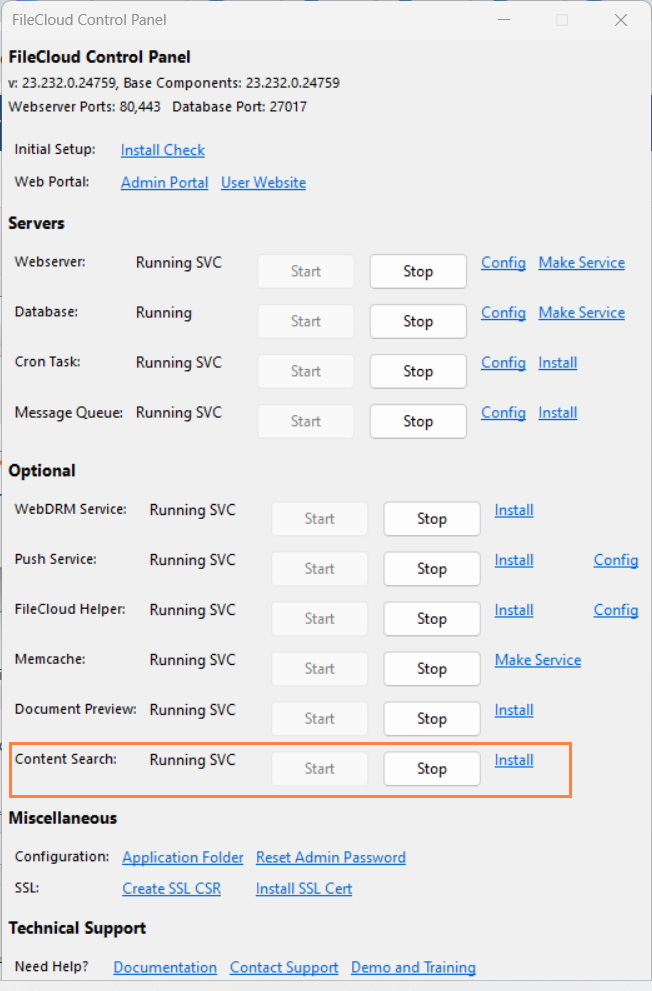
- Log in to the FileCloud admin portal.
- In the FileCloud Control Panel, and stop and restart Content Search.
Linux
- Upgrade FileCloud.
- Run:
filecloudcp --install-solr
- If OCR is enabled, run:
filecloudcp -t
- Log in to the FileCloud admin portal.
- Restart Solr.
systemctl restart solr
If your indexed Solr data was created using Solr version 7.x or older, a full re-index is required.