Enabling Solr OCR
Solr OCR is available for Enterprise users and users with OCR licenses beginning with FileCloud Version 20.3.
We recommend adding 4-8 CPUs to your system before enabling OCR indexing, which is resource-intensive.
When you enable OCR:
- FileCloud's content search engine searches image files and PDF files for your search string.
- FileCloud's content classification engine (CCE) scans image files and PDFs for pattern-matching text.
Install and enable Solr OCR on Windows
Follow these instructions on Windows when performing a fresh installation of FileCloud or when performing an upgrade to the OCR component license.
- Upgrade to FileCloud 20.3 or higher.
- Open cloudconfig.php at XAMPP DIRECTORY/htdocs/config/cloudconfig.php
Add the following:
define("TESSERACTOCR_BIN_DIR", "C:\\xampp\\tesseractocr");
define("TESSERACTOCR_TESSDATA_DIR", "C:\\xampp\\tesseractocr\\tessdata");
Note:
TESSERACTOCR_BIN_DIR is the path to the TesseractOCR installation directory which contains the tesseract binary. In windows, this is typically at C:\xampp\tesseractocr\
TESSERACTOCR_TESSDATA_DIR is the path to the TesseractOCR training data. In windows, this is typically at C:\xampp\tesseractocr\tessdataIn the FileCloud admin portal's left navigation bar, scroll down and click Settings. Then, on the Settings navigation page, click Content Search
 .
.
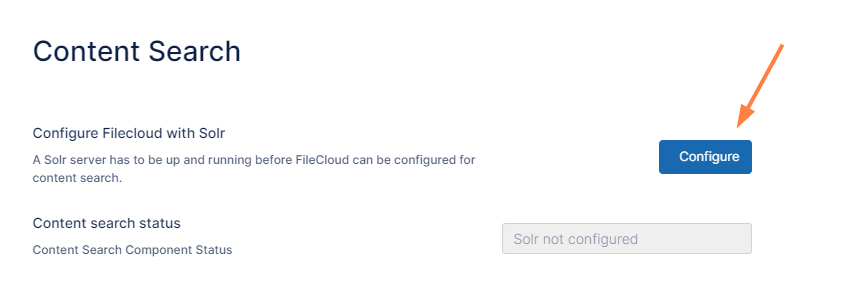
The Content Search settings page opens.If you are performing an upgrade, click Reset.
If you are performing a fresh installation, click Configure.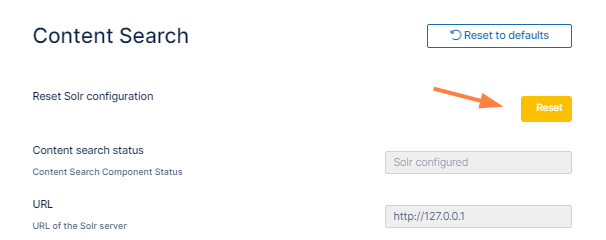
Beside Enable Solr OCR, click the Enable button.

A confirmation box warns you that enabling OCR will require you to restart Solr.
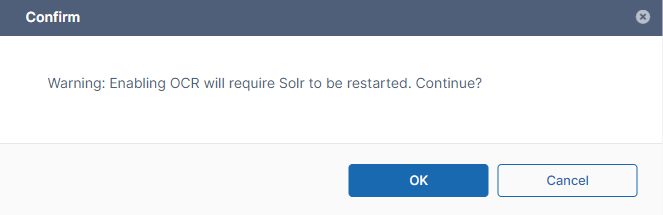
Click OK.
A notification confirms that OCR is enabled.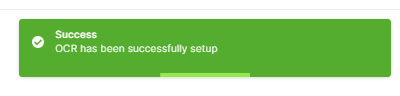
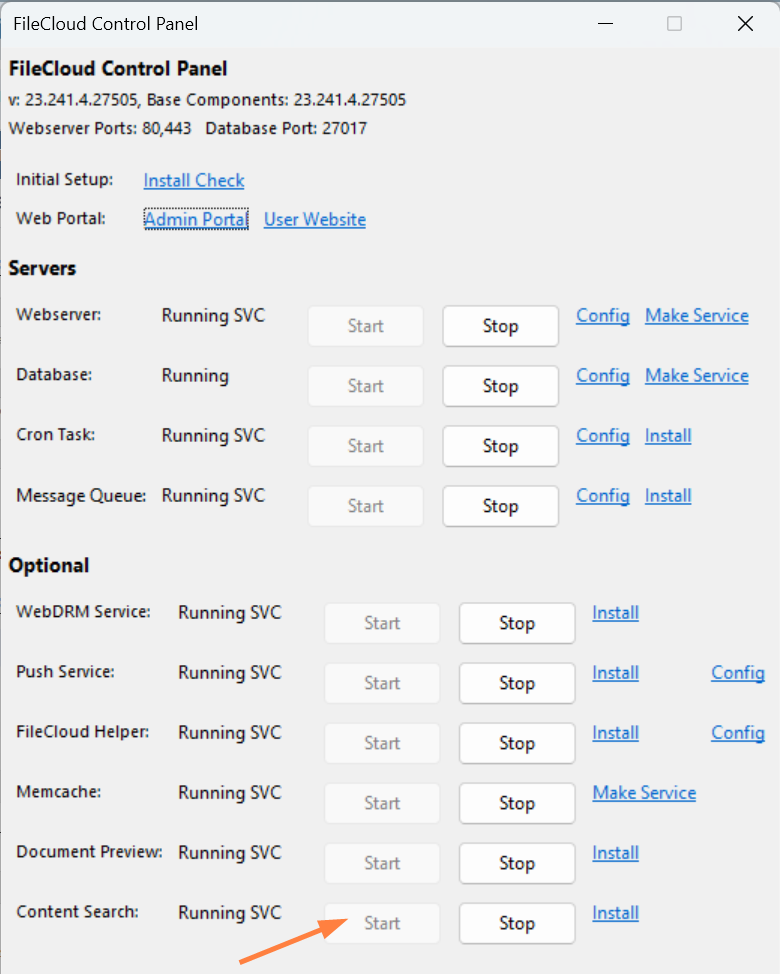
Restart the Solr (Content Search) service from the FileCloud control panel.
- In the admin portal, go to the Content Search settings page again.
Now the text Image OCR is enabled should appear under Enable Solr OCR and the button should display Enable PDF OCR.
- To activate OCR for PDFs as well as images, click Enable PDF OCR.
The confirm box appears again. - Click OK.
The notification that OCR has been successfully set up appears again, and the text OCR has been successfully setup appears under Enable Solr OCR.
- Restart the Solr (Content Search) service from the FileCloud control panel.
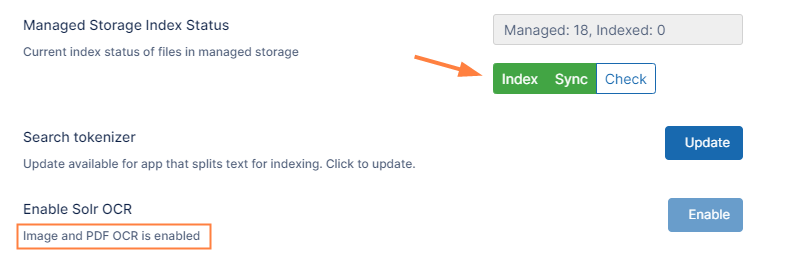
Now the text Image and PDF OCR is enabled appears under Enable Solr OCR.
You have finished enabling image and PDF OCR. - To build or rebuild the search index with OCR for images with text and PDFs, under Managed Storage Index Status,
- If you are performing a fresh installation, click Index.
- If you are performing an upgrade, click Reindex.
Install and enable Solr OCR on Linux Ubuntu
Follow these instructions on Linux when performing a fresh installation of FileCloud or when performing an upgrade to the OCR component license.
- Upgrade to FileCloud 20.3 or higher.
- In the FileCloud admin portal's left navigation bar, scroll down and click Settings. Then, on the Settings navigation page, click Content Search .
The Content Search settings page opens. - Run:
filecloudcp -t
- If you are performing an upgrade, click Reset and delete the current fccore if it exists (run command : rm -rf /opt/solrfcdata/var/solr/data/fccore/).
- Inspect the file solrconfig.xml inside /var/www/html/thirdparty/overrides/solarium/Solarium/fcskel/conf and uncomment the line containing parseContext.xml.
- In /var/www/html/thirdparty/overrides/solarium/Solarium, copy the folder fcskel into /opt/solrfcdata/var/solr/data (on the solr server) and rename it fccore.
Note: For a multi-tenant setup, rename it fccore_ site name (for example, if site name is mysite, rename it fccore_mysite). After copying the folder as fccore, set the ownership for the folder and its contents to solr by running:
chown solr.solr -R /opt/solrfcdata/var/solr/data/fccore
- In the admin portal, go to the Content Search settings page again.
- Click Configure.
- Confirm that the message below Enable Solr OCR is Image and PDF OCR is enabled.
- To build or rebuild the search index with OCR for images and PDFs with text, click Index or Reindex.
Install and enable Solr OCR on other Linux distributions:
To confirm that Tesseract is set up, enter:
filecloudcp -t
You should receive the response Tesseract is already installed and configured.
To assign the Apache user (usually named www-data) to the solr group (for example solr:x:123) open /etc/group for edit, and append the apache user name to the solr group.
solr:x:123:www-data
Restart Apache.
systemctl restart apache2
Assign read and write permissions to the solr group for the Solr core directory of the site/tenant that OCR is being set up for.
chmod -R g+rw /opt/solrfcdata/var/solr/data/fccore__<sitename>
- In the FileCloud admin portal's left navigation bar, scroll down and click Settings. Then, on the Settings navigation page, click Content Search .
The Content Search settings page opens. - Follow steps 6 through 12 under Install and enable Solr OCR on Windows, above.
Enable OCR manually
If your system is unable to configure OCR automatically, use the following instructions to enable it manually when performing a fresh installation of FileCloud or when performing an upgrade to the OCR component license.
- Set the Tesseract environment variables:
For Windows, add the following to solr.in.cmd:
SET PATH=%PATH%;C:\xampp\tesseractocr
SET TESSDATA_PREFIX=C:\xampp\tesseractocr\tessdata
For Nix, add the following to to solr.in.sh (or define the environment variables globally)
PATH="/path/to/tesseractocr:$PATH"
TESSDATA_PREFIX=/path/to/tesseractocr/tessdata
- In the FileCloud admin portal's left navigation bar, scroll down and click Settings. Then, on the Settings navigation page, click Content Search .
The Content Search settings page opens. - If you are performing an upgrade, click Reset.
If you are performing a fresh installation, clicking Reset is not necessary. - In C:\xampp\htdocs\thirdparty\overrides\solarium\Solarium copy the folder fcskel and rename it fccore.
Then move it into C:\xampp\solr\server\solr. - Restart the Solr (Content Search) service from the FileCloud control panel.
- In the Admin portal, go to the Content Search settings page again.
- Confirm that Image and PDF OCR is enabled appear under Enable Solr OCR.
- To build or rebuild the search index with OCR for images with text and PDFs:
- If you are performing an upgrade, click Reindex.
- If you are performing an upgrade, click Reindex.
Enable OCR manually when FileCloud and and Solr are on different servers
On the Solr server:
- In C:\xampp\solr\bin\ open the file solr.in.cmd and add the following lines:
SET PATH=%PATH%;C:\xampp\tesseractocr
SET TESSDATA_PREFIX=C:\xampp\tesseractocr\tessdata
SET SOLR_SECURITY_MANAGER_ENABLED=false
- In the FileCloud admin portal's left navigation bar, scroll down and click Settings. Then, on the Settings navigation page, click Content Search .
The Content Search settings page opens. - Click Reset to reset Solr configuration.
- From the FileCloud server, copy the folder C:\xampp\htdocs\thirdparty\solarium\fcskel to the Solr server as C:\xampp\solr\server\solr\fccore (rename fcskel to fccore).
In C:\xampp\solr\server\solr\fccore\conf open the file solrconfig.xml and uncomment the line containing parseContext.xml. Save the file.
Change:<!-- <str name="parseContext.config">parseContext.xml</str>
to:
<str name="parseContext.config">parseContext.xml</str>
- In the FileCloud admin portal, go back to the Content Search settings page and click Configure.
- Run the following command to stop Solr:
cd C:\xampp\solr\server
java -DSTOP.PORT=7983 -DSTOP.KEY=solrrocks -jar start.jar --stop
- In the FileCloud control panel, start Solr.
On the FileCloud server:
- In c:\xampp\htdocs\config\cloudconfig.php add the following lines:
define("TESSERACTOCR_BIN_DIR", "C:\\xampp\\tesseractocr"); define("TESSERACTOCR_TESSDATA_DIR", "C:\\xampp\\tesseractocr\\tessdata"); - In the FileCloud admin portal, go to the Content Search settings page and verify that the message Image and PDF OCR is enabled appears under Enable Solr OCR.