Create a Network Folder Based on an Wasabi S3 Bucket
![]() There are few limitations you should know about using Wasabi S3 bucket network folders
There are few limitations you should know about using Wasabi S3 bucket network folders
- No versioning support (Version key will be ignored and the file will be overwritten)
- No real-time network sync or indexed search is allowed (Regular file search will work)
To create a Network Folder from an S3 bucket:
- Open a browser and log in to the Admin Portal.
- In the left navigation panel, select Network Folders.
- On the Manage Network Folders window, click Add.
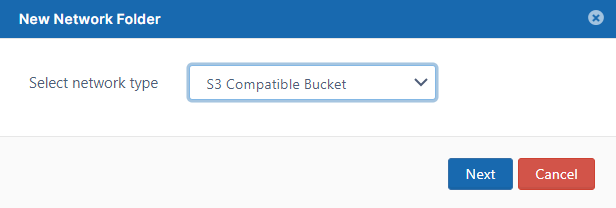
- On the New Network Folder dialog box, in Select network type, select S3 Compatible Bucket, and then click Next.
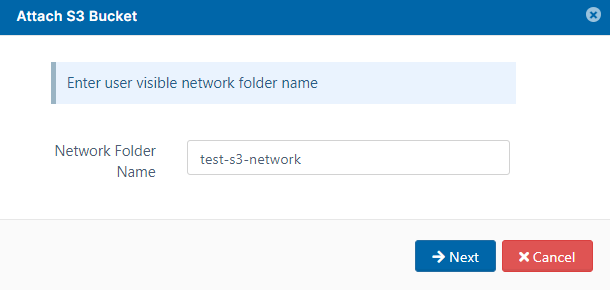
- On the Attach S3 bucket window, type in a unique Network Folder Name and then click Next.
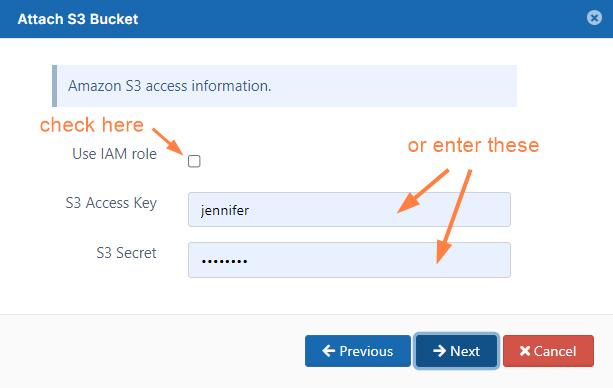
- On the Attach S3 Bucket window, either check Use IAM role or type in authentication credentials in S3 Access Key and S3 Secret, and then click Next.
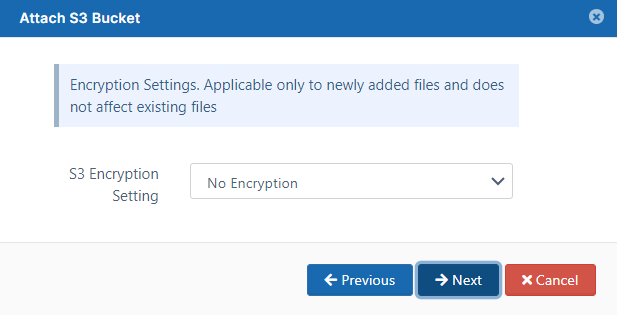
- On the Attach S3 bucket window, select No Encryption because Wasabi does not provide managed key encryption as AWS does.
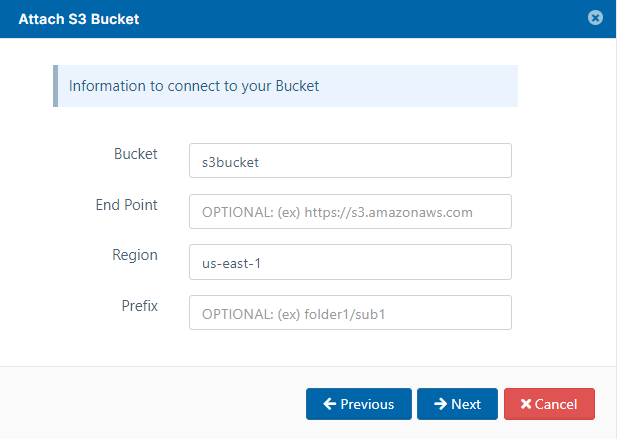
- On the Attach S3 bucket window, type in the bucket name and Region, and optionally the End Point and Prefix..
- Click Next.
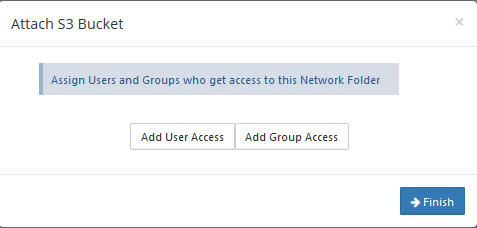
- When the S3 bucket is mounted as a network share, permissions need to be assigned to users or group to allow access.
The network share access can be granted to