How to Integrate Filecloud with Backblaze (B2) Cloud Storage
FileCloud officially supports only Amazon S3 storage.
- Other Amazon S3 compatible storage systems are supported through our Amazon S3 drivers, including:
- Alibaba Cloud object-based storage
- Digital Ocean S3 object storage
- Scality
- Wasabi
- Google Cloud object storage
- Backblaze B2
- Cloudian S3-Compatible Object Storage
The robustness of these S3 compatible storage systems depends on their compatibility with Amazon S3 API.
Administrators can change the FileCloud storage type after FileCloud has been installed but before any data has been stored.
- When changing the storage type from local to B2 object storage, the files and folders that have been already stored in local storage will not be automatically moved to S3 storage.
- In this case, the administrator must manually export files and folders from local storage before changing the storage type, and then manually import them after changing the storage type.
- Only change the FileCloud storage type for new installations.
- Do not change the FileCloud storage type if FileCloud has been in use and data is already stored.
- Be careful when changing the storage path; If done improperly it could lead to data loss.
- The Backblaze B2 storage should NEVER be modified outside of the FileCloud subsystem.
- Do not add, edit, or modify files directly using Backblaze tools. Doing so will destabilize your FileCloud installation.
To change the FileCloud storage path from LOCAL to Backblaze(B2) object storage:
NOTES:
Although FileCloud does not have an explicit connector for B2 object-based storage, the Amazon S3 connector can be used.
In this step you will need to access WWWROOT. It is typically located at:
| Windows | Linux |
|---|---|
| c:\xampp\htdocs | /var/www/html |
To enable B2 object storage as the backend:
- To make sure that your server does not have any time variations, set up the time on your server to be synchronized.
Open the following file for editing:
WWWROOT/config/cloudconfig.php
Find the following line:
define("TONIDOCLOUD_STORAGE_IMPLEMENTATION", "local");Change it to:
define("TONIDOCLOUD_STORAGE_IMPLEMENTATION", "amazons3");- Save and close the file.
Find the following file:
WWWROOT/config/amazons3storageconfig-sample.php
- Rename it to:
WWWROOT/config/amazons3storageconfig.php
![]() Nothing needs to be added or edited in amazons3storageconfig.php
Nothing needs to be added or edited in amazons3storageconfig.php
To configure Backblaze (B2) Credentials
- Open a browser and log into the Admin Portal.
- Go to Settings > Storage > My Files.
- Enter the settings for your environment. See the table below for information about each setting.
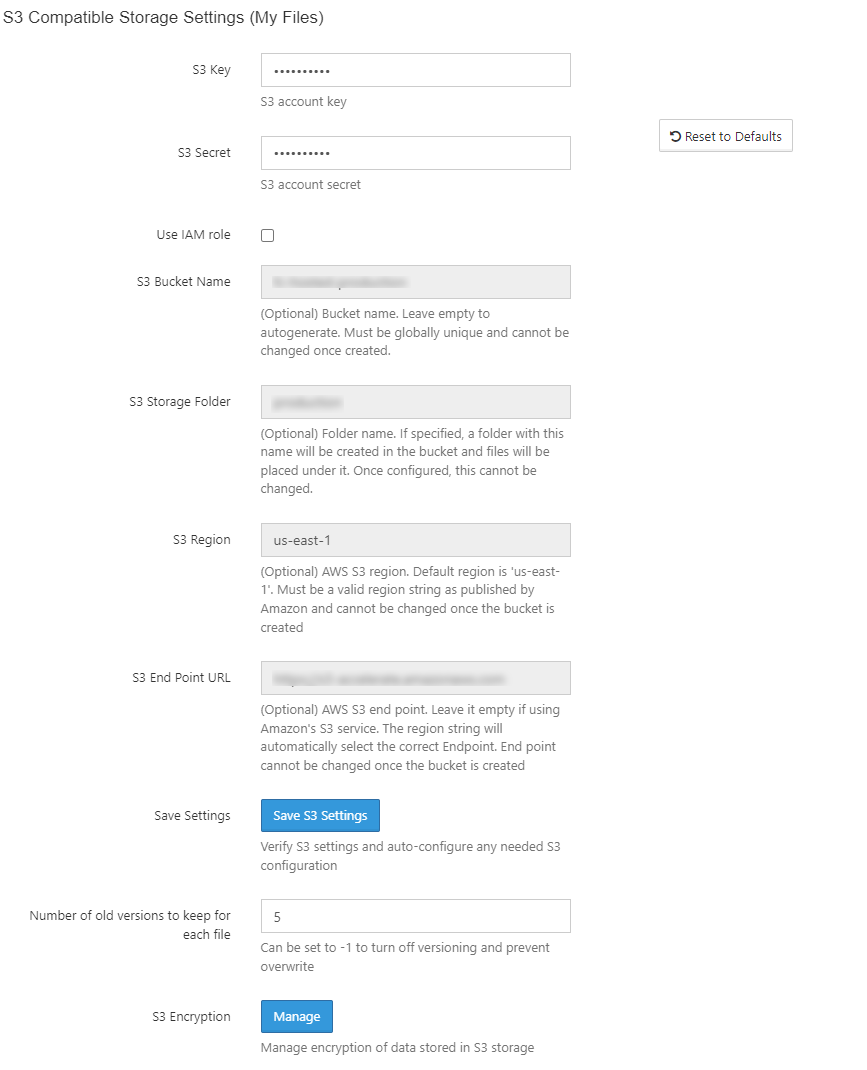
- Click Save S3 Settings.
- Enter values for Number of old versions to keep for each file, and, if you are using encryption, click Manage for S3 Encryption to set the encryption type.
- Click Save.
Field Description S3 Key Your B2 authentication key. S3 Secret Your B2 authentication secret. Use IAM role When checked, the S3 Key and S3 Secret fields disappear and the IAM role is used to connect to the S3 bucket. S3 Bucket Name Provide a bucket name. The bucket should be new (in some circumstances, a previously used bucket in FileCloud can be used).
It is important that the S3 bucket is never modified outside of the FileCloud subsystem,
The bucket name is case sensitive; make sure you are using the exact name of the bucket.
Optional: All files are stored inside this root storage folder (it is created automatically). S3 Region Optional: Provide the region string.

S3 End Point URL This is the S3 endpoint. note that for each region there is a specific endpoint URL.
Number of old versions to keep for each file When a user uploads a new version of a file, it is saved, and the latest Number of old versions to keep for each file versions are kept. When set to -1, each upload of a file overwrites the previous one, and no versions are saved.
S3 Encryption By default encryption type is: Backblaze B2 key (SSE-B2), an encryption key that Backblaze creates, manages and uses for you.
For this integration, only Google-managed key encryption is supported. No additional actions are need in FileCloud.
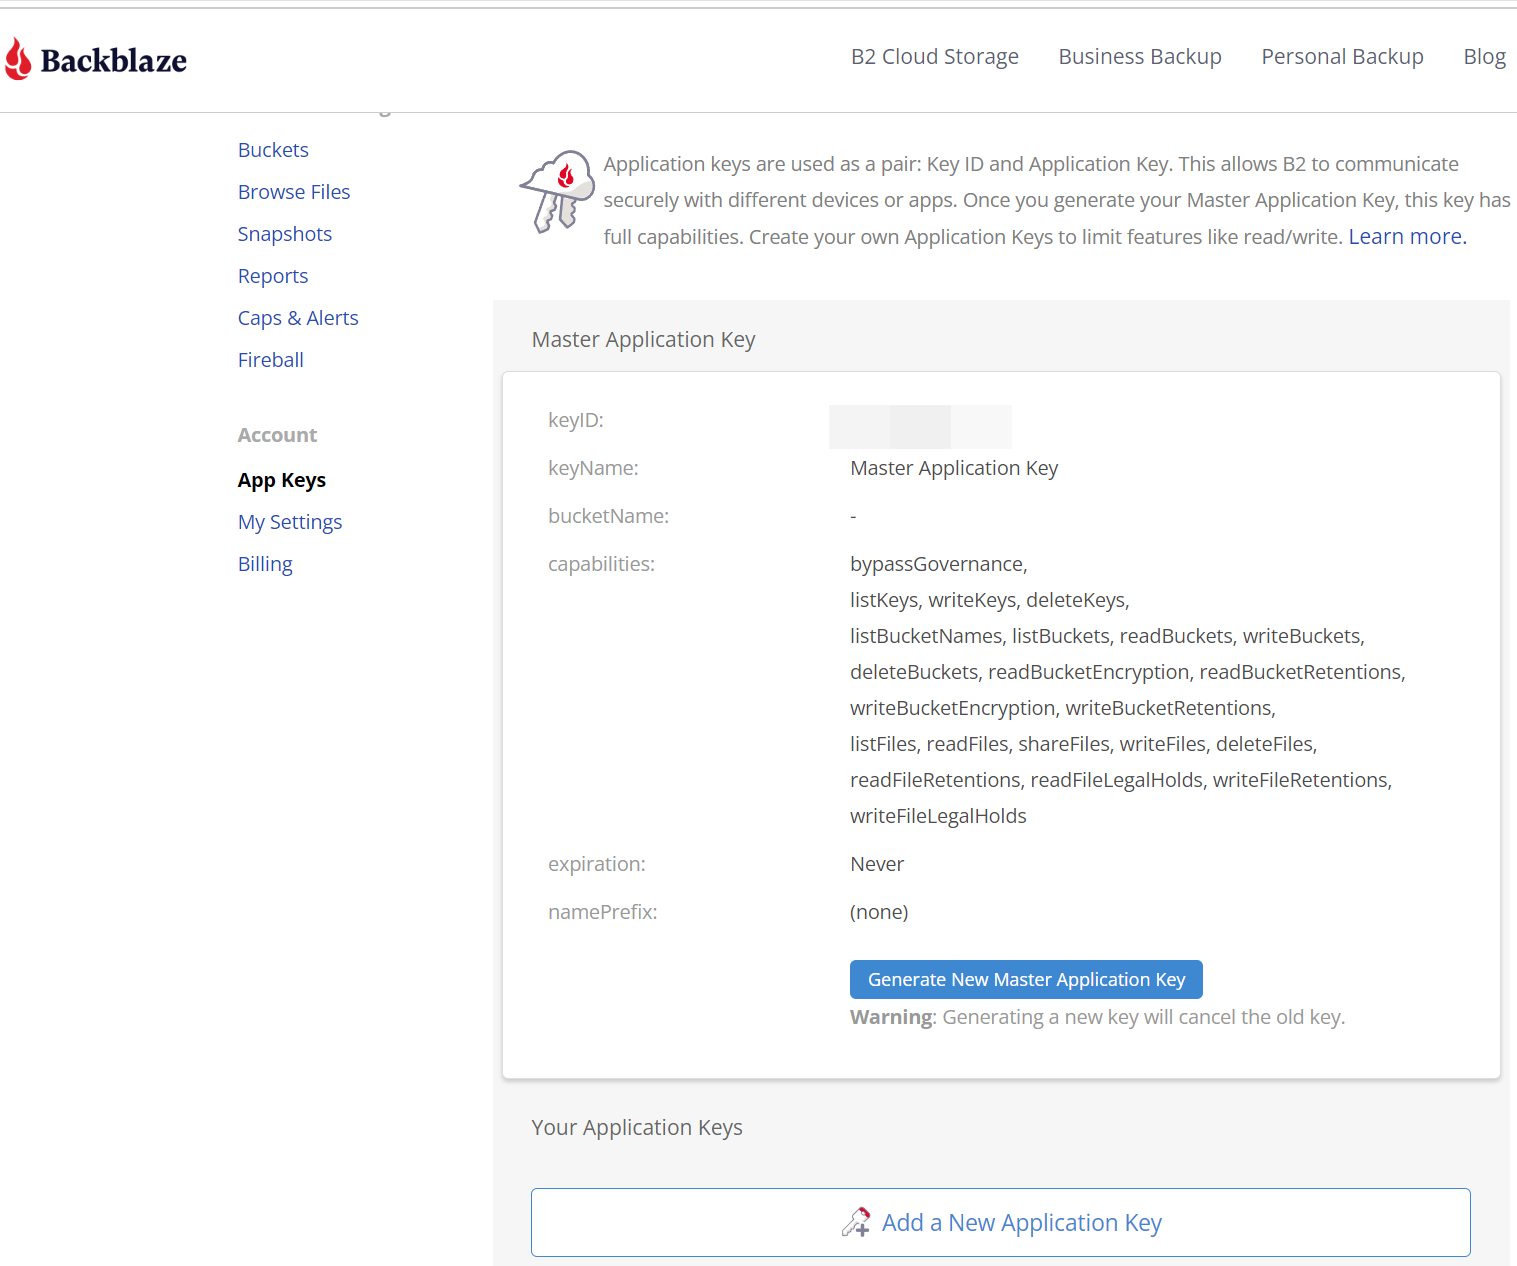
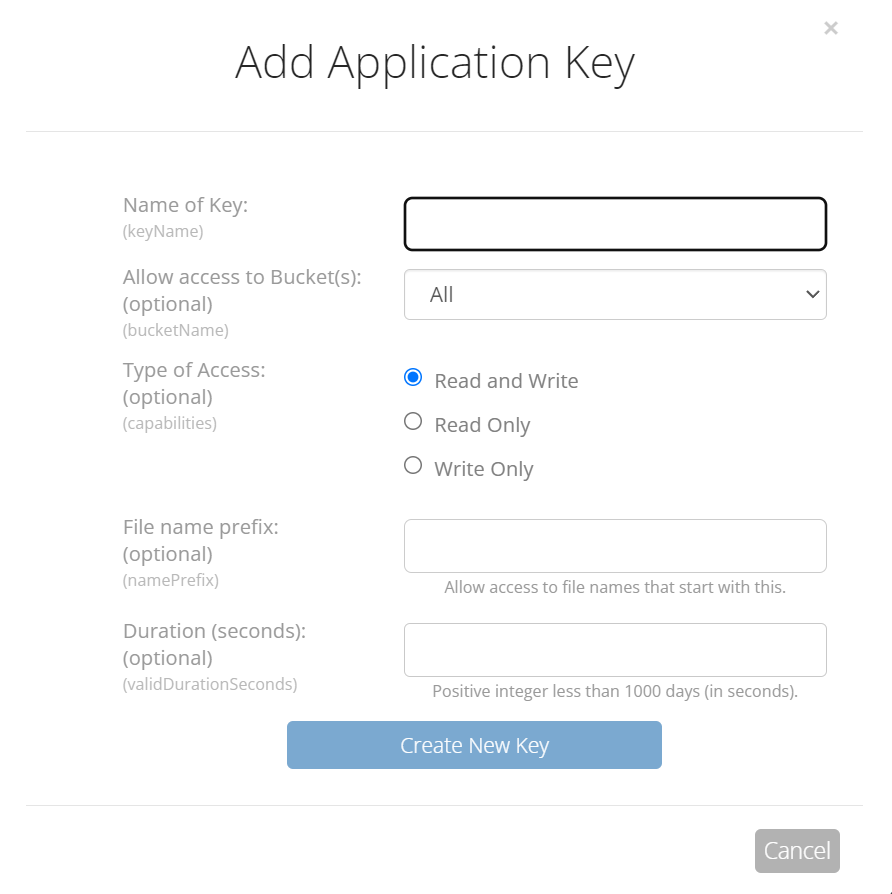
To enable HMAC access key for a bucket, go to Account > App Keys, and select the Add a New Application Key button under "Your Application Keys".
*Selecting "All" under "Allow access to Bucket(s): (optional) is a requirement for this integration. Otherwise it will throw out a missing capability error.
Troubleshooting: