FileCloud Community Edition Registration and Installation
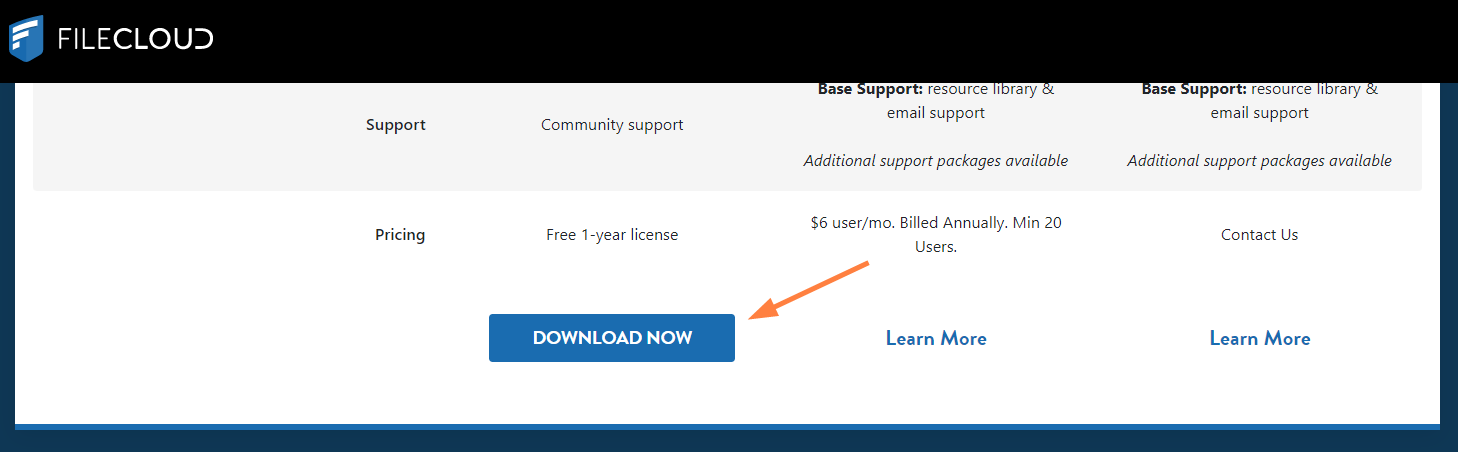
To register for a one-year free license for FileCloud Community Edition, go to https://ce.filecloud.com.
- Scroll down, and click DOWNLOAD NOW.
A FileCloud Community Edition registration form opens. - Fill in the information including whether you plan to use FileCloud Community Edition for Business Use or Personal Use, and read and agree to the terms and conditions.
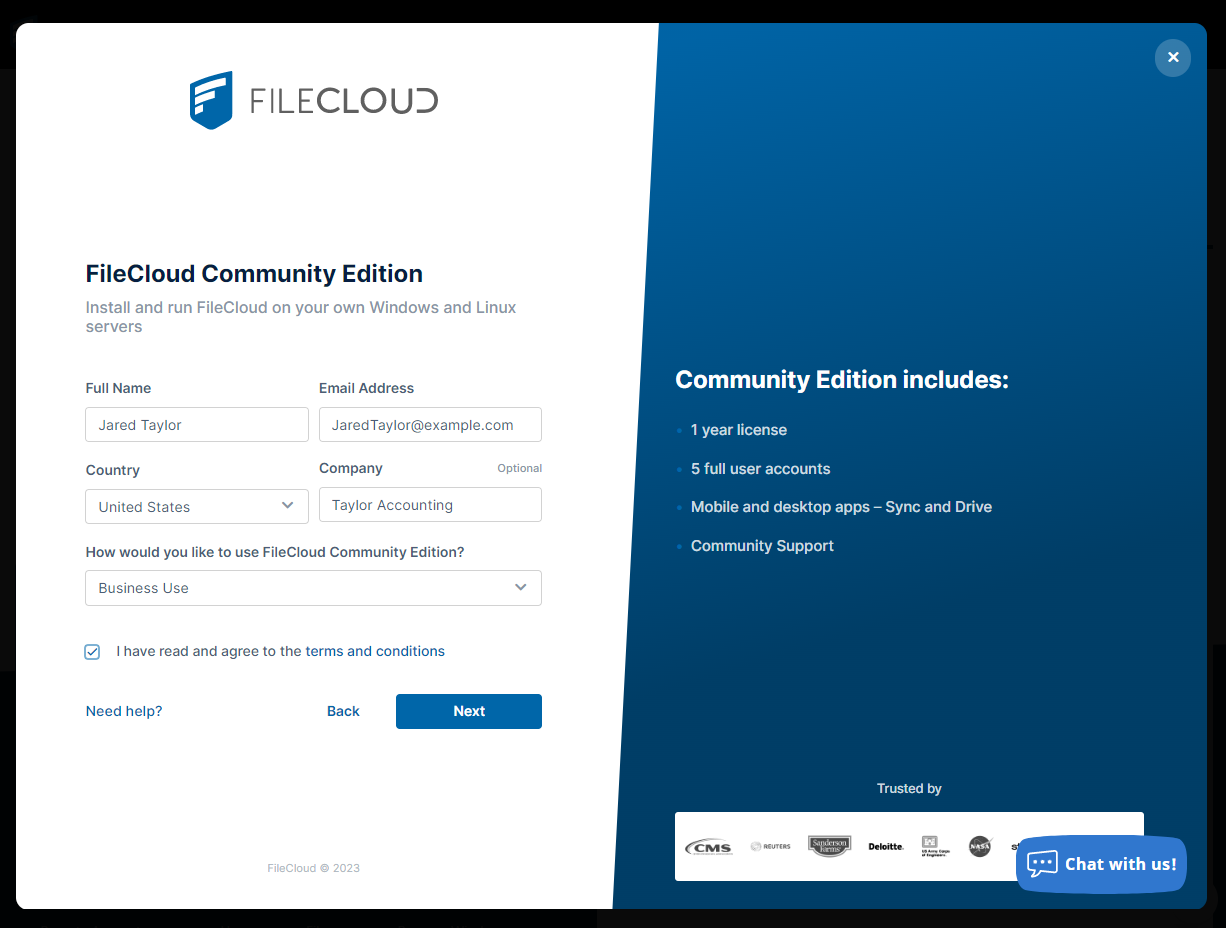
- Click Next.
The next screen prompts you to enter your verification code. - Check your email for a message with the label FileCloud Community Edition.
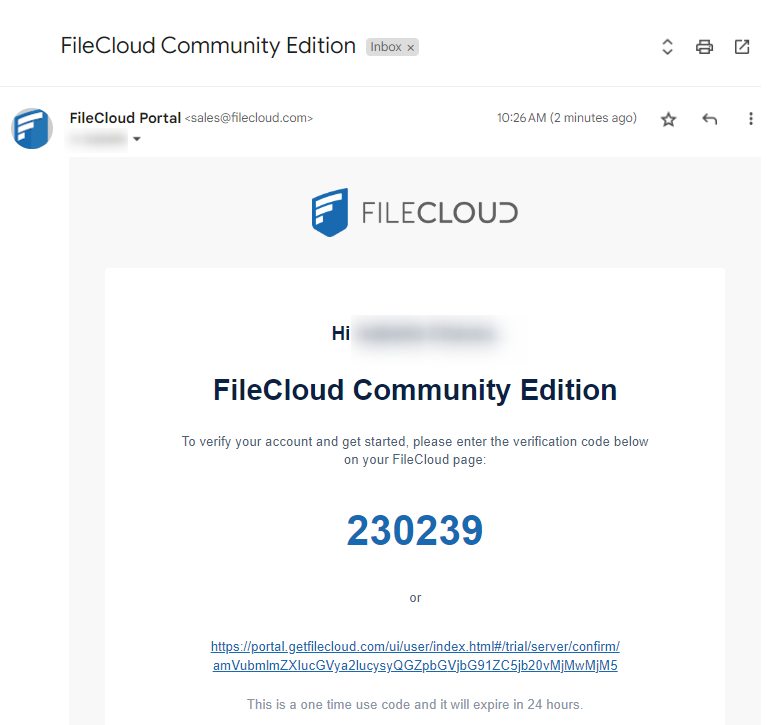
- Copy the verification code from the message into the screen:
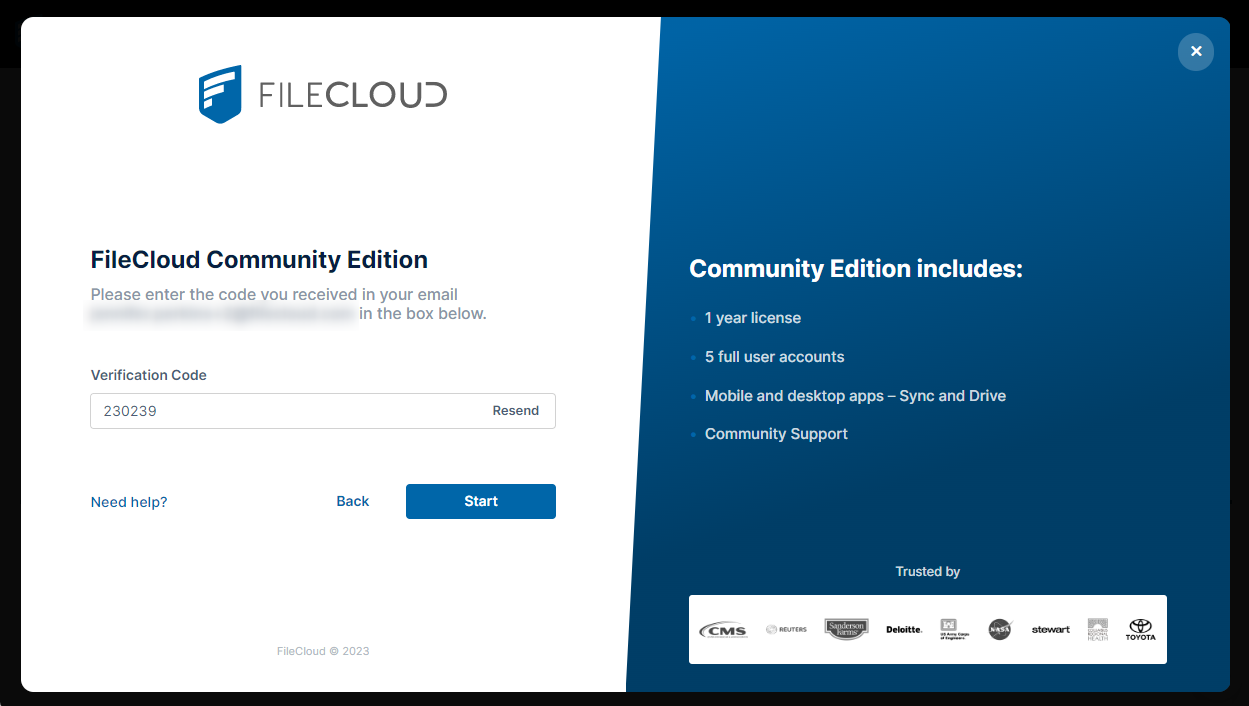
- Click Start.
You are taken to FileCloud's customer portal's Sites and Licenses page, where your Community Edition license is listed.
(In addition you are sent a Welcome to the FileCloud Community Edition email with links to the same Sites and Licenses page and to this help page.)
Note: The customer portal is located at portal.getfilecloud.com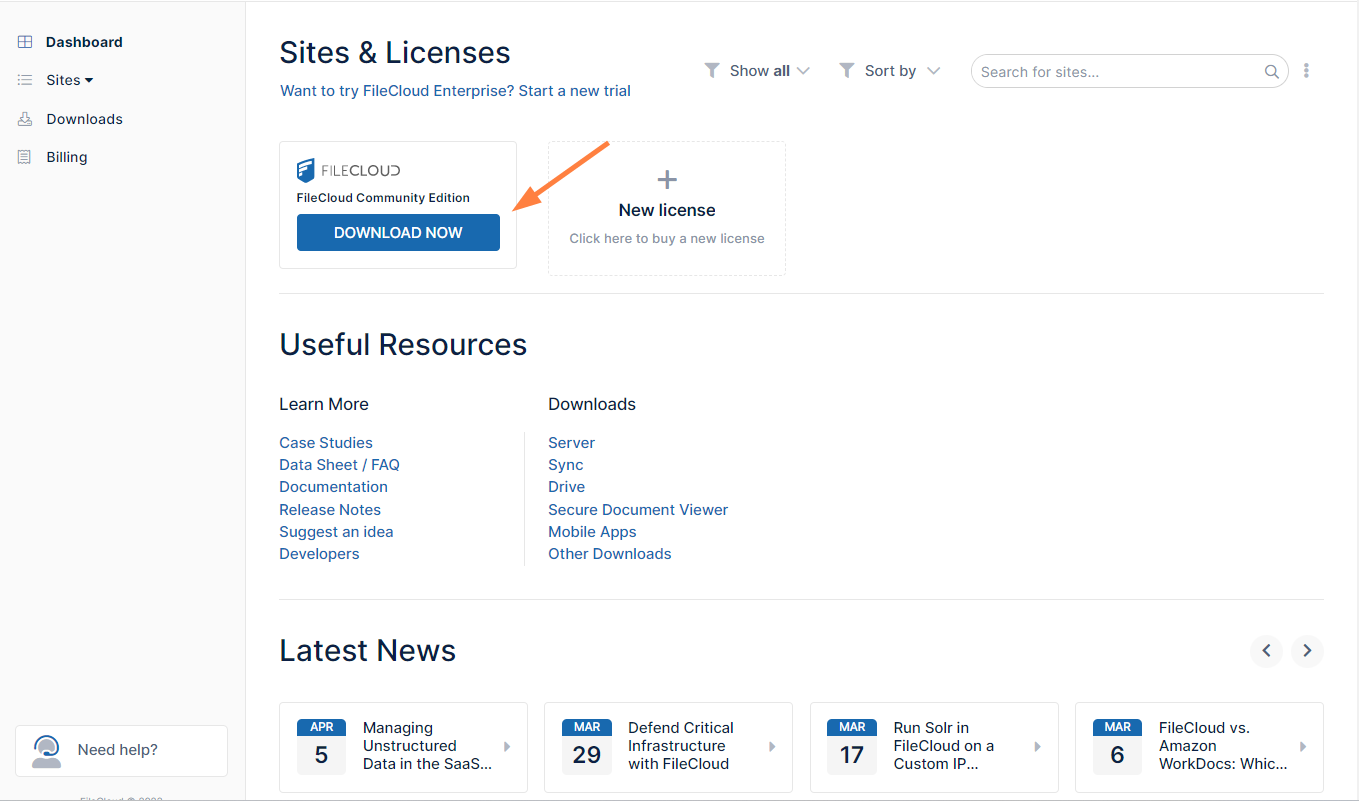
- In the box for FileCloud Community Edition, click DOWNLOAD NOW.
You are taken to a Next Steps page. - In step 1, Download FileCloud Community Server, click Download and choose your server option.

Install FileCloud according to the instructions for the server platform you are using.
If you are installing on a Windows 64-bit server, follow these instructions:- After you click Download and choose Windows 64 bit, you are prompted to save the FileCloudSetup.exe file.
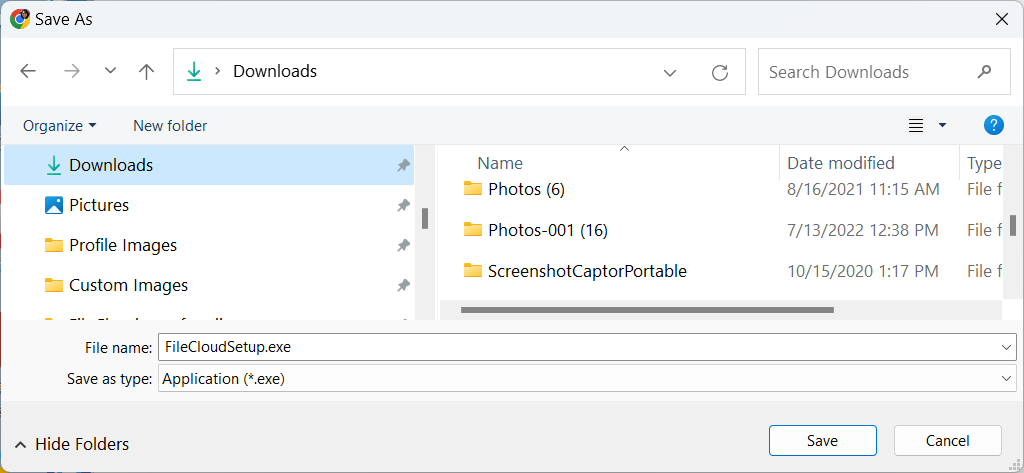
- Save and run the file.
The first window of the Install FileCloud for Windows wizard opens: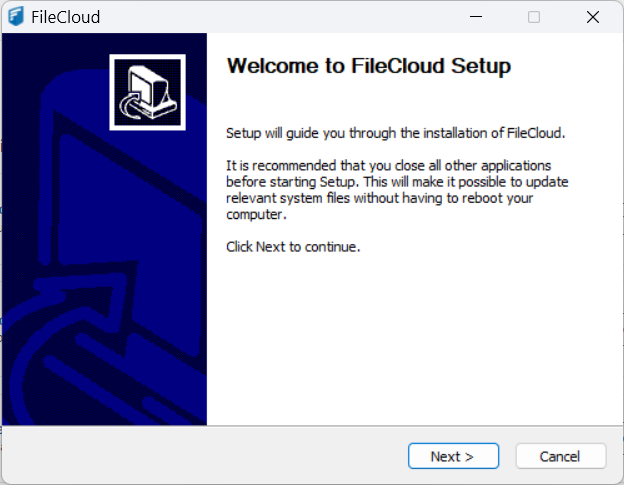
- Click Next.
The Terms of Service window opens: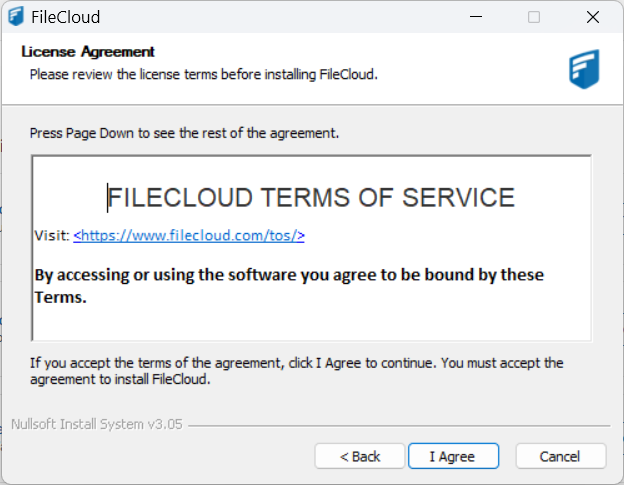
- Review the Terms of Service and click I Agree.
The Installation drive window opens: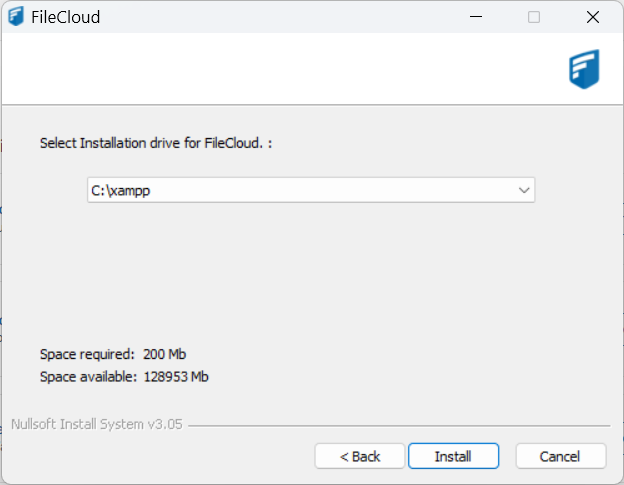
- Change the drive if necessary. In most cases, you can leave the default installation drive.
- Click Install.
The window displays installation progress.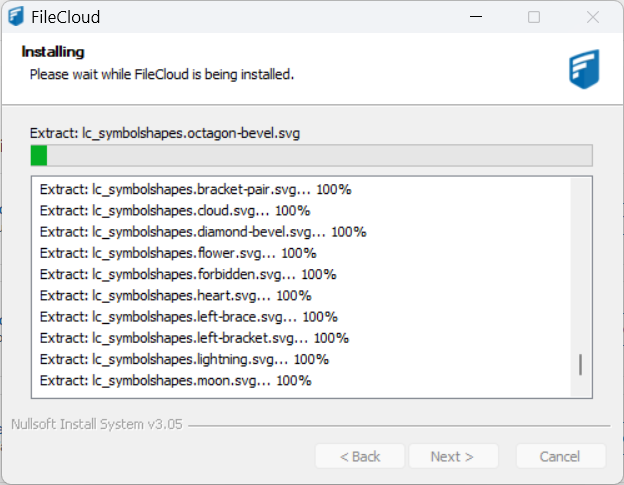
- When the entire installation is complete, click Next.
The final window of the setup wizard has Start FileCloud Control Panel checked by default.
- Leave it checked, and click Finish.
The Install wizard closes and the FileCloud control panel opens. - Using the instructions at Configuring Servers with the FileCloud Control Panel start the services on the Control Panel.
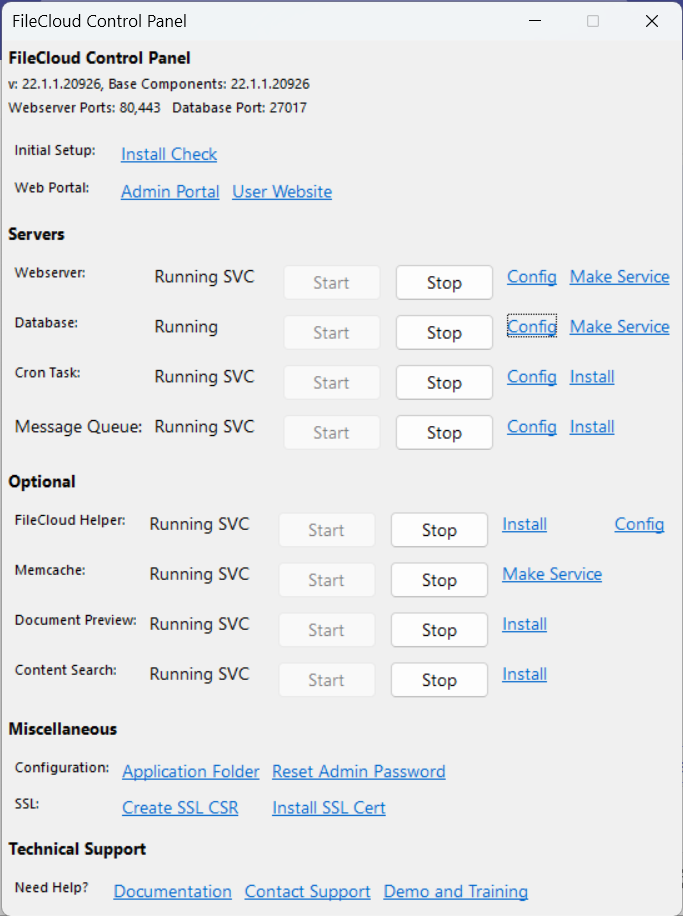
- When you are done configuring and starting services, click Install Check at the top of the control panel.
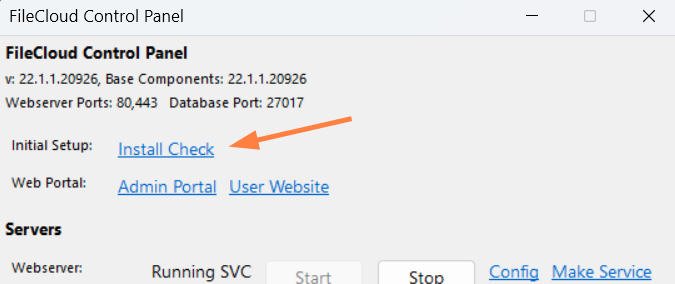
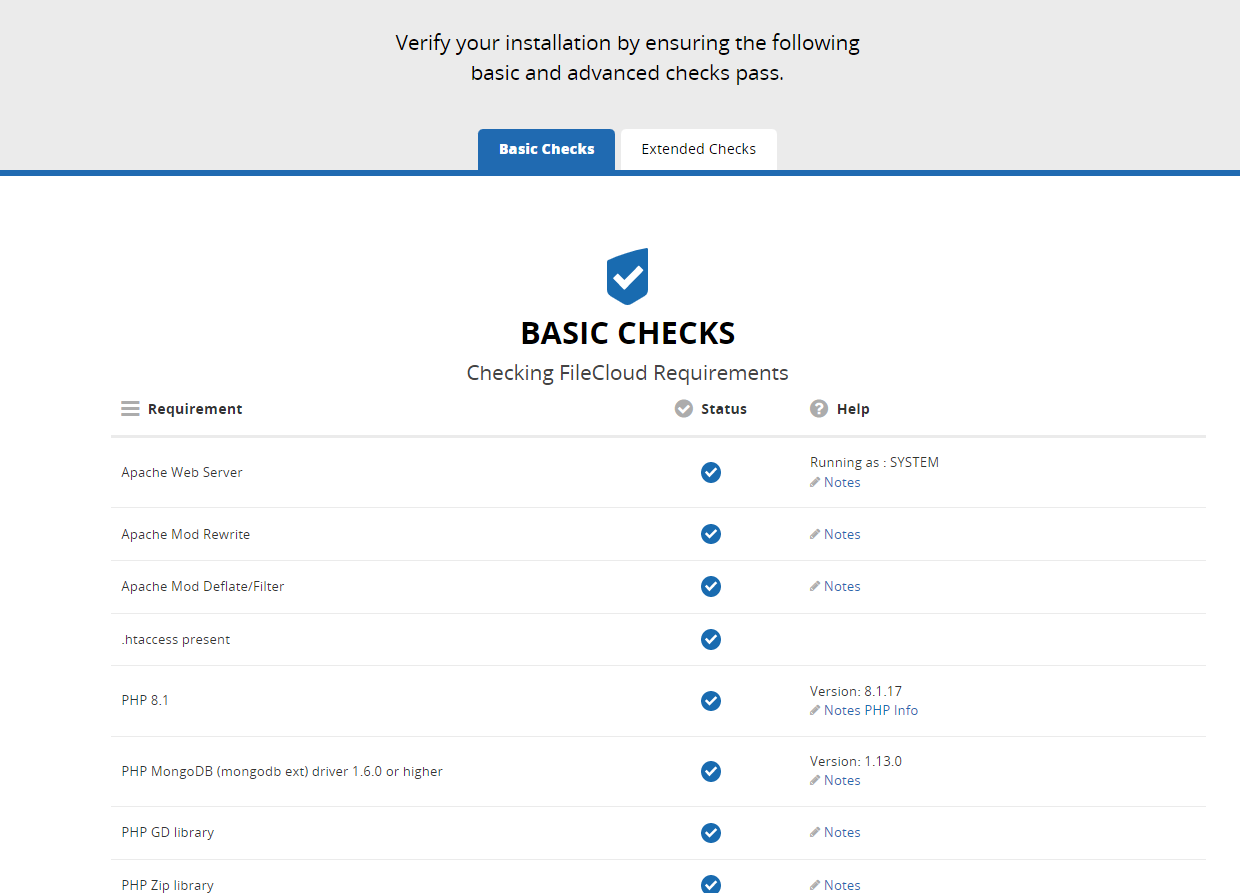
- Confirm that the Basic Checks and the Extended Checks all have a status of Pass.
Continue with the following step for getting your license.
- After you click Download and choose Windows 64 bit, you are prompted to save the FileCloudSetup.exe file.
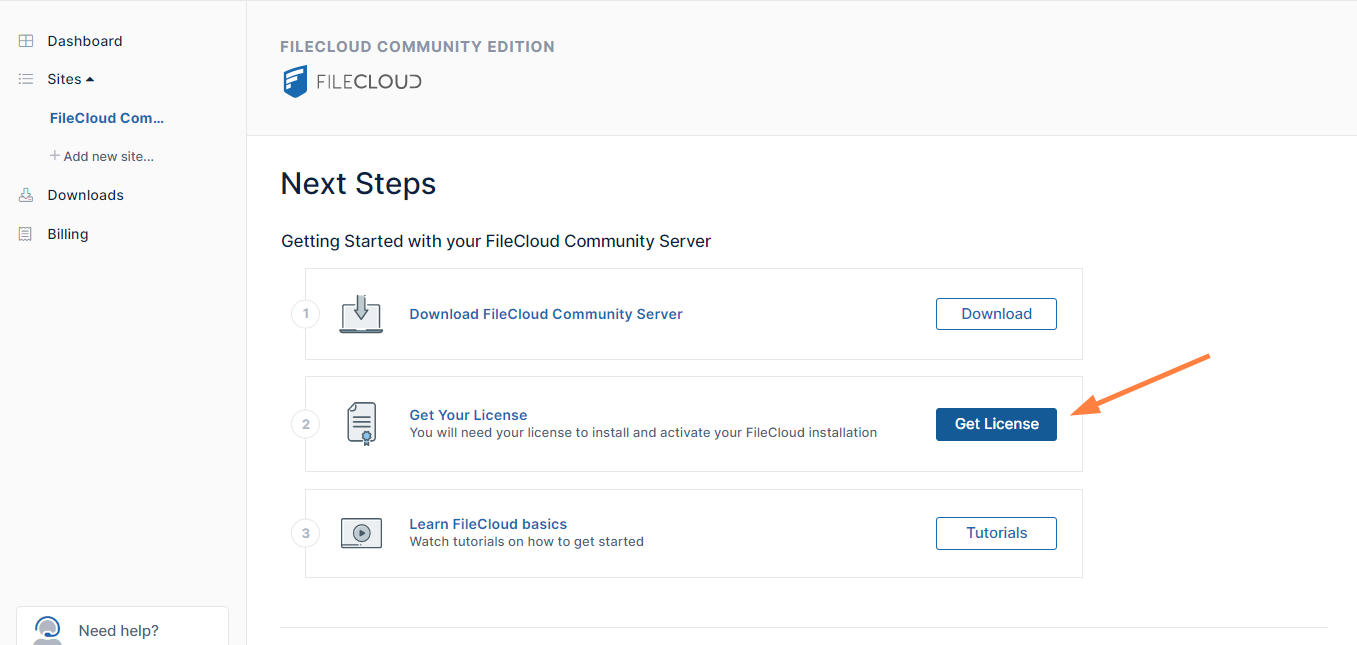
- After you have installed FileCloud, click Get License and save license.xml.
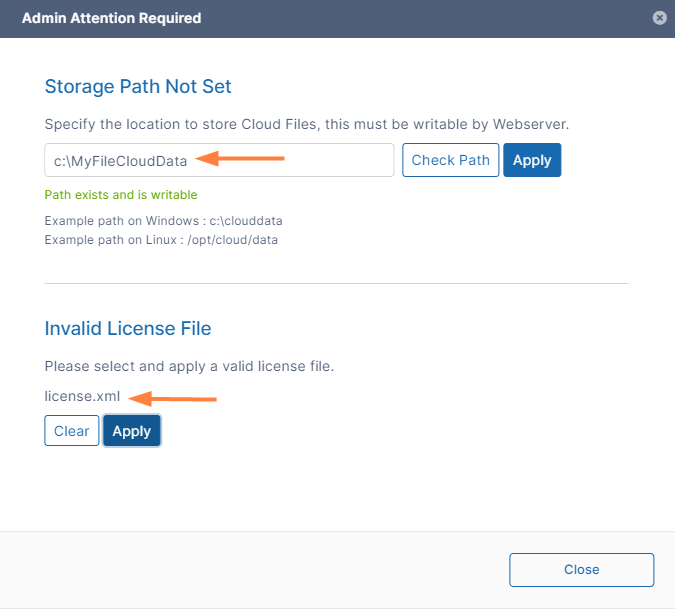
- When you start FileCloud for the first time, it prompts you to specify your storage path location and to upload your license.
- Enter the path for your data, click Check Path to make sure the path exists, and then click Apply.
- Find the license file you just uploaded and click Apply.
FileCloud Community Edition opens. Your dashboard should resemble the following: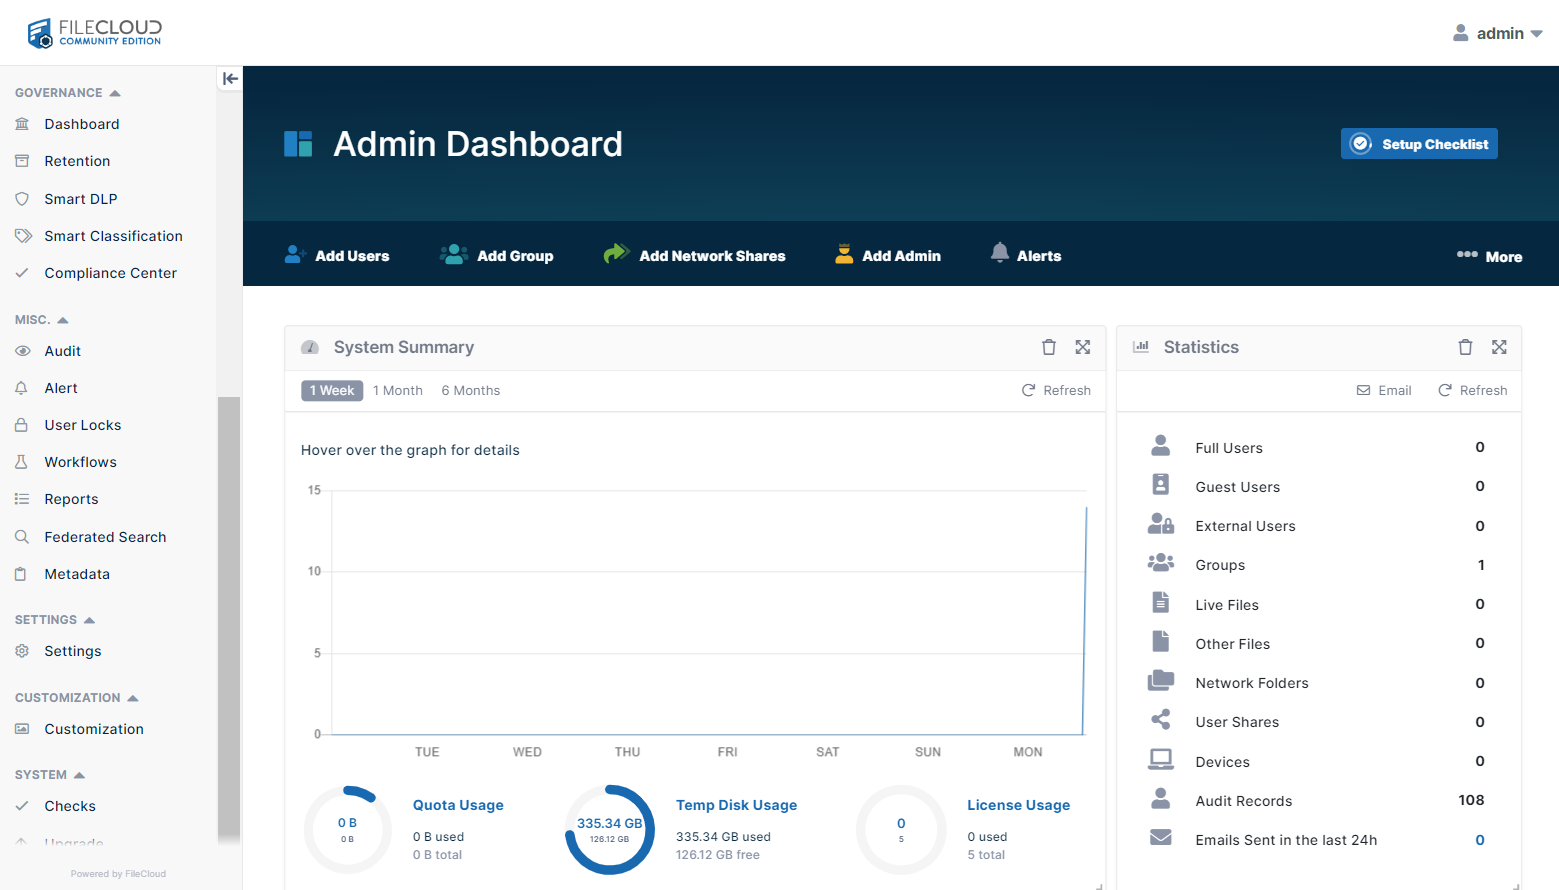
FileCloud Community Edition primarily functions in the same way as FileCloud Server. The FileCloud Server documentation will provide you with any help you need implementing and using it; however, some help topics discuss features that are not present in Community Edition.
To review help videos, click Tutorials in the Next Steps page or go to Video Tutorials - FileCloud Docs - Server.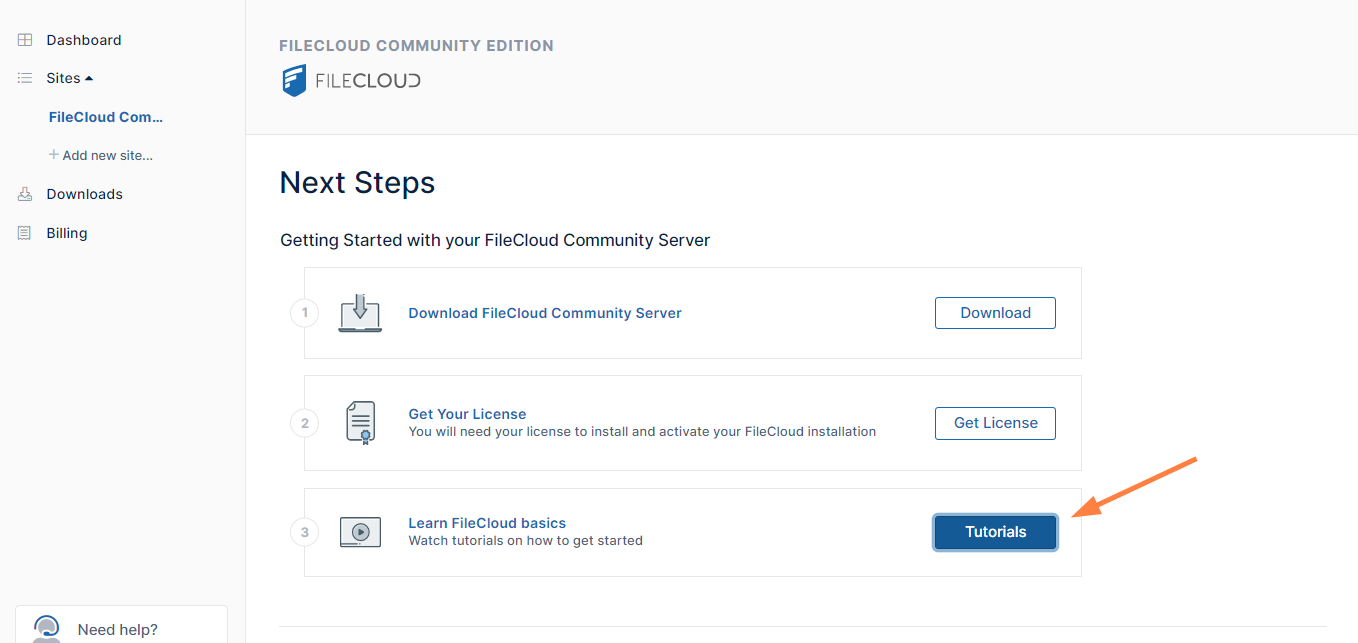
Configuring Storage, Setting up Users and Starting with FileCloud
Now that you’ve installed your license and accessed your FileCloud admin portal, you can configure storage, set up users and start using FileCloud.
For setup information, see FileCloud Site Setup.