Configure Content Search for Managed Storage
Administrators must configure FileCloud to use Solr before it can be used for advanced search.
- Configure FileCloud with the URL of the Solr server and the port number.
- Create an index to allow Solr to search the files in managed storage.
- Configure Solr in the Content Search tab.
Follow these steps to configure FileCloud with Solr after it is installed.
- In the FileCloud admin portal's left navigation bar, scroll down and click Settings. Then, on the Settings navigation page, click Content Search
 .
.
The Content Search settings page opens.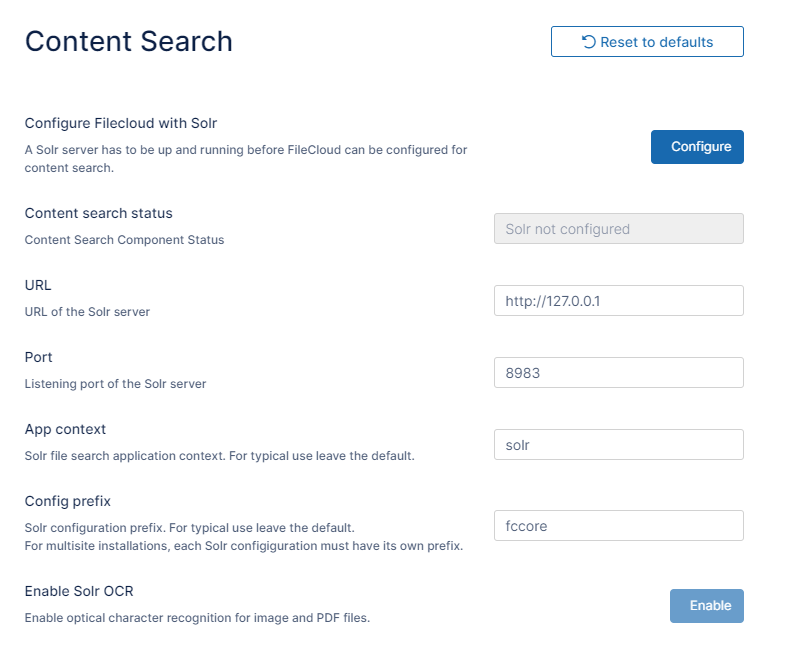
- Update the settings depending on your environment.
Parameter Remarks Content search status This is a read-only field that displays the status of FileCloud Solr configuration. URL The http url of the Solr server. Default value is http://127.0.0.1. If Solr is installed on a different server, use its IP address.
Note: Do not use the port number as part of the URL. It is entered in the next field.Port Port number of the Solr server. Default value is 8983. If Solr is running on a different port, update this value. App context This is the application context under which the Solr server is hosted. Default value is solr. Config prefix Unique prefix for the current sites configuration. Default value is fccore.
Note: In multisite FileCloud installations, each site should have a unique prefix if they use the same Solr server.Enable Solr OCR Enables optical character recognition so search can find matches in images. - Click Configure to configure FileCloud with Solr, using the entered information.
If this fails, a message may appear that prompts you to copy a configuration directory from a source directory to a target directory.
If the message appears, follow the instructions to copy the template folder. In the following example, the folder <FileCloud web root>/thirdparty/overrides/solarium/Solarium/fcskel should be copied to <FileCloud web root>/server/solr and renamed fccore.
Directories and target folder name for your environment might be different.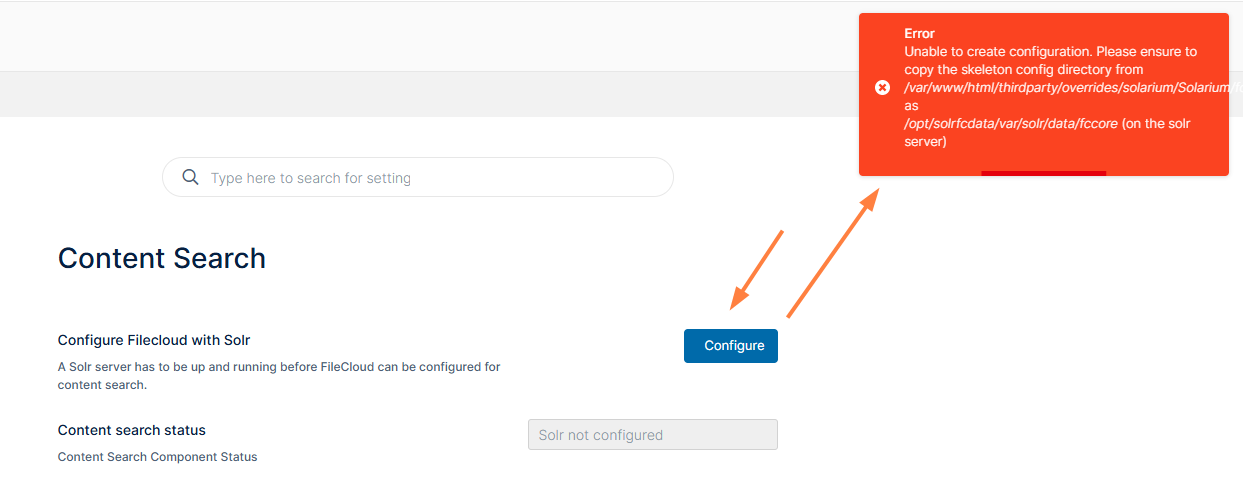
- If you are prompted to copy the configuration directory, after you copy it, click the Configure button again.
Upon successful configuration, a new field appears and shows the index status of all Managed Storage files.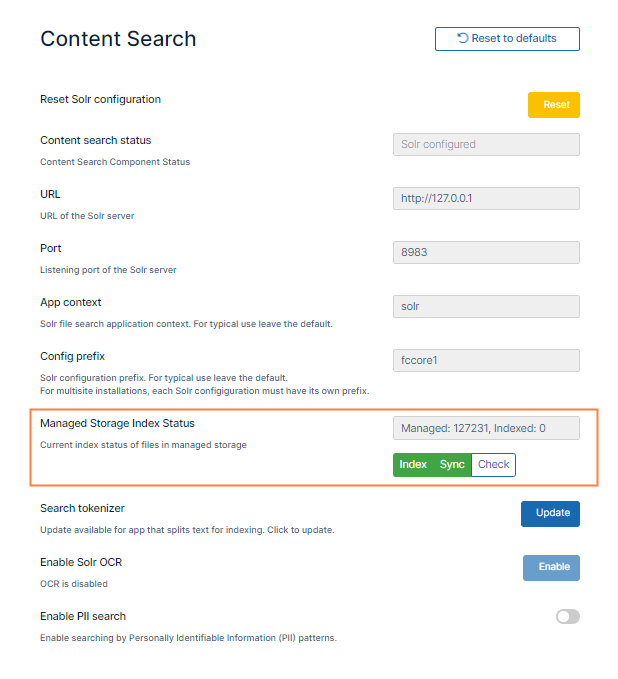
If it is a fresh installation, each new file is indexed when it is uploaded.
If it is an existing installation, managed files already exist. Though the new files will be indexed, the existing files have to be indexed separately. - To index existing files, click the Index button.

- When the button appears as Reindex, click the Check button to see the number of indexed files.

Multi-site Solr configuration is similar to single site configuration. After a new site is created, repeat the above steps, but in the Config Prefix field, specify a unique prefix for the new site.
This configures Solr with a separate index database for each new site.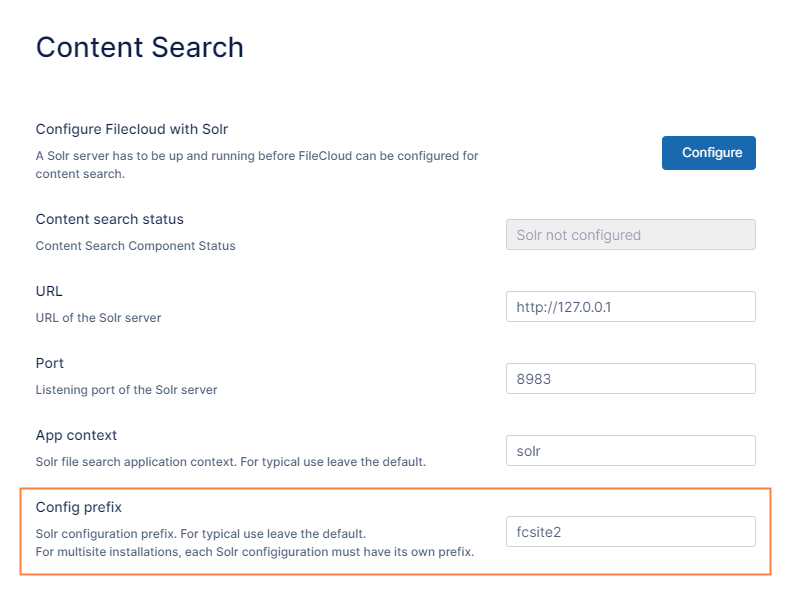
- In the FileCloud admin portal's left navigation bar, scroll down and click Settings. Then, on the Settings navigation page, click Content Search
- Index Files in Managed Storage.
Indexing Network Folders
Unlike managed storage, Network Folder files exist outside of FileCloud and therefore changes occurring in the network folders might not be propagated into FileCloud.
Monitoring such changes are important in the following scenarios:
- Faster searching
- Content Search
- Automatic Realtime Syncing of Network Folders
- Pattern Searches for GDPR
For these scenarios, you must index network folders and keep them indexed as files and folders change.
- To index network folders, the FileCloud Helper service is required
To enable and configure PII Search:
- In the FileCloud admin portal's left navigation bar, scroll down and click Settings. Then, on the Settings navigation page, click Content Search .
The Content Search settings page opens. Scroll down to the Enable PII Search field and enable it.
The Manage PII Patterns section opens.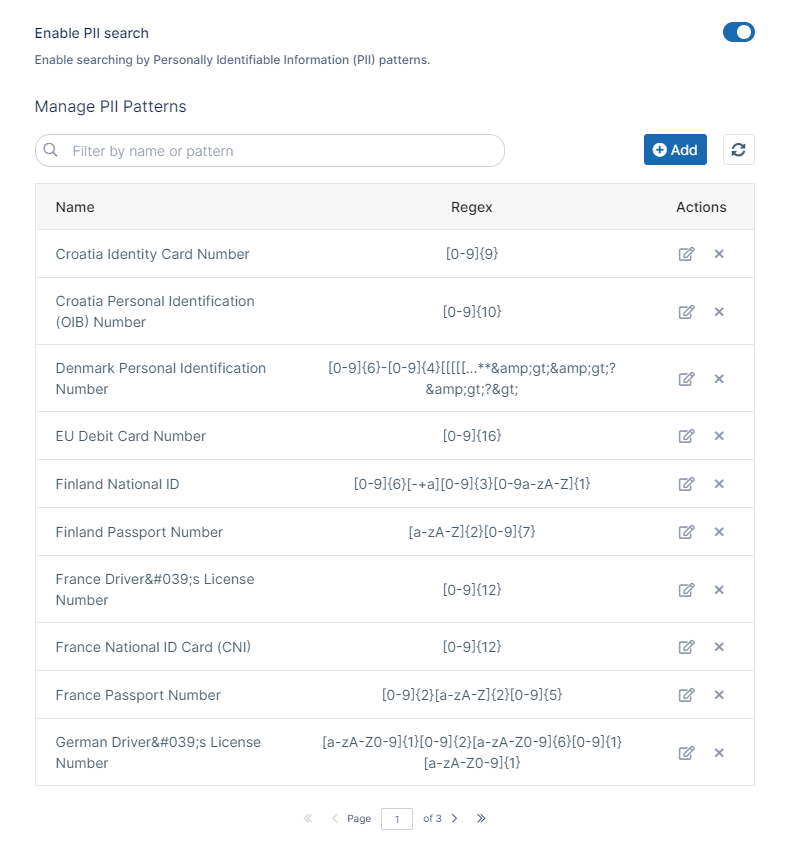
In the Manage PII Patterns section, you can add, edit, search for, and remove patterns.- To add a new pattern to the list, in the Manage PII Patterns section, in the top right corner, click Add.
- To edit an existing pattern, in the Manage PII Patterns section, click the edit icon (
 ) for the pattern.
 - To remove an existing pattern, in the Manage PII Patterns section, click the delete icon (x) for the pattern.
Pattern formatA pattern contains the following information:
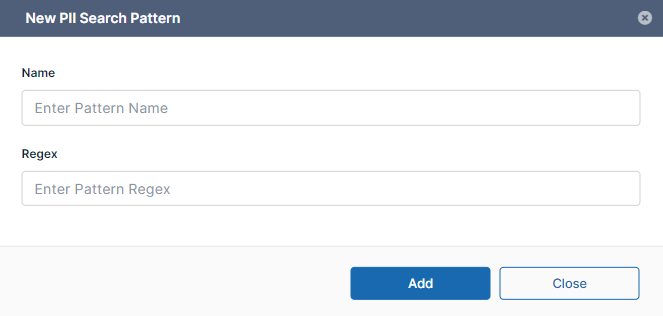
Regex is short for regular expression. This is a special alphanumeric string used to describe a search pattern.
If you need to create a new pattern or edit an existing one, use the following table to understand the Regex format used by FileCloud.
Name Input Type Length of Input RegEx Format Description Identifies the type of protected information - enclosed in square brackets [ ]
- a number range
- uppercase letter range
- lowercase letter range
- enclosed in curly brackets '{ '}
- a number
[Type]{Length} Numerical
Example
U.S. Social Security Number 0-9 (can contain any number 0-9) 3 (for the first number)
2 (for the second number)
4 (for the third number)
[0-9]{3}-[0-9]{2}-[0-9]{4}
012-34-5678
Letter example
Poland Passport a-zA-Z
0-9
2 letters (followed by)
7 numbers
[a-zA-Z]{2}[0-9]{7}
ME0123456