FileCloud Online Quick Start Guide
Active Directory (AD), single sign-on (SSO), and data leak prevention (DLP) features are only available in some versions of FileCloud Online.
Follow the steps in this guide to start sharing and syncing your files through the FileCloud Online service..
Begin by registering for a trial version and exploring FileCloud with the sample users and files we provide you with. Then create your own components to see how FileCloud Online works with your specific use case. When you are ready to go live, we'll remove any test components, but you can keep any that you'd like to use in your live system and continue to build from what you have already created.
1. Register
We host the FileCloud site for you. FileCloud creates the site based on the team name you use when registering for trial. For example: https://<yourteamname>.filecloudonline.com FileCloud sends you an email with your trial username and password as well as links to your user and Admin sites. Log in to both sites with the username and password sent to you. |
2. View and Add User Accounts
User accounts let employees in your company access the FileCloud Online user site so they can share and sync files. When you begin the FileCloud Online trial, two user accounts have been added to the system for you: your user account and the demouser user account.
- To view the user accounts, log in to the Admin portal with the user account and password sent to you in your Welcome email, and click Users in the navigation panel.
The Manage Users screen shows your user account and demouser.
Your user is an Admin user, which means in addition to logging in to the user site, you can log in to the Admin site and perform admin functions. Your user account has access to all administrative functions. The user demouser is not an Admin user, and therefore only has access to the user site. - In order to log in as demouser in the user portal, reset demouser's password in the admin portal:
- Click Users in the navigation panel.
- In the row for demouser, clidk the Edit icon.
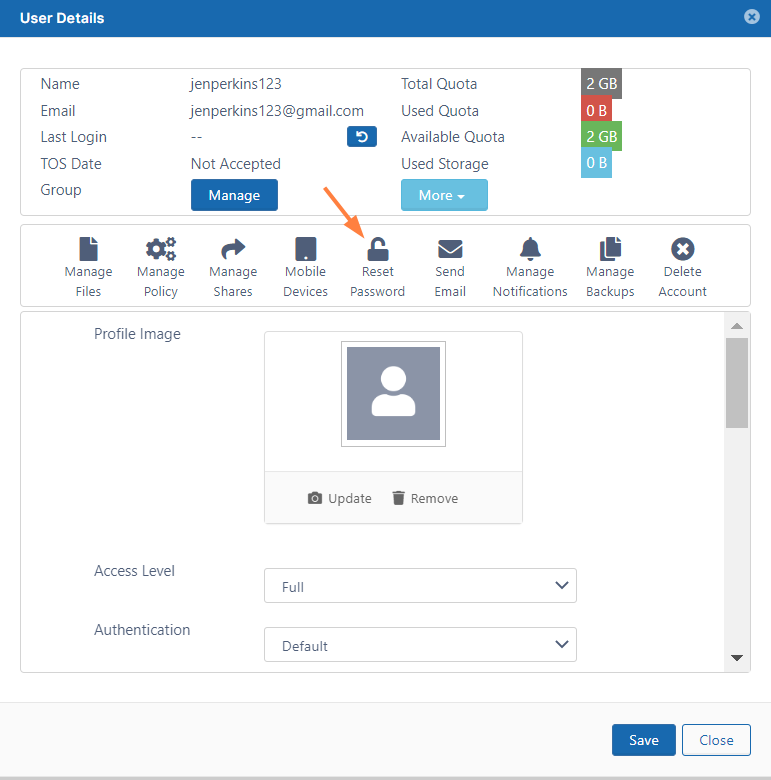
The User Details window opens. - Click Reset Password.
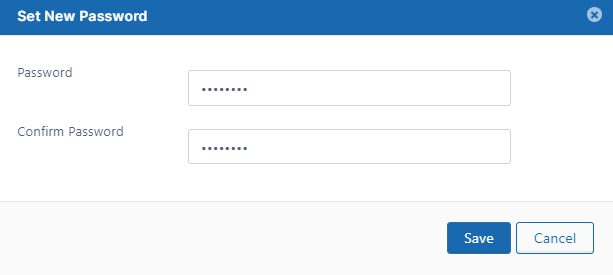
The Set New Password dialog box opens: - Set the new password for demouser and click Save.
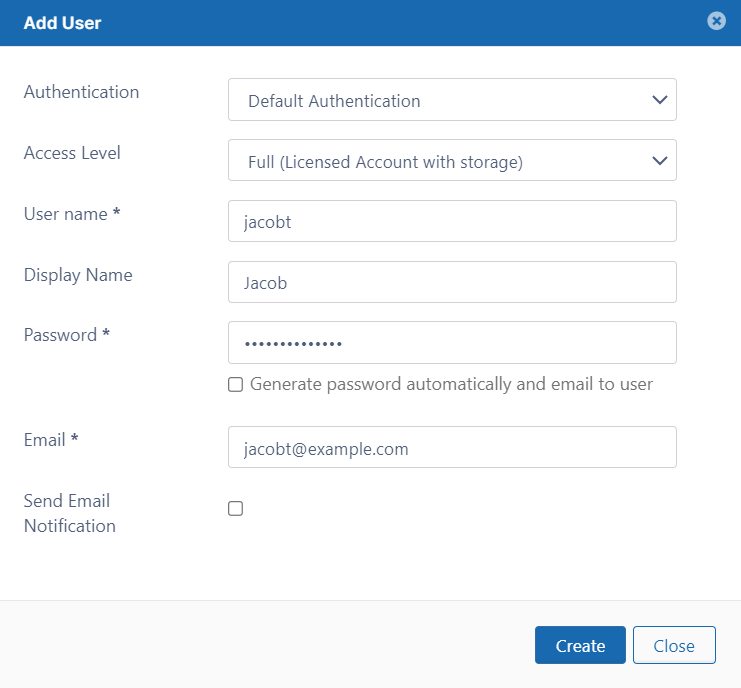
Add additional user accounts and see what users with different levels of permissions can do. See User Account Types for more information about user permissions.
Also see:
Import a user account from AD or LDAP Service
Bulk creation of User Accounts from a CSV File
Managing Groups
3. Configure Team Folders
Team Folders are an easy way to share files and folders among a team. When you begin the FileCloud Online trial, a Team Folders account and four Team Folders have already been set up for you.
To see your Team Folder account:
- In the FileCloud admin portal's left navigation bar, scroll down and click Settings. Then, on the Settings navigation page, click Team Folders .
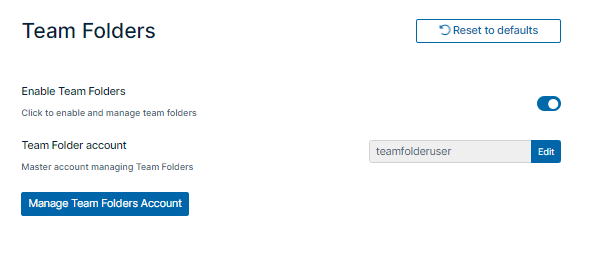
The Team Folders settings page opens.
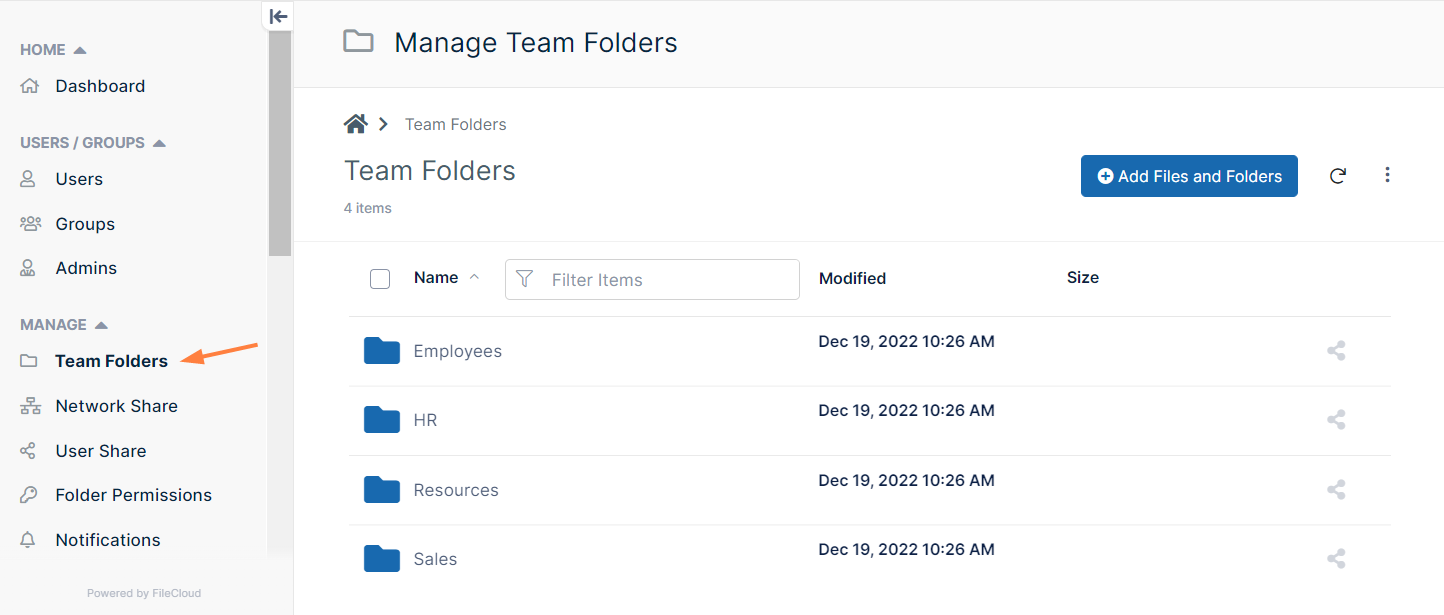
Enable Team Folders is checked, and the Team Folder Account is set up for you with the user teamfolderuser. - Now, click Team Folders in the navigation panel.
The sample Resources Team Folder is listed: Hover over any of the Team Folders, and click the share icon:
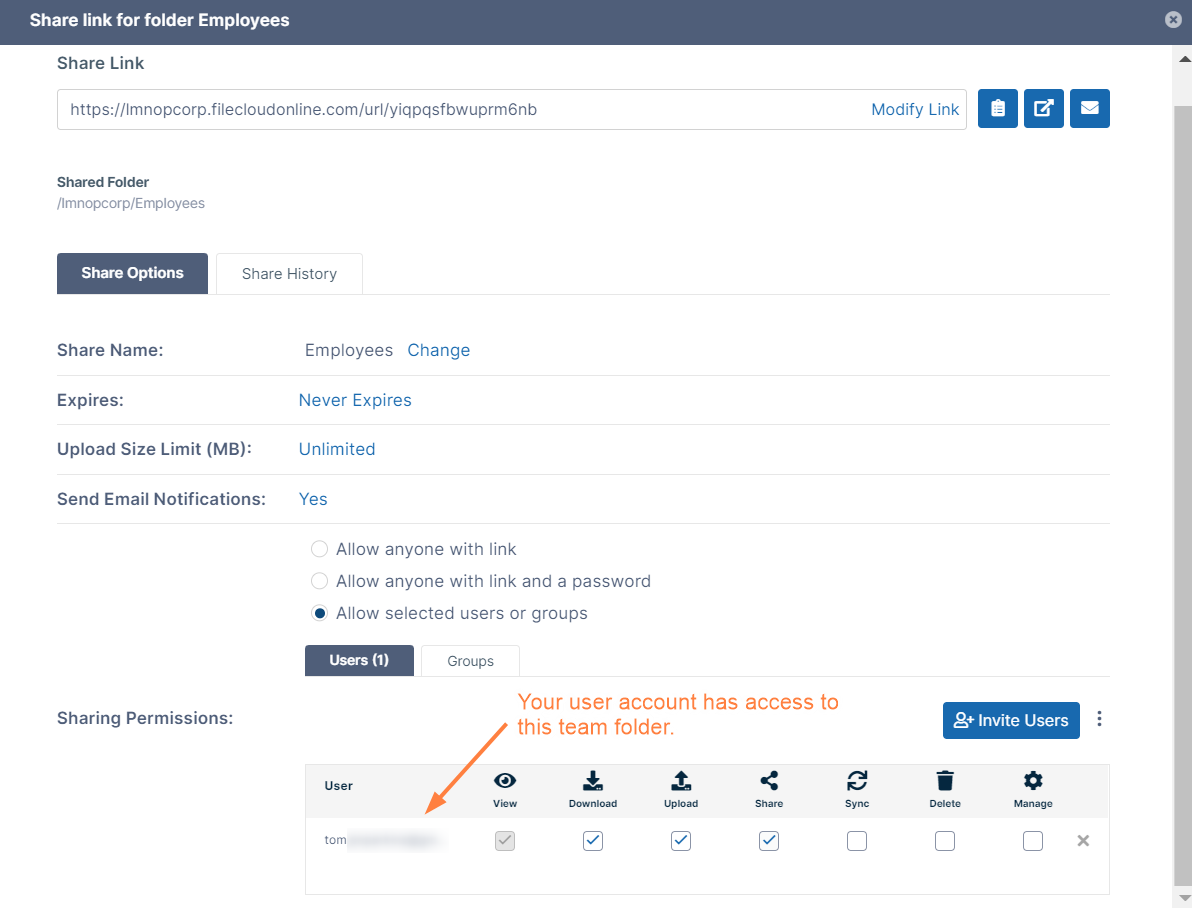
A Share link for folder dialog box opens and shows you which users the Team Folder are shared with and what their access to the folder is. The only user with access to the Team Folders when you begin using the FileCloud trial is your user account. demouser has not been given access to the Team Folders.
If you log in to the user portal using your user account, you'll see that your account has access to all four team folders. If you log in as demouser, you'll see that demouser has access to none of the Team Folders.- Share the folder with demouser.
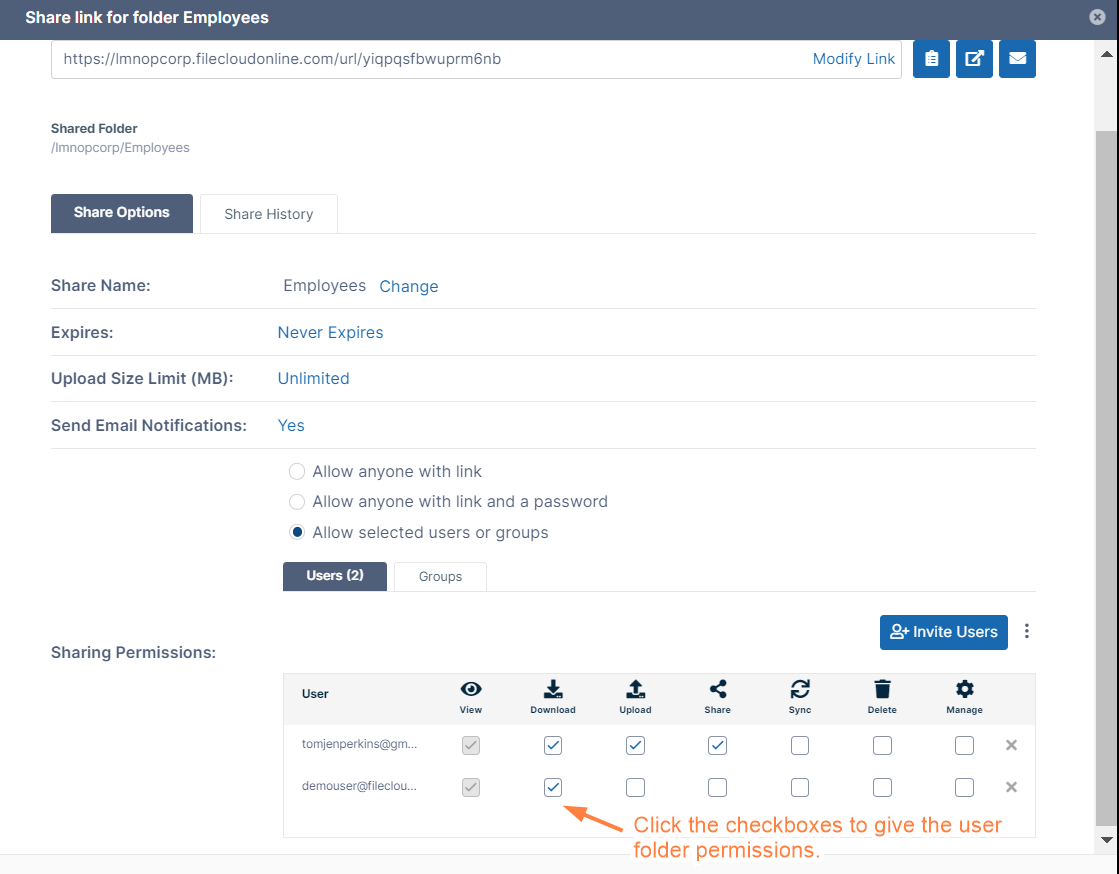
- In the Share link for folder dialog box, click Invite Users and add find demouser in the search box.
- Add demouser to the share.
- Check the boxes in the listing for demouser to give the user permissions to the Team Folder.
- In the Share link for folder dialog box, click Invite Users and add find demouser in the search box.
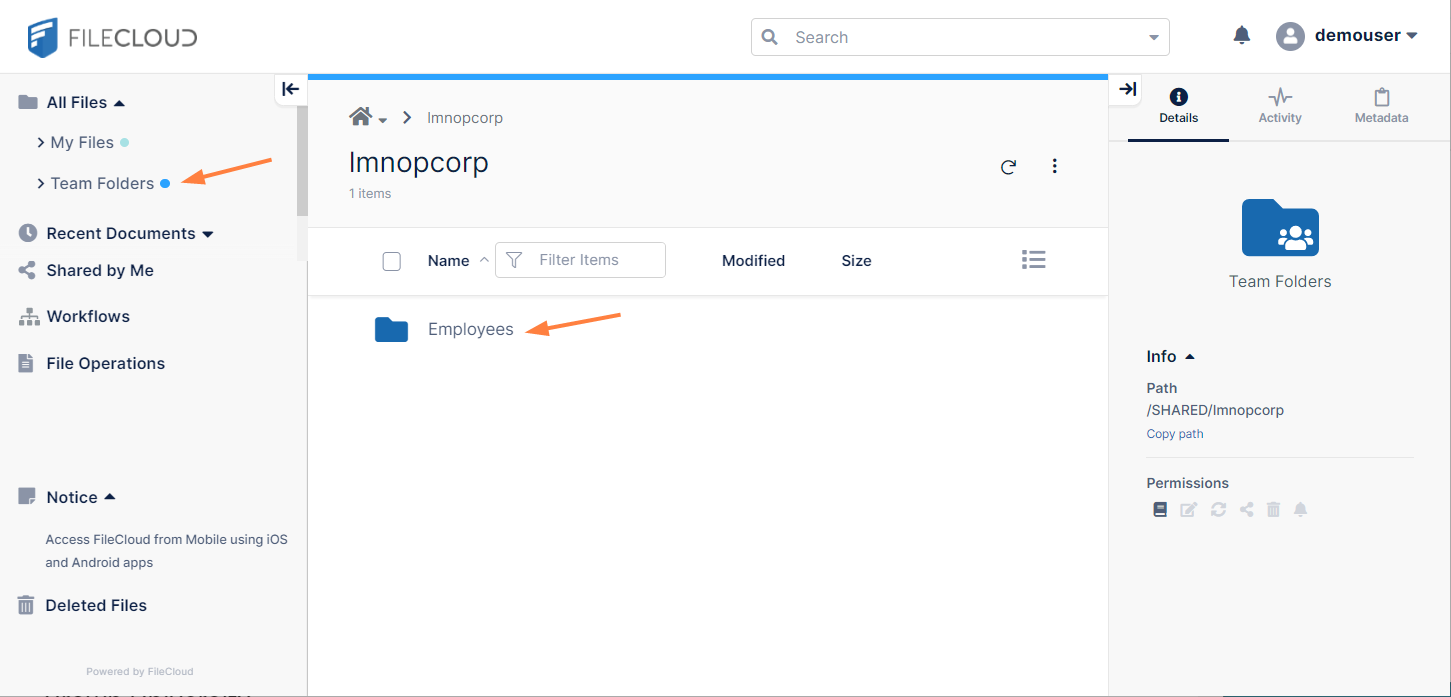
- Log in to the user portal as demouser (or refresh the screen if you are already logged in).
Now demouser lists Team Folders in the navigation panel and has access to the Team Folder you have just shared.
When you set up FileCloud to use with your users, you can set up your own Team Folders. See Seed and Organize Team Folder Data.
Also see:
Share Team Folder and Set Share Permissions for users and groups
Setting Folder-Level Permissions on Team Folders
4. Configure Security
Security means not only verifying the identify of someone who connects to a network resource, but also setting alerts to know when there are problems and setting permissions on folders shared on the cloud.
| Administrator | To manage security, choose how you want to secure your resources:
Manage Folder Level Permissions
|
To maintain your FileCloud Online site, see FileCloud Online Administrator Tasks.
5. Work in the User Portal
Once you have the site configured, you can log in to the user portal to see how your end users will experience FileCloud.
To help you see how file sharing works, your trial installation includes a file shared by demouser with your user account.
To view the file shared with you:
- Go to https://[yourcompanyname].filecloudonline.com and log in with the account and username originally sent to you.
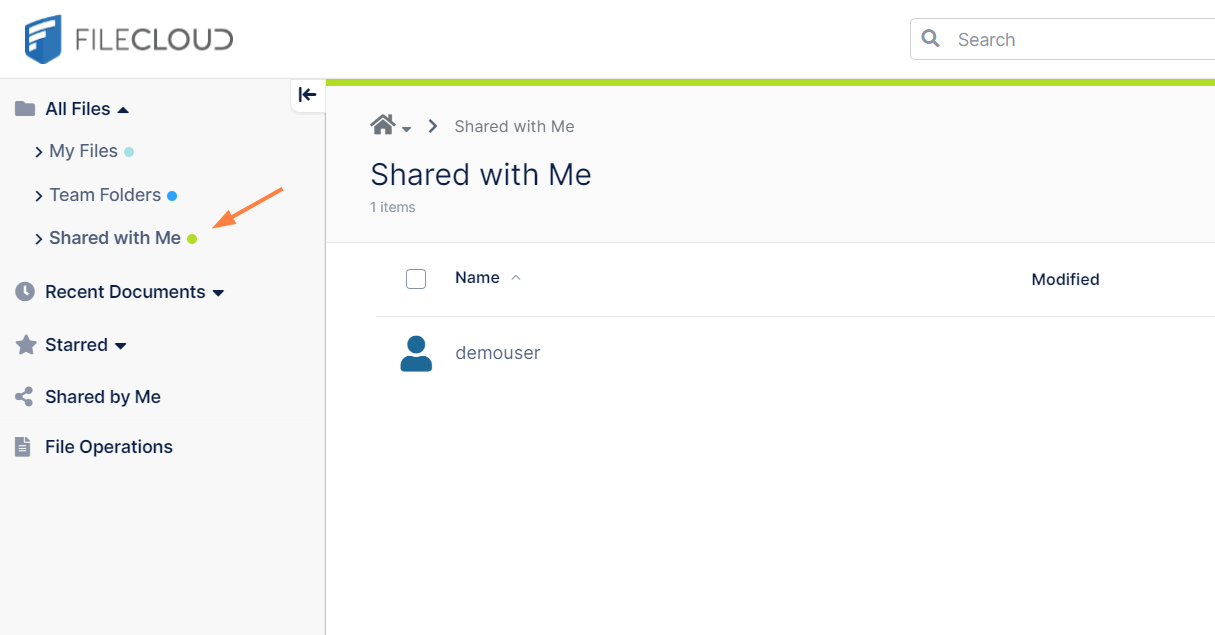
- In the navigation panel, click Shared with Me.
In the Shared with Me screen, demouser is listed. Any other users who shared files with you would also be listed. - In the Shared with Me screen, click demouser.
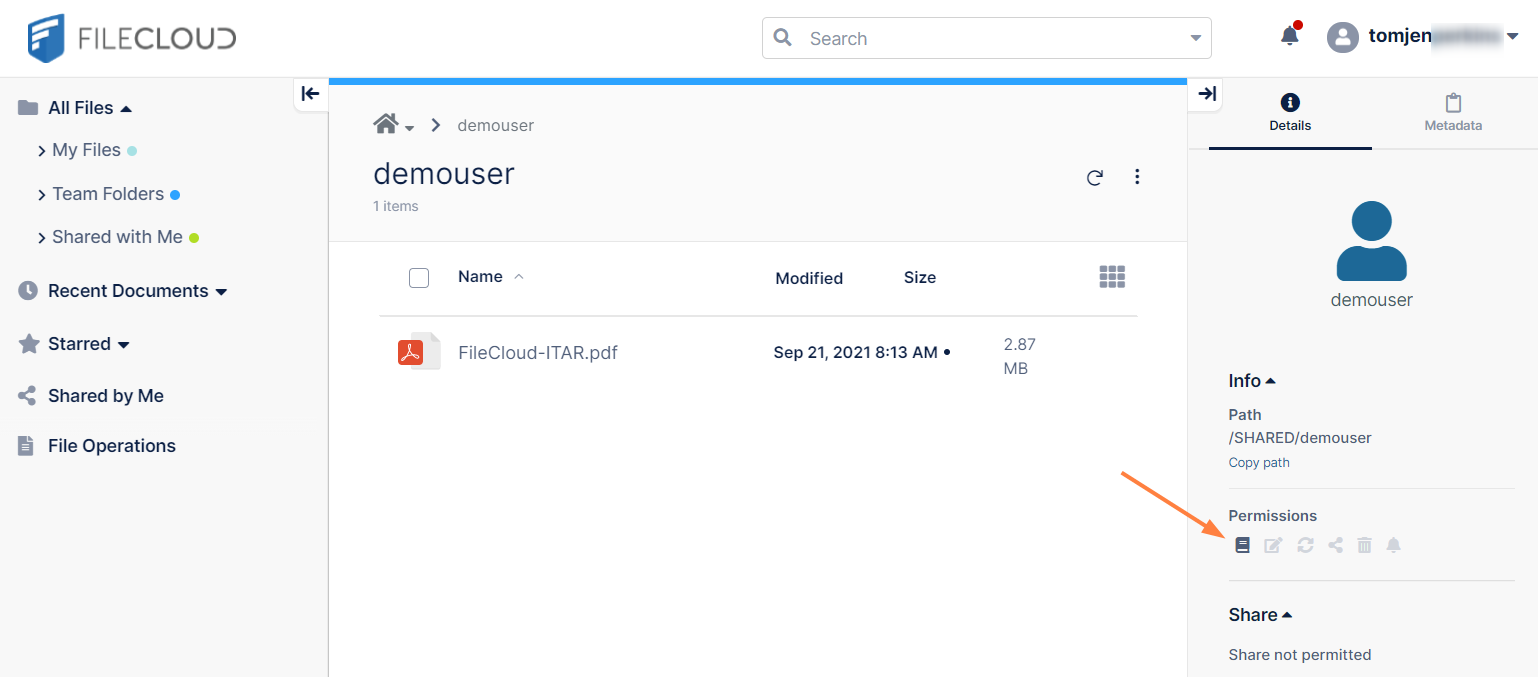
The file shared with you by demouser, FileCloud-ITAR.pdf, appears.
If you look in the Details tab of the right panel, you can see that the only permission you have for this shared file is view/download. - To see how the shared file appears to the user who created the share, log out, and log in as demouser.
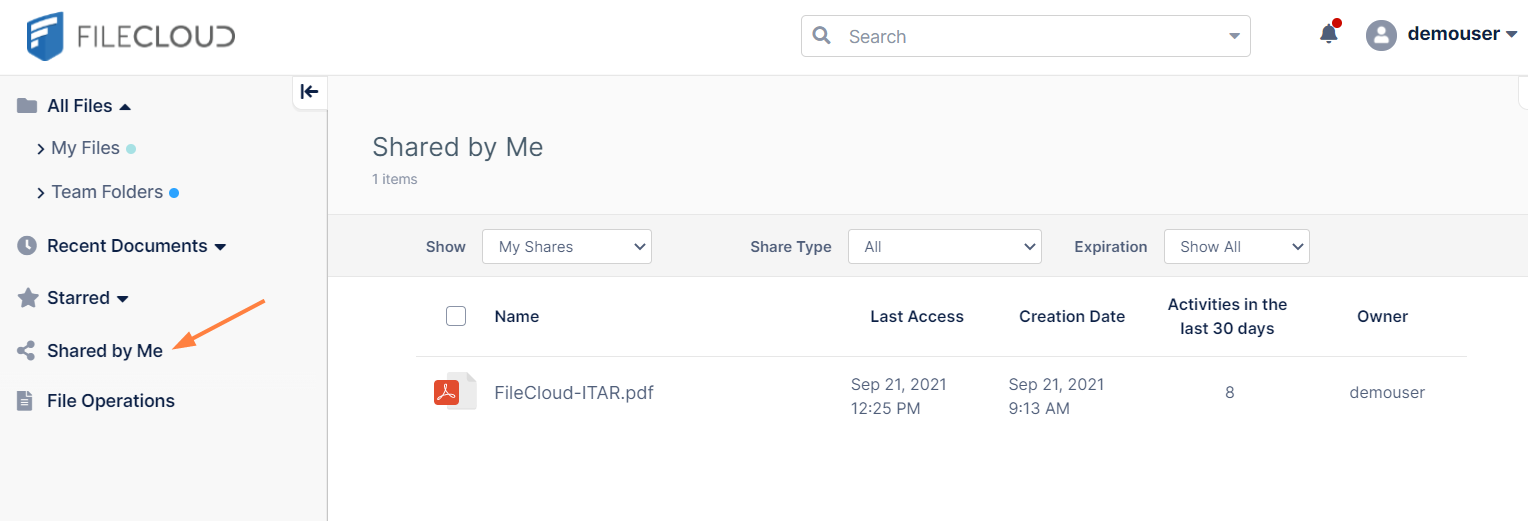
- Click Shared by Me.
The file shared by demouser, FileCloud-ITAR.pdf is listed on the screen.
For links to more end user features available to FileCloud Online users, see FileCloud Online User Tasks


