One of the most frequent use cases of FileCloud is “sharing files securely with an external user.” By default, FileCloud enables all types of shares (public, public with password-protection, and private shares), with a focus on security and collaboration.
In this article, we will review the recommended configuration to securely share files to external users and use External Accounts (free user accounts) to improve traceability and auditing.
Types of Shares in FileCloud
FileCloud gives you the option to use public and private shares; in essence, you can do the following:
- Share a public link.
- Share a public link with a password.
- Allow selected users or groups to access the link (private).
Share a Public Link
The default share option in FileCloud is to share a public link. This will allow anyone with the link to view, download, or upload (depending on your choice).

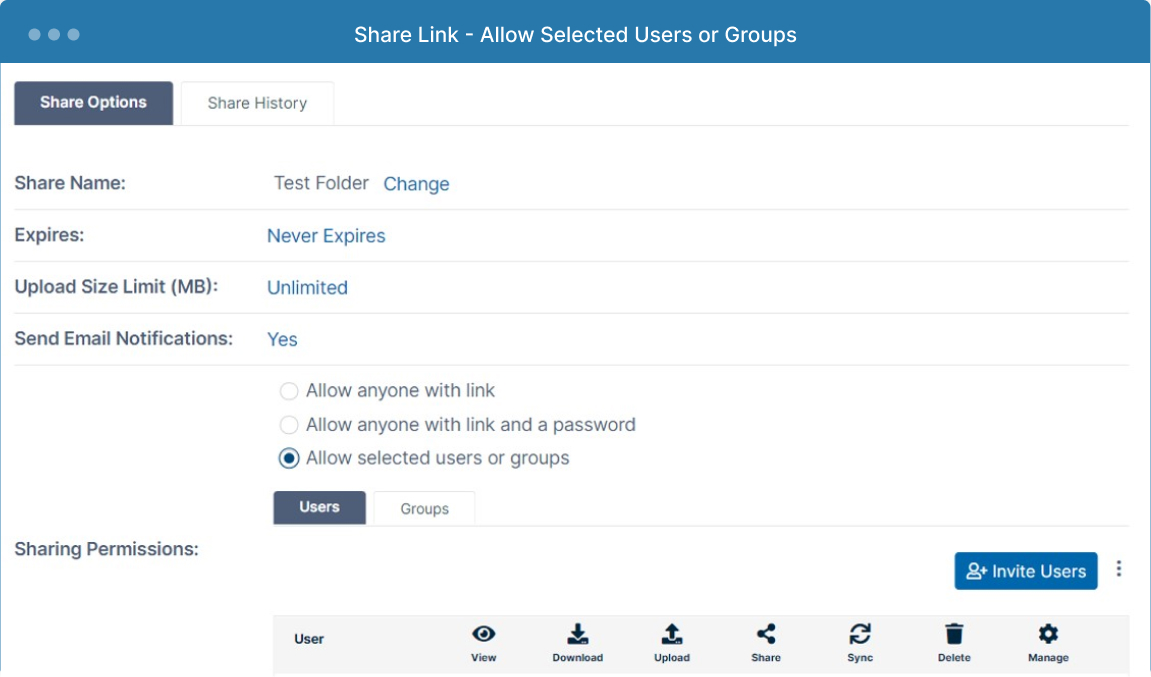
Allow Selected Users or Groups
The third option is to share a link to a selected list of users or groups. These users can be external users, and their accounts can be created while creating the share.
You can “Invite users” with this type of share and create their accounts on the fly in the background. First though, you need to configure some settings to enable the account creation option.
Configure FileCloud to Create User Accounts with Shares
To create accounts when creating a new share, the following settings need to be applied in the admin portal:
Adjust the Admin settings to allow the creation of new accounts for external users.
Log in to your admin portal and go to Settings > Admin, and set the following values:
Allow Account Signups -> True
This will allow accounts to be created automatically in the background.
Automatic Account Approval -> 3
This configures the system so that “Limited” or external accounts are the default account to be created in the background.
Note: External User Accounts don’t count towards your license; you can create as many as you need. These accounts have a few limitations: they can only be accessed via the web browser (no applications), and you can only share files with external user accounts from the User UI, not from the Admin UI (for example, Team Folders cannot be shared).
Allow accounts to be created when creating a new share.
In your admin portal, go to Settings > Policies and edit the “Global Default Policy.” Then go to “User Policy” and change the following values:
Disable Invitations to New Users -> No
This configures the system to “send” invitations to new users. (Default Value: No)
Create account on new user shares -> Yes
This configures the system to “allow” the creation of new accounts “when” creating a new share. (Default Value: No).
Changing these settings will allow accounts to be created in the background when creating the share.
Configure FileCloud to Only Create Private Shares
Now that external accounts are allowed to be created in the background, the next step is to restrict the type of shares that can be made. For that, go to Settings > Policies > Edit the Global Default Policy. Then select the “General” tab.
Share mode -> Allow Private Shares Only
This configures the system to only allow the creation of private shares.
How Sharing Works After Configuration Changes
After the configuration changes are made, when you create a new share, this is the result:
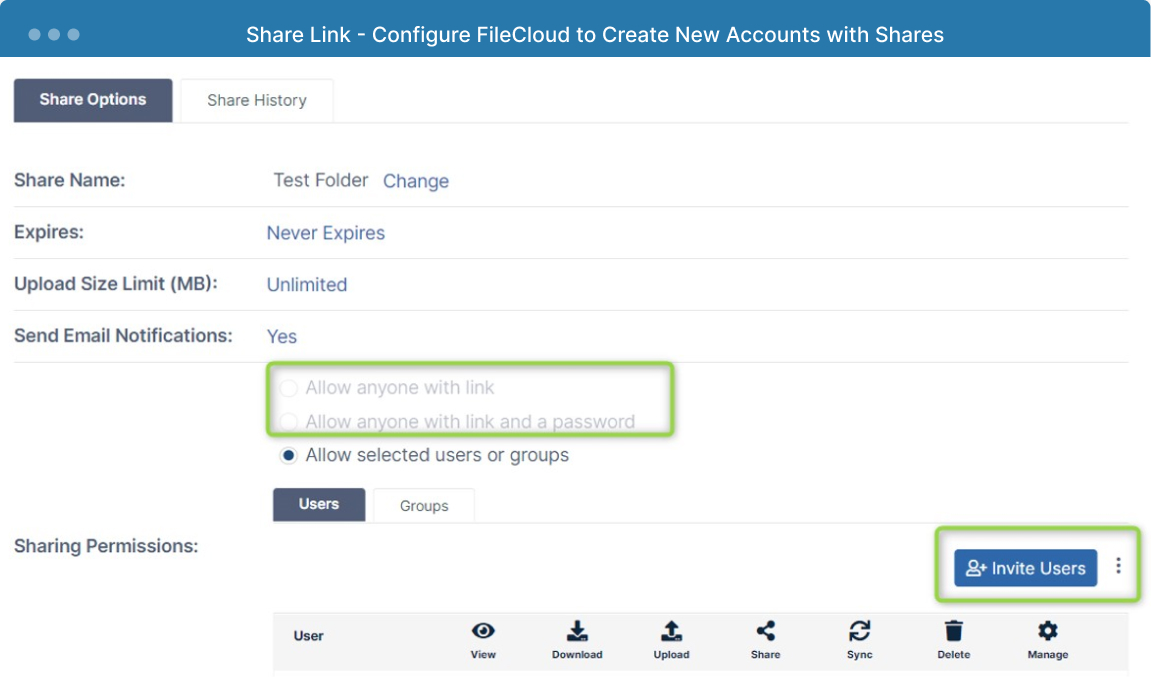
The option to “Allow selected users or groups” is selected by default, with the options to “Allow anyone with the link” and “Allow anyone with link and password” disabled.
Note: The ability to invite users and enable “Private Shares Only” is a setting based on Policy Group. This means that you can apply these restrictions to a subset of your users and still allow other groups of users to create different types of shares.
Add an External Account to the Share
To invite a new user, you need to click on the “Invite Users” button; this will open the invite window; write the email address of the external user you want to add, then click on the “Invite” button below the email address. You can add multiple new users in the same way; once completed, click on the “Add Users to this Share” button.
Once you have added all the emails necessary to your share, you can check the sharing permissions desired for the users in the original share link box.

Now, those two accounts have been created as “Limited User Accounts” in the background; you can confirm these external accounts have been created by visiting the Admin UI > Users section.
The External User Experience
After adding the account to the share, the External User will receive two emails. If you checked the “send email” box when adding them, they only receive one.
Welcome to FileCloud Email
The first email they receive is the Welcome to FileCloud! Email. This email includes the Server URL, user email, and login password.
Shared Files Notification Email
This email includes the name of the “Full User” that has shared files with the “External User.” Additionally, it consists of the Folder Name (if you share a single file, they will get the single file name) and the share link URL to directly click on it.
Once the external user logs in, they will gain access to the shared content.
Improve Traceability and Auditing with External Accounts
Following our example, the external user uploads a PDF file.
The Full User can view shared document and folder details, including “Activity,” which shows who uploaded the file, to which folder, and when. Without an External User account, this file information would show as uploaded by “ANONYMOUS.” With an external account, the file information includes the user’s information.
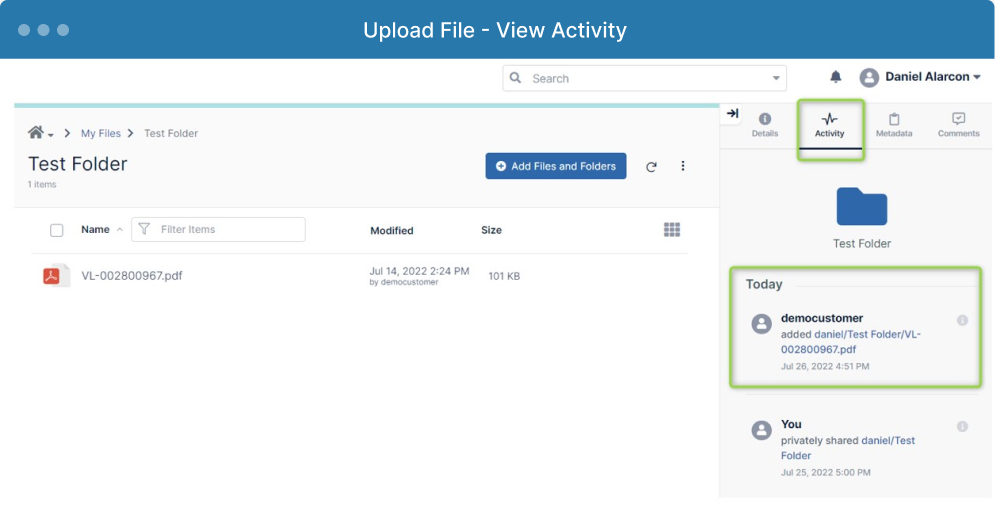
If you click on the “i” icon to the right of the username, you can view details like the IP address, date, and time of when the file was uploaded.
Collectively, external user accounts provide more information about your external shares and help you identify when a user uploads/downloads or takes any action on shared content.
In following blog posts, we will discuss how to maintain these External User accounts automatically and enable 2FA.
Article written by Daniel Alarcon and Katie Gerhardt

Product Marketing Manager