SSL certificates are a routine security recommendation when it comes to hosting data on a server. Specifically, SSL certificates enable end-to-end encryption for web servers when it comes to data transfers with HTTP protocol. This security is typically displayed by changing a URL from http to https. An icon such as a padlock may also be used to visually indicate that the site or server is secure.
FileCloud is a content collaboration solution that can either be self-hosted on private infrastructure or hosted by us. For self-hosted instances, FileCloud recommends installing and maintaining an active SSL certificate. This is a significant measure you can take to provide greater security for your data.
This blog post will cover how to purchase, configure, and verify an SSL from a trusted third-party provider in five easy steps.
Step 1: Generate the CSR for the SSL Certificate
A CSR or certificate signing request is generated on the server where the SSL certificate will be installed. The CSR is created by the Certificate Authority and contains the following information:
- Legal name of the business or organization
- Domain name
- Identification for the person or unit responsible for managing the certificate
- Geographic location (city, state, and country)
- Email address
For these step-by-step instructions, we are using the domain name example.com for demonstrative purposes.
To generate a CSR, run the below command in the windows CMD or Linux Shell:
openssl req -new -newkey rsa:4096 -nodes -keyout example.key -out example.csr

Enter the required information to generate the CSR for the SSL:
- Country Name (2 letter code): [AU]
- State or Province Name (full name): [Some-State]
- Locality Name (e.g., city, county): []
- Organization Name (e.g., company): [Internet Widgits Pty Ltd]
- Organizational Unit Name (e.g., section, division, department): []
- Common Name (e.g., server FQDN or YOUR name): []
If you are generating a CSR for a wildcard certificate, then the common name should be *.example.com
Step 2: Purchase an SSL Certificate from the Desired Vendor
In this tutorial, we are purchasing a wildcard COMODO SSL from SSLBUY.com. You can apply the same steps to any SSL vendor.
Log in to the platform of your selected vendor, then purchase the SSL.
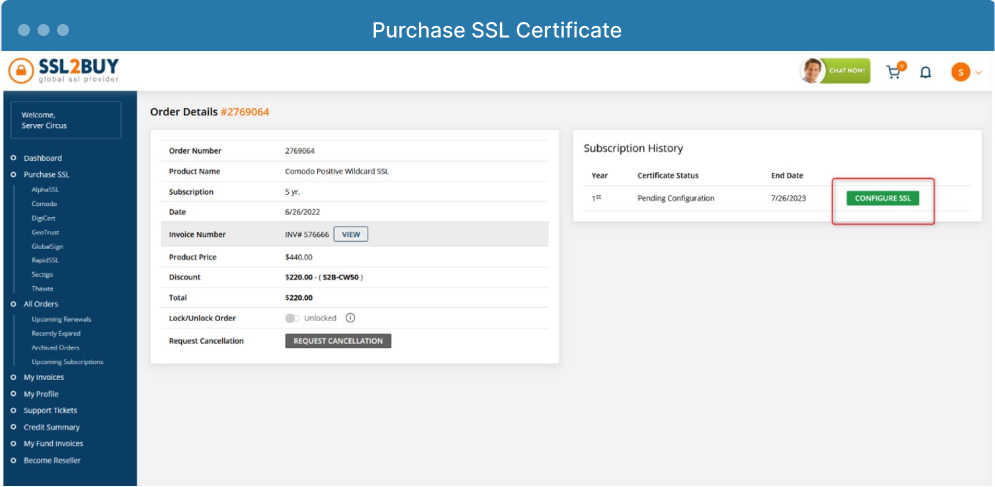
Step 3: Configure and Verify the SSL
Click on “Configure SSL” and submit the CSR generated earlier.
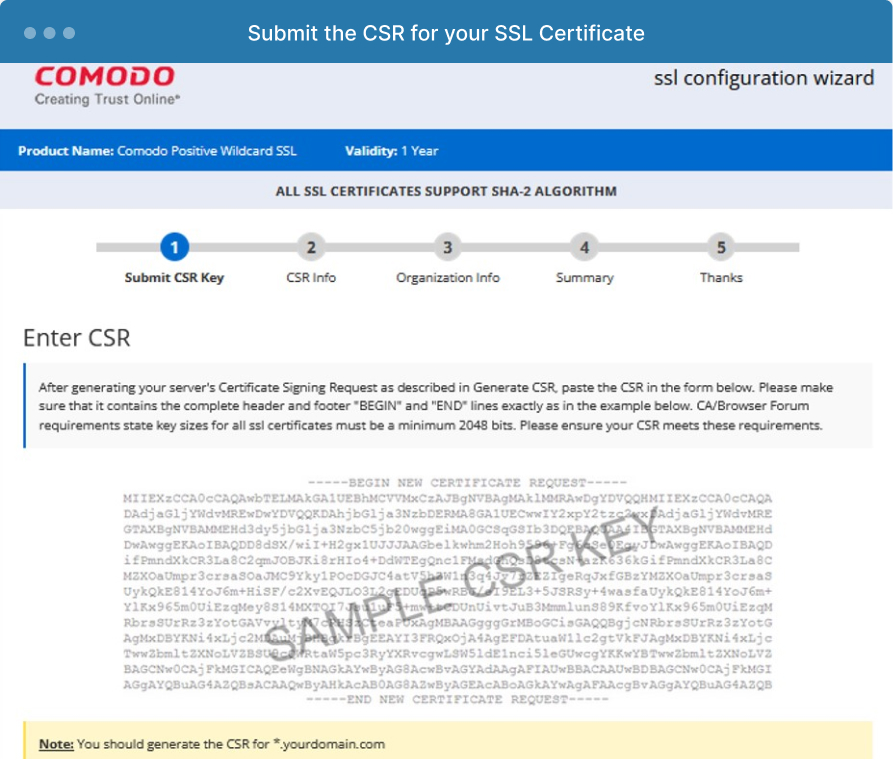
Click on “Continue.”
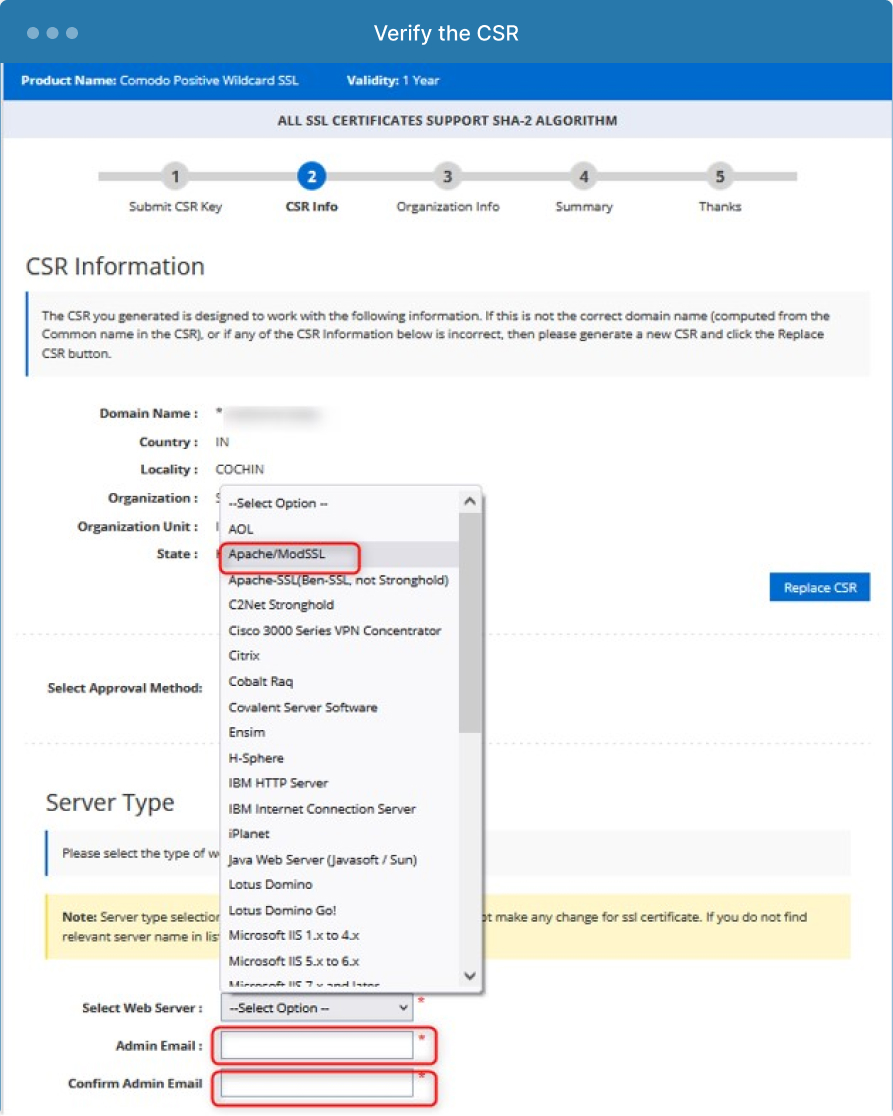
After this step, you will see the information from the CSR and verify that the CSR mentioned is correct.
Choose an SSL approval method with one of the two methods:
- Add CNAME in the DNS record of the domain that requires an SSL
- Email approval
In this case, we are choosing email approval and the web server should be Apache.
Enter the admin email and confirm the admin email by re-entering it again as in the screenshot below:
Step 4: Complete Verification
If you chose email verification instead of DNS verification, you will be redirected to the SSL provider site to enter the confirmation email address.
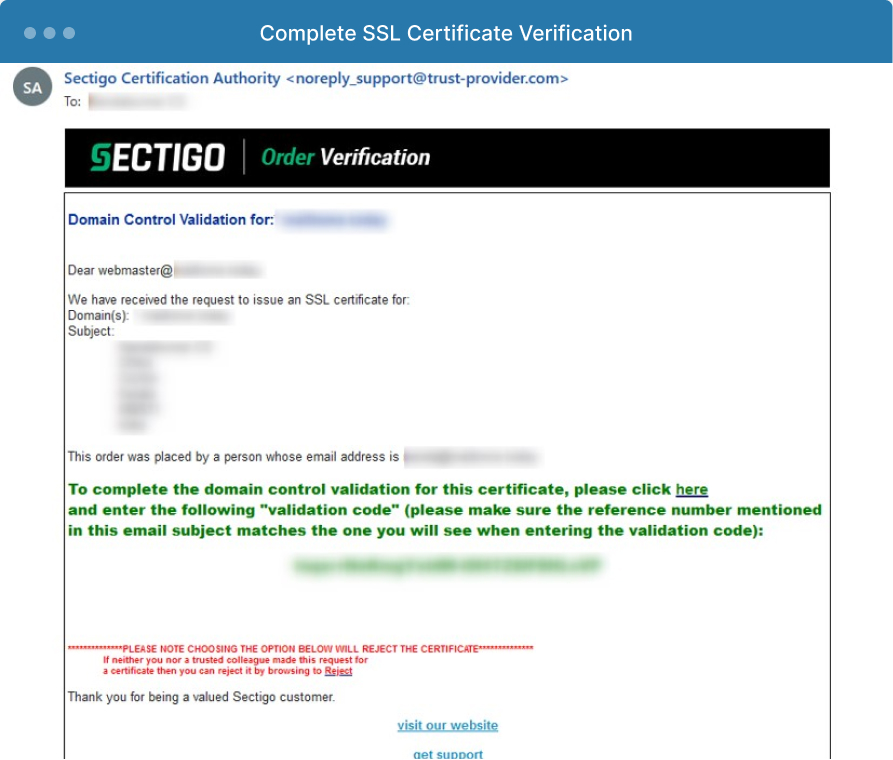
Once you have completed the verification steps with the SSL vendor, you will receive an email confirmation for the SSL. This email serves as the verification and confirms the domain is under your control. There will be a link for the verification in the email; click the link and enter the verification code in the directed space.
Step 5: Download the SSL Certificate
After verification is complete, download the SSL certificate from the SSL vendor. Alternatively, an email may be sent to the admin email address with SSL certificates attached.
Conclusion
Once the SSL has been downloaded, install the SSL certificates on your FileCloud server by following our documentation, depending on your operating system: Windows | Linux. You can also check out this blog post, which provides a specific step-by-step example of how to configure and install a wildcard “Lets Encrypt” SSL Certificate with Ubuntu 20.04 LTS on a multi-tenant site.
With an SSL certificate in place, you can rest assured knowing your data in transit is encrypted, which creates another layer of protection for your important files and processes.
Article written by Nandakumar Chitra Suresh, Technical Support Lead | Edited by Katie Gerhardt, Junior Product Marketing Manager

By Katie Gerhardt
Jr. Product Marketing Manager