What is the difference between Share Permissions and Folder Permissions?
We are continuing our “Getting Started with FileCloud Online” series. In this article, we will address a common question: What is the difference between Share Permissions and Folder Permissions?
(Missed the first post? Check it out here – Part 1: Create Users, Groups, & Storage Policies)
FileCloud makes secure file sharing easy and simple with the option for users to share files and folders and set certain protections. Admins can also create policies that serve as file sharing guard rails (like Data Leak Protection rules or Retention policies).
Sharing files or folders is a highly specific action taken by a FileCloud user (or perhaps an automated workflow, but that’s a topic for another post). The user initiating the share can modify certain settings, including:
- Public share link vs Private (internal) share
- Password-protection
- Zero Trust (encrypted Zip folder) share
- Share expiration
- Recipient permissions:
- Write (modify), upload, share, download (limited or unlimited)
So how does that differ from “Folder Permissions”?
The answer to this question of permission types (share vs folder) lies in FileCloud’s Team Folders. These folders provide a centralized, collaborative workspace for users. For the best user experience, managing access permissions can be streamlined and automated through folder permission policies.
To better visualize this use case, we’ll explore an example:
- Sample Company needs to provide the sales team with a shared folder where they can create folders for their customers and share information.
- The sales manager wants to grant access to this folder to the sales team, and he wants to be able to restrict access to some subfolders to the rest of the team.
Leveraging Folder Permissions
Folder permissions in FileCloud are useful because they organize access, sharing, downloading, and other actions based on the folder location of the data.
Say we have a folder and we only want to grant access to a subset of people in our directory. It can save time and effort for the admin to enact a folder policy that will automatically enforce the exact permissions necessary to protect that data without impeding collaboration.
This is especially useful for organizations that need to meet compliance requirements stipulating that data must only be accessible to people who have a legitimate business interest or operational need.
Now that we understand a little more why folder permissions are useful, let’s explore how to create them.
Step 1: Add Users and Manage Groups
The first step is to add the team members to a user group in FileCloud. You can find step-by-step instructions on how to add users and create groups in part 1 of this series. In brief:
- Log into the admin UI and go to the user section.
- Add two new users.
- John Doe (John.Doe@democompany.cloud)
- Jane Doe (Jane.Doe@democompany.cloud)
- Create a new group.
- Add the users to the group.
Step 2: Enable Folder Permissions
Now that we’ve identified who we want to impact (the users in the Sales Team group), we can move on to the next factor: what is it that we want to happen? Well, we want the Sales team to be able to access a specific Team Folder in FileCloud.
To create this permission, first, we must ensure that FileCloud is configured to use Folder permissions.
Enable Global Setting to “Apply Folder Level Security”
Log into the admin portal and navigate to: Settings > Misc. Enable “Apply Folder Level Security” and click save:

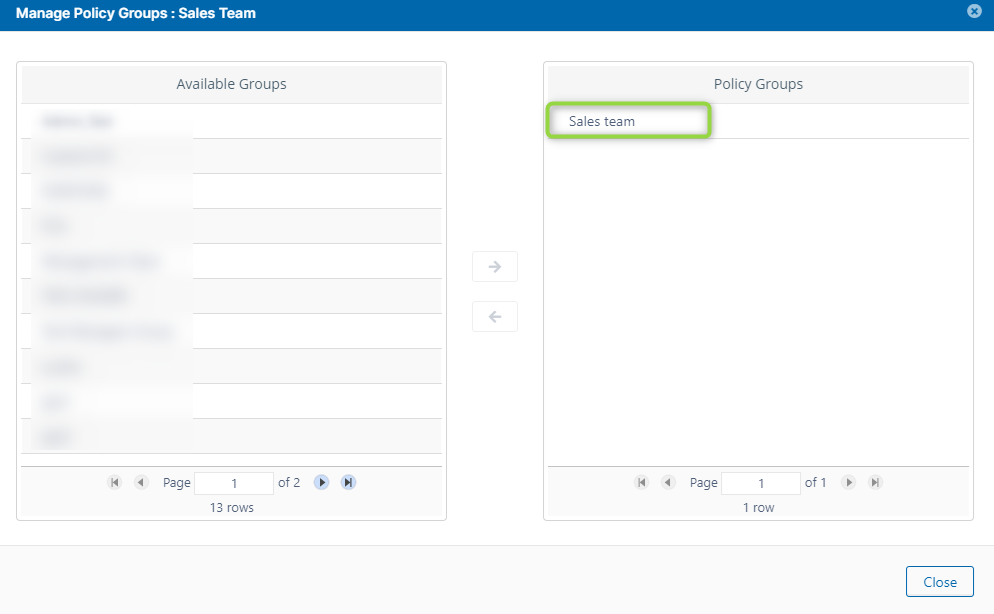
Create a New Policy Group
For the sake of our test scenario, we created a new policy group named “Sales Team.”

Add the “Sales Team” user group to the policy, then save and close.
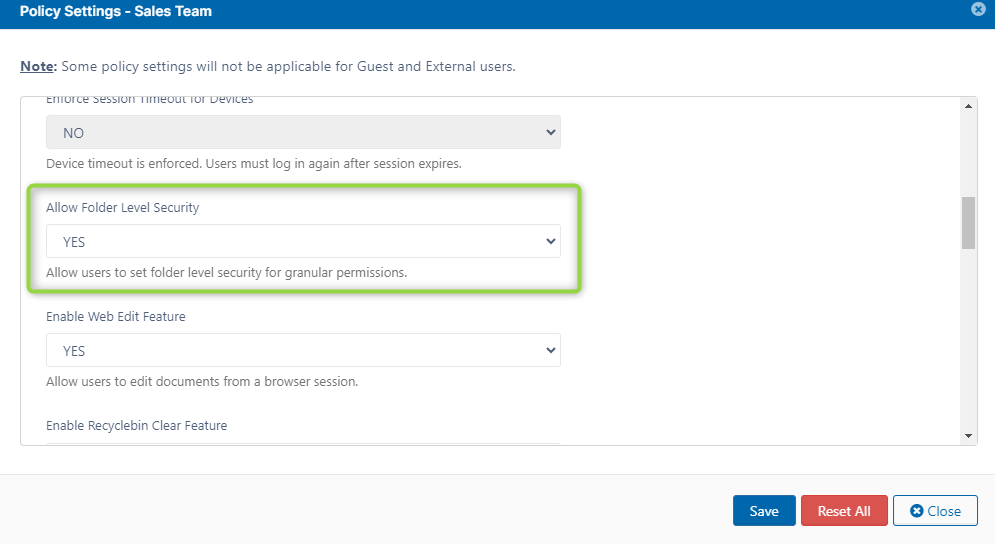
Edit the Policy
Now we need to edit the policy itself. Go to the Policy tab, scroll down to the setting “Allow Folder Level Security,” select “Yes,” and save the changes.
Step 3: Create and Share a Team Folder
Now that we have a “Sales Team” user group (who will be impacted) and a “Sales Team” policy enabling folder-level permissions (what we want to happen), we need to create a space for our actual sales team members to collaborate on content (where this will take place).
Create New Team Folder
In the admin UI, navigate to the Team Folders section and create a new folder. For our example use case, we’ll name it “Sales Team.”
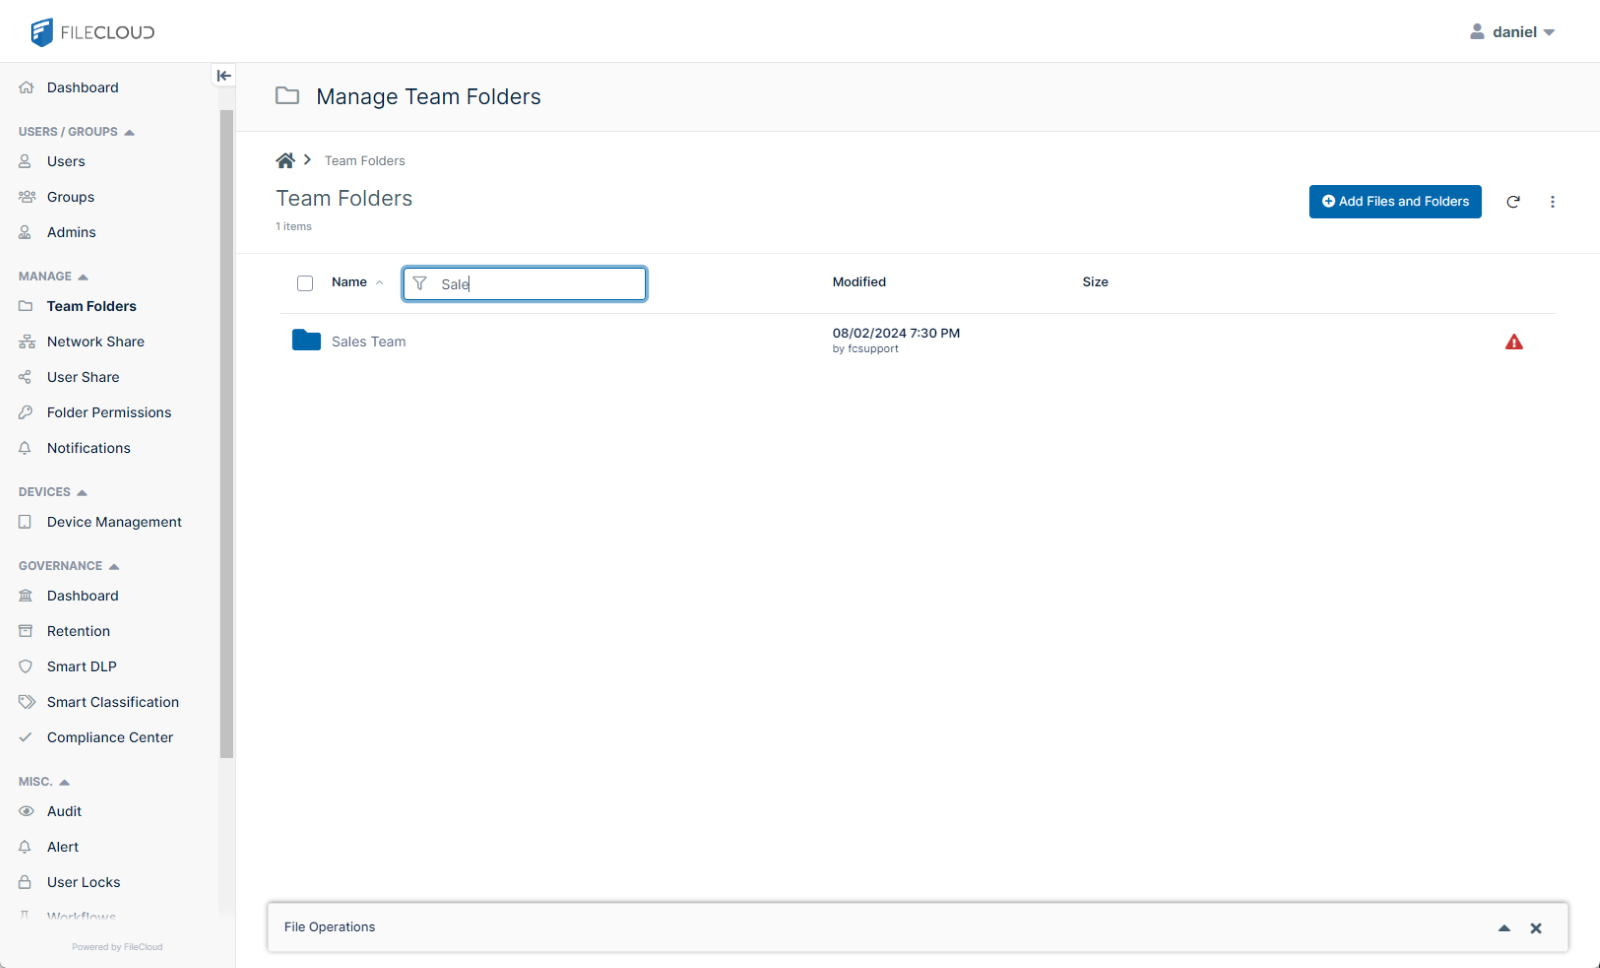
Share the Team Folder
Once created, an exclamation icon appears to the right of the folder. This is a visual reminder that the folder hasn’t been shared with any users or user groups (yet).
To remedy this, we need to mouse over the team folder to display the action bar.
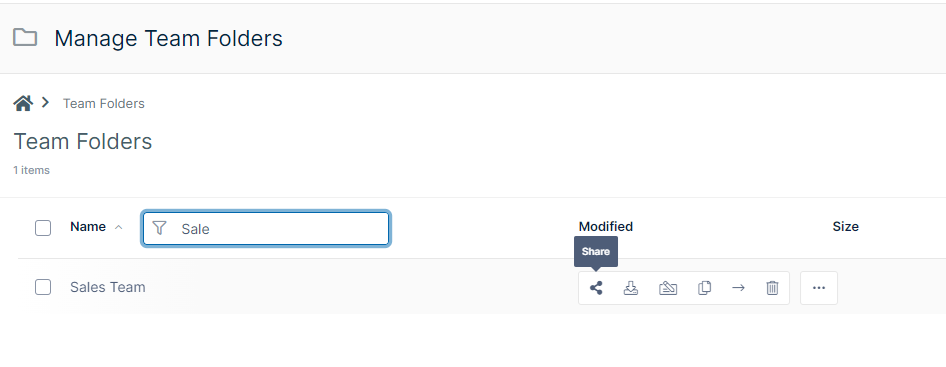
The first option in the bar is to share the folder. Click on the share button and add the “Sales Team” user group.

Now, any user who is also part of the Sales Team group will have access to the “Sales Team” Team Folder.
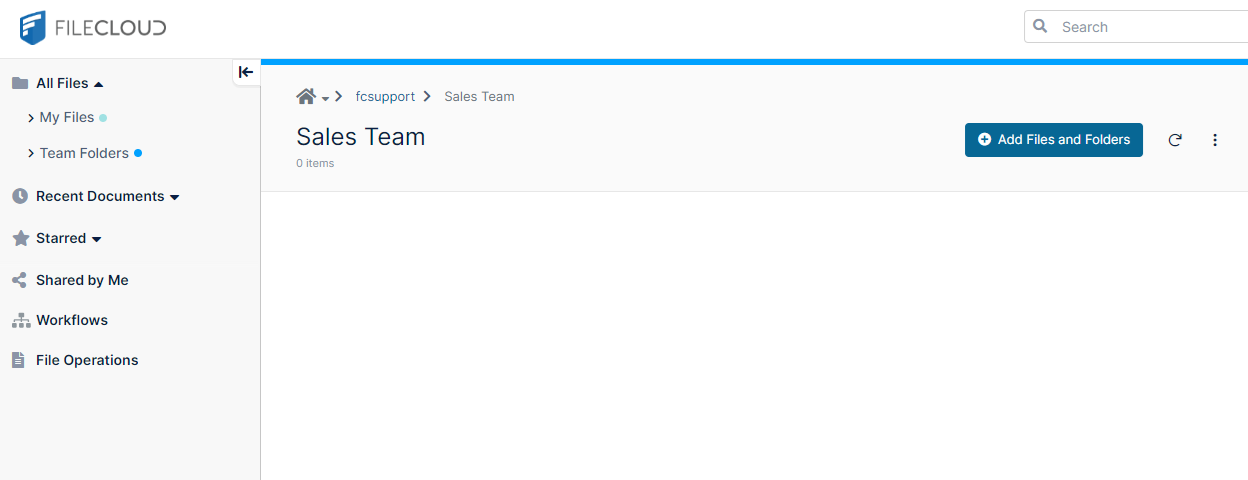
If we log in with any of the accounts sample user accounts we created at the beginning (Jane or John Doe), we can see what the team folder looks like from the user interface:
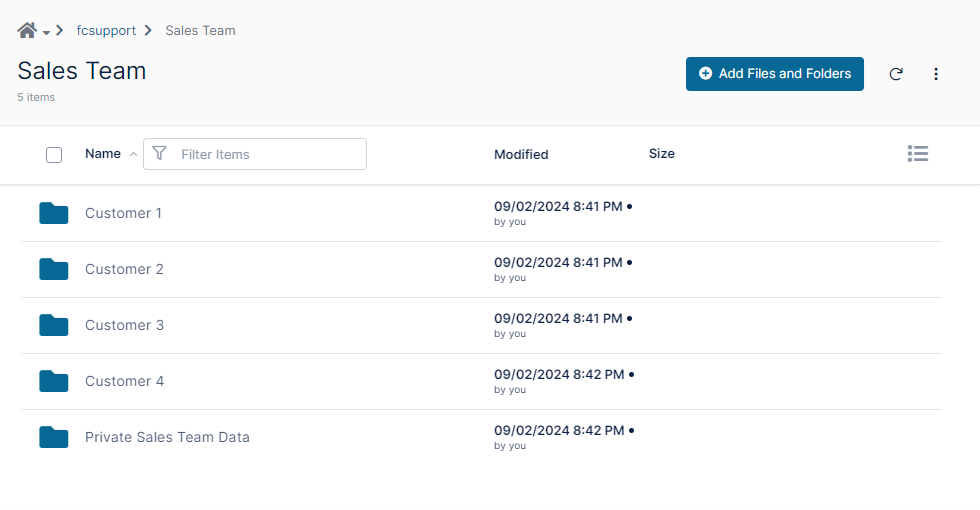
Step 4: Populate Team Folder with Sub-folders
Let’s create some folders, so our users can keep their work organized!
Step 5: Restrict Sub-folder Access
After we’ve created our sub-folders, we may want to segment access permissions so that only specific team members can access specific sub-folders within the larger Team Folder space. This is also referred to as granular permissions.
This concept is also referred to as “least privilege” within the Zero Trust framework. Essentially this means that individuals should have the least access privilege possible for them to carry out their job duties.
In our example, the sub-folder “Private Sales Team Data” probably doesn’t need to be visible to everyone on the Sales team. Let’s fix that real quick.
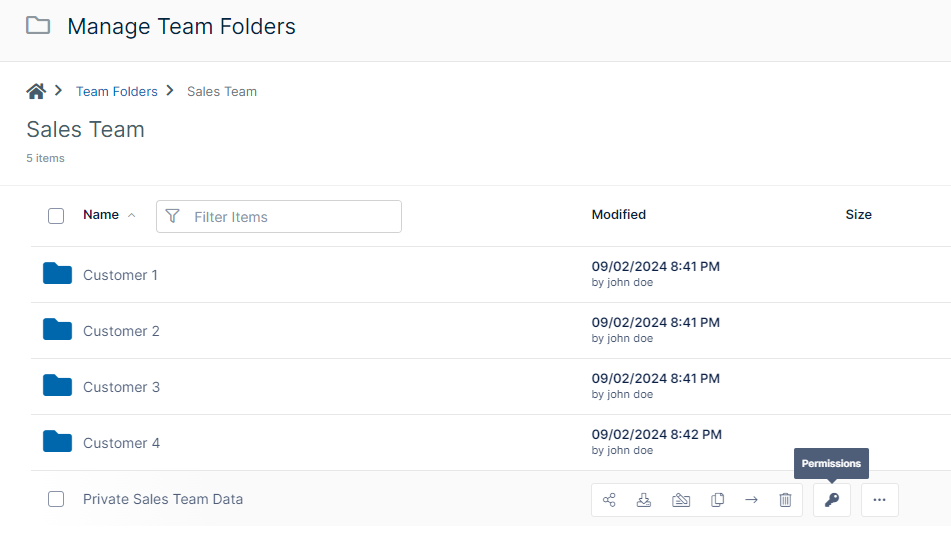
Adjust Sub-folder Permissions
From the admin interface, we need to open the team folder, “Sales Team.” Then we’ll mouse over the last folder to display the action bar and click on the key icon for permissions.
This will open up the Permissions menu:
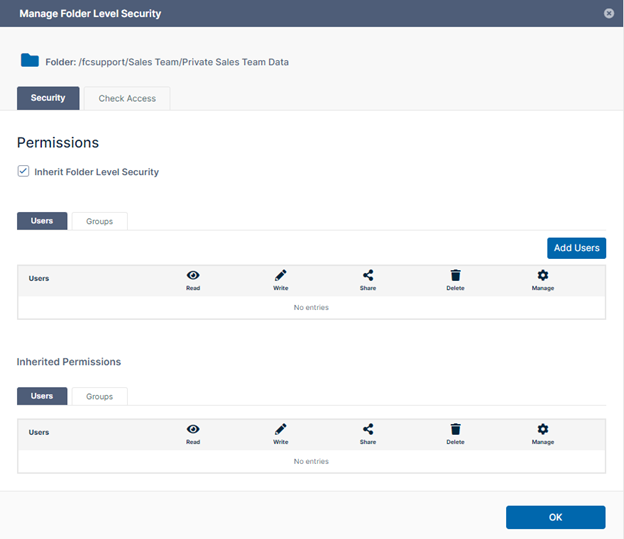
We want to restrict access to this private folder to our Sales Team manager, Jane. We don’t want John to even be able to see this folder in his interface.
You might think that we would start with Jane, because we want to enable her access. However, bearing the “Least Privilege” concept in mind, the user permissions we actually want to modify are John’s.
Adjust User Permissions for Sub-folder
Click “Add Users” to open a dialog box. Then type the user ID or email address into the search bar, select John Doe, and click “Add.”
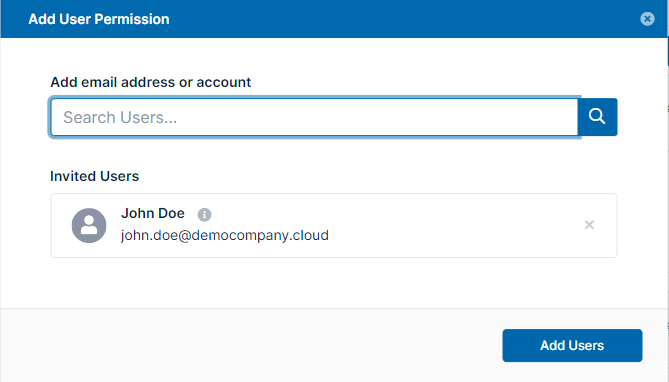
This will add John to the list of users, with all permissions automatically enabled.
But this is the opposite of what we want! Stay with us though – it will all become clear with a simple modification…
Uncheck the boxes across all permission columns.
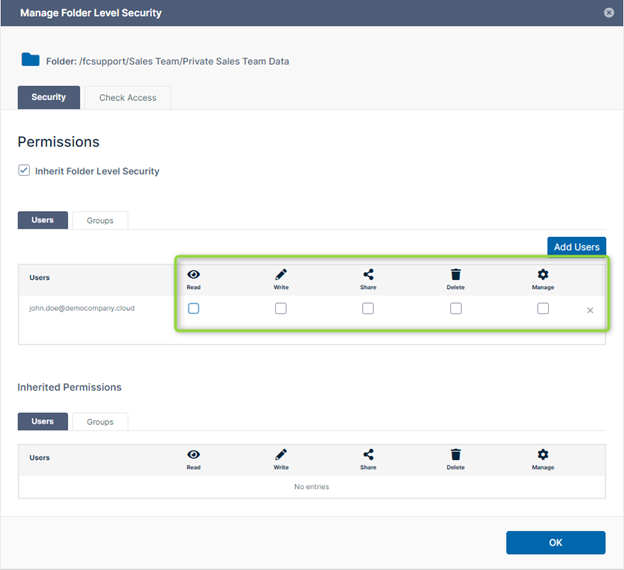
Voila! John has no access to the “Private Sales Team Data” sub-folder, including read access.
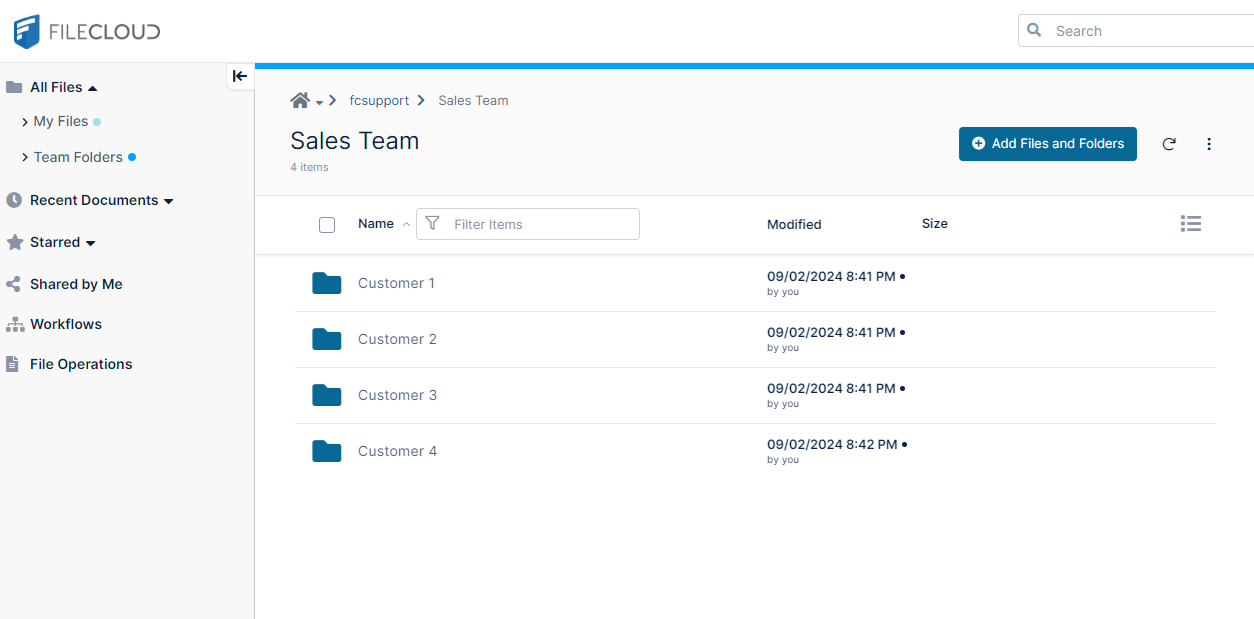
What does this look like for John? If we pop into the User interface, we’ll notice that John can only see the four customer folders.
Conclusion
We hope this walk-through of enabling folder permissions has clarified and illuminated the differences between share permissions and folder permissions.
To briefly recap:
- Share permissions in FileCloud enable users to carry out a share action. Only the file or folder selected by the user is shared. The user can also modify how the item is shared and the recipients’ level of access.
- (This method can also be used to publicly share a folder with upload-only access, creating a secure URL for file requests.)
- Folder Permissions are the easiest way for admins (and users, if this option is enabled) to manage user and user group permissions for sub-folders inside Team Folders. These permissions can hide sub-folders from view or grant higher-level permissions such as deletion or management (along with standard permissions such as read, write, and share).
- (Folder permissions are also used when importing files and folders from NTFS Shares.)
If you have any questions about share and folder permissions, please visit our documentation, which provides additional information on setting up Team Folder permissions. You can also watch our on-demand demo or submit a ticket with our support team.
We will follow up soon with more tips for getting started in part 3! (Hint: it’s about mastering notifications.)
Article written by Daniel Alarcon, Technical Support Manager
Edited by Katie Gerhardt, Jr. Product Marketing Manager

By Katie Gerhardt
Jr. Product Marketing Manager