FileCloud offers granular notification options to users and administrators. The default setting is for all users to be notified of all file operations (whether added, deleted, or edited) within the folders to which they have access.
However, when using Team Folders, users often don’t want to be notified about every single operation. They may be interested only in a specific folder they're using for collaboration, or in an external share they sent to a third party.
Managing Notifications from the User UI
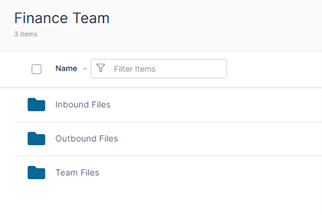
For our current example, let's say you're a user who is part of a Finance team, and you're added to your specific Team Folder for collaboration.
Inside this root-level Team Folder, there are three sub-folders:
- Team Files
- Inbound Files
- Outbound Files
As the user, you want to perform the following tasks:
- Ensure you are notified of all file operations in the Inbound Files folder.
- Ensure you are notified of download/upload operations in the Outbound Files folder.
- Disable all notifications for the Team Files folder.
Enabling all Notifications in a Folder
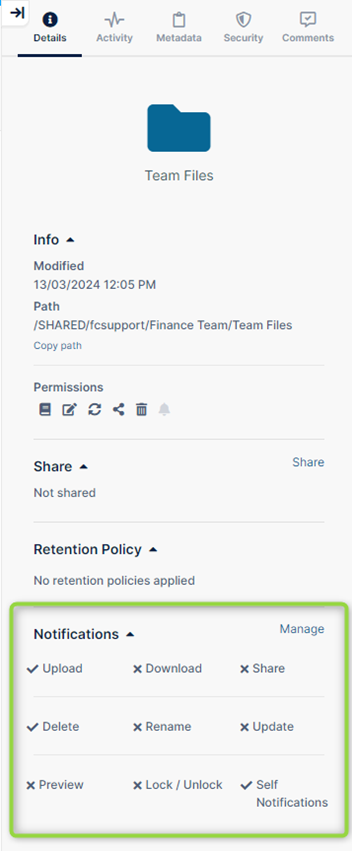
When you are logged in, you navigate to the Inbound Files folder. On the action sidebar to the right, in the Details tab, you will see the following options:
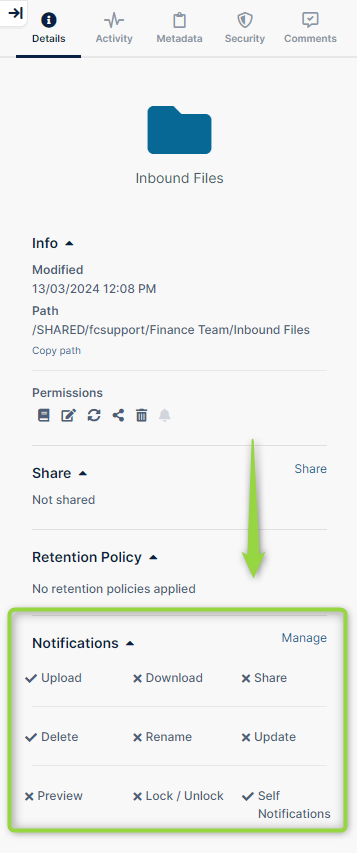
As you can see, not all notifications are enabled for this user in this folder. To modify this, click the Manage link in the Notifications section to display the current settings.
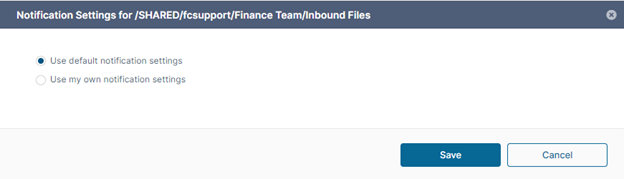
Since you want to enable all notifications, you switch to “Use my own notification settings.” After selecting this, you will be able to configure the notification settings by selecting the relevant checkboxes. Then you choose all the options you want to use and save your changes.
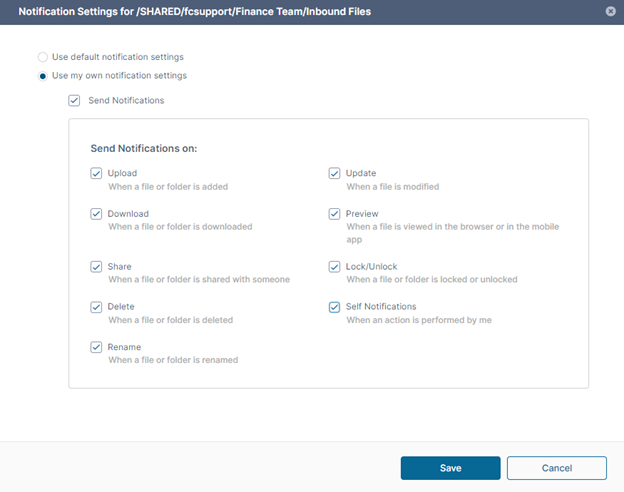
Once you have saved your settings in the right sidebar, the message "All notifications are enabled" is displayed in the Notifications area. You will also be notified of all file operations for the Inbound folder.
Enabling Selected Notifications in a Folder
Let's say you want to configure your settings to ensure you are only notified about upload/download operations in relation to the Outbound folder. To achieve this, you first navigate to the Outbound folder in the UI and check the notification settings on the right sidebar, as before.
You then click Manage and select the custom notifications that you want to configure:

Once you have saved your new settings, you can review your custom notification settings again on the right sidebar.
Disabling all Notifications in a Folder
In this scenario, you have decided that you don't want to receive any notifications from the Team Files folder. Now you need to navigate to that folder and update the notification settings:
To disable all notifications, you simply deselect the Send Notifications checkbox.

Once you have saved your settings, a message appears in the right sidebar confirming that you have successfully disabled all notifications. You will no longer receive alerts about file operations in this folder.
Managing Notifications from the Admin UI
You can review all the custom settings you've configured for the user before in the admin UI. From there, you can edit or delete the existing custom settings and create new ones.
To access the relevant section, login to the admin UI and navigate to Notifications in the left menu:
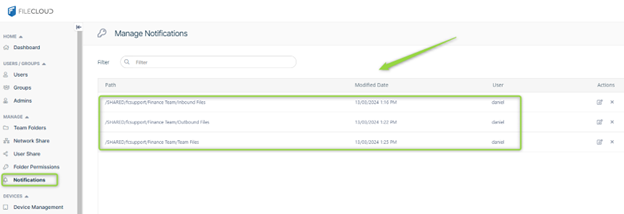
Here you review the three custom settings, indicating the path, the user, and the date of creation.
If you click the Edit icon to the right of the entry (the Actions column), you can view the custom notifications, for example, for the Inbound Folder:
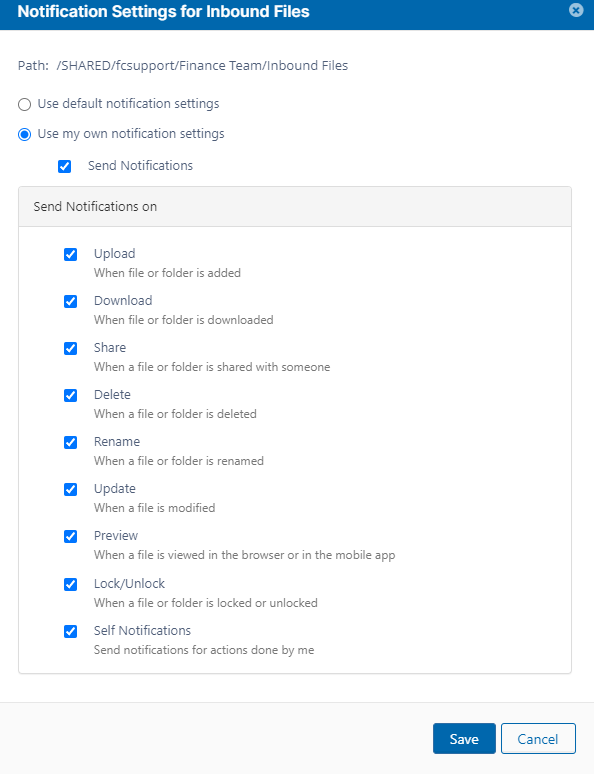
From here, as an admin user, you can override the user's settings or delete the custom setting completely.
Adding Custom Notifications from the Admin UI
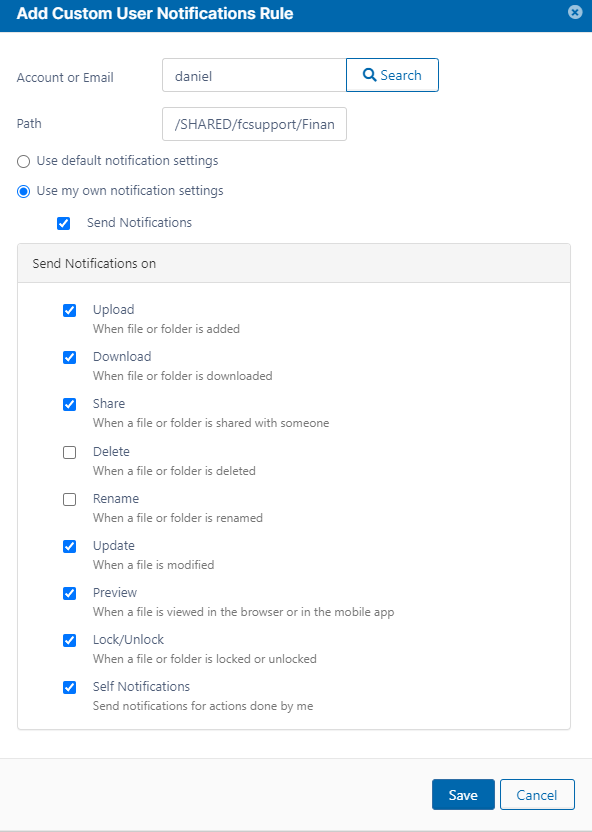
If you are an admin user, you can also create custom alerts about file activity. To do this, you need the following information:
- Folder path
- Username
- Required settings
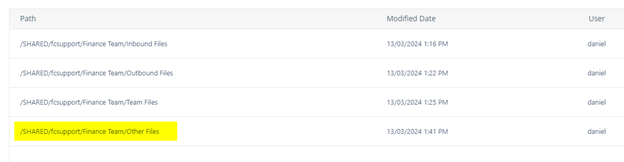
In this example, a new folder in the root Finance folder is now Other Files. The admin has a request to turn off the Rename and Delete options for this folder.
As the admin, the first thing you need is the path. You can get this information from the Details section in the sidebar by clicking Copy Path.
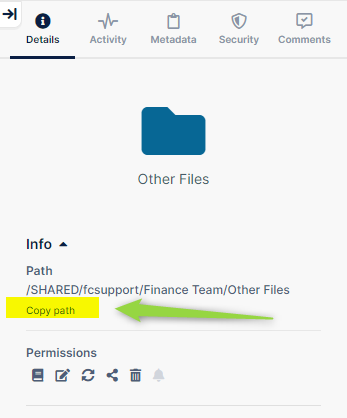
In our example, the details are as follows:
- Path: /SHARED/support/Finance Team/Other Files
- Username: daniel
Now you can go to the Add Rule option:
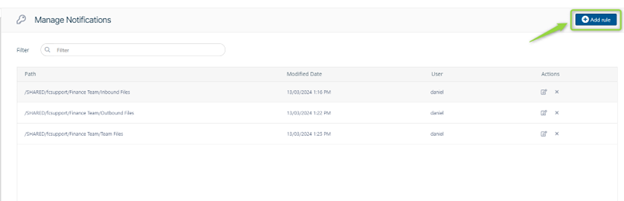
You look for the relevant user and paste the path provided into the Path field. Finally, you check the custom settings and remove the Rename and Delete operations, as requested:
After you have saved your changes, the new custom settings display in the Manage Notifications grid:
Turn off the Option to Add Custom Notifications
Let's say that, as an admin, you don’t want the users to override your settings. To remove this option, you first need to navigate to the admin UI, then go to Settings -> Policies and edit the policy group of the users for whom you want to turn off customization:
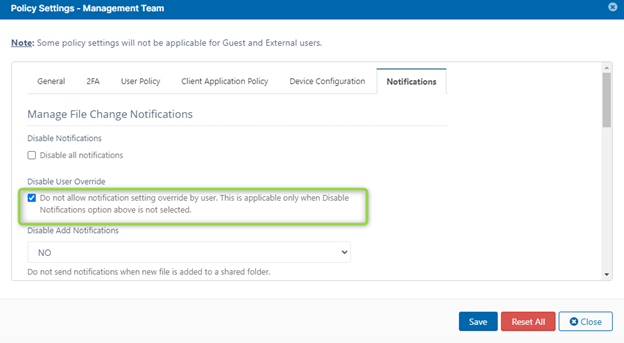
In the Notifications tab, you select the checkbox “Do not allow notification settings to be overridden by the user.” Now the user will no longer be able to modify these settings.
If non-admin users now navigate to the user portal and try to modify the settings, they will find the option disabled.
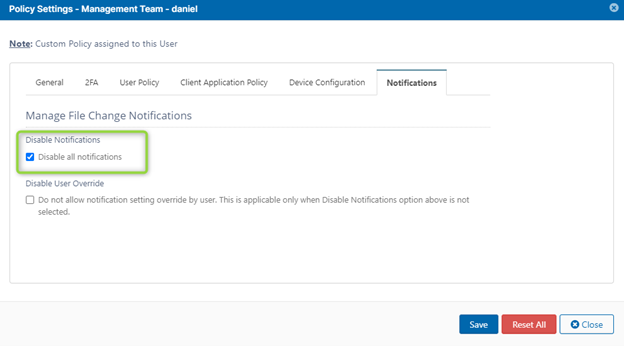
Disable All Notifications for a Policy Group
Let's say you don’t want to be notified about file activity for a particular group of users (via Policy Group). You can disable this option by editing the policy:
Modify the Default Options
The default notifications are tied to the policy group. You can change default settings by updating the values in the policy group settings:
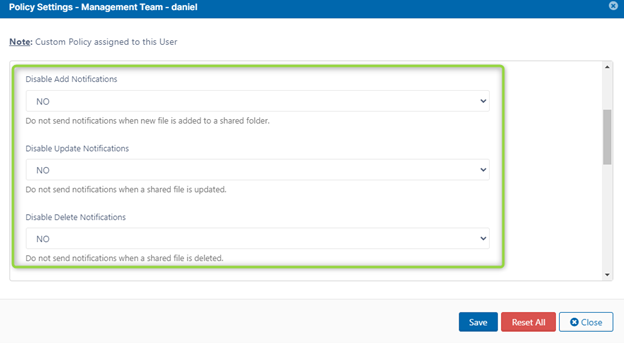
Important: To enable all notifications, select No for all settings. If you want to turn off a specific setting, select Yes for all settings.
Article written by Daniel Alarcon, Senior Manager, Customer Success and Enablement
Edited by Deirdre Clancy, Technical Content and Communication Manager

By Team FileCloud